White Cake Mix Recipes — From Box to Bakery-level Magic
Turn a simple box into bakery-level cupcakes, cakes, and bars with smart swaps, pro tips, and crowd-pleasing flavor twists.
You want a dessert that looks catered, tastes unforgettable, and costs less than a latte run. The fastest way there isn’t baking harder—it’s upgrading smarter. Box mix gives you the structure; a few strategic moves deliver the wow. If you can stir, you can hack your way to applause.
Here’s the game plan: boost moisture, lock in flavor, and control texture like a pro. We’ll turn a pantry staple into a signature treat people ask you to bring “every time.” Ready to make the easiest hero move of your week? Your mixer’s about to become your secret weapon.
The Secret Behind This Recipe
The beauty of a white mix is its neutral canvas and reliable chemistry. Manufacturers nail the ratios of flour, sugar, leaveners, and stabilizers, so you can focus on flavor and texture enhancements. Think of it as a pre-framed house—you’re just customizing the finishes.
To level up, we tweak three levers: fat, liquid, and structure. Swap water for milk to add protein and lactose sweetness. Use oil for plush moisture that stays soft for days, or melted butter for richer flavor and tighter crumb. A spoonful of sour cream or Greek yogurt adds acidity, tenderness, and a “just-baked” feel even on day two.
White cakes also love aromatics and emulsifiers. A touch of vanilla or almond extract amplifies that classic “wedding cake” vibe. Adding instant pudding mix improves moisture retention and sliceability. And FYI, using mostly egg whites keeps the crumb clean and white, while one yolk deepens flavor if color isn’t critical.
What You’ll Need (Ingredients)
Here’s a flexible base that supports cupcakes, layer cakes, Bundts, or snack cakes, plus easy add-ins.
- 1 box (15.25 oz) white cake mix
- 3 large egg whites (or 2 whole eggs + 1 white for more richness)
- 1 cup whole milk (or 2% milk; see FAQs for dairy-free)
- 1/2 cup sour cream (or plain Greek yogurt)
- 1/3 cup neutral oil (canola/vegetable) or 6 tbsp melted butter
- 1 tsp vanilla extract (or 1/2 tsp almond extract for a “wedding” vibe)
- 1/4 tsp fine salt (balances sweetness)
- Optional boosters: 1/4 cup instant vanilla pudding mix (dry), 1–2 tsp citrus zest, 1/2 cup mini chocolate chips, 1/2 cup sprinkles, 1 cup fresh berries (patted dry), or 1/2 cup shredded coconut
- Frosting options: vanilla buttercream, cream cheese frosting, whipped cream, or a simple glaze
Weights matter, but this base is forgiving. Use room-temperature ingredients for best mixing and lift, and measure liquids with a liquid measuring cup for accuracy.
The Method – Instructions
- Preheat and prep pans. Set oven to 325–350°F depending on pan type (lower for Bundt). Grease and flour pans or line with parchment for easy release.
- Whisk the wet ingredients. In a large bowl, combine milk, egg whites, oil (or melted butter), sour cream, vanilla, and salt. Whisk until smooth and homogenous.
- Add the mix. Sprinkle the dry mix over the wet ingredients. If using pudding mix or zest, add now. Stir with a spatula until just combined—no flour pockets.
- Don’t overmix. Mix 30–45 seconds after incorporation. Overmixing knocks out air and tightens the crumb, leading to tunnels and toughness. Stop when it’s silky.
- Fold in mix-ins. Add sprinkles, chips, or fruit just before baking, folding gently to avoid streaking or sinking. Pat fruit dry to minimize bleeding.
- Pan and fill. Fill cupcake liners 2/3 full; fill cake pans to about 2/3 height. Tap pans lightly to release big air bubbles.
- Bake smart. Bake until the top springs back and a toothpick has a few moist crumbs. Typical ranges: cupcakes 16–20 min, 8-inch layers 22–27 min, 9×13 pan 25–32 min, Bundt 40–50 min.
- Rotate once. If your oven has hot spots, rotate pans at the 2/3 mark. Avoid opening too early—steam is your friend for rise.
- Cool strategically. Cool cakes in the pan 10 minutes, then turn out onto a rack. Cupcakes can stay in the tin 5 minutes before transferring.
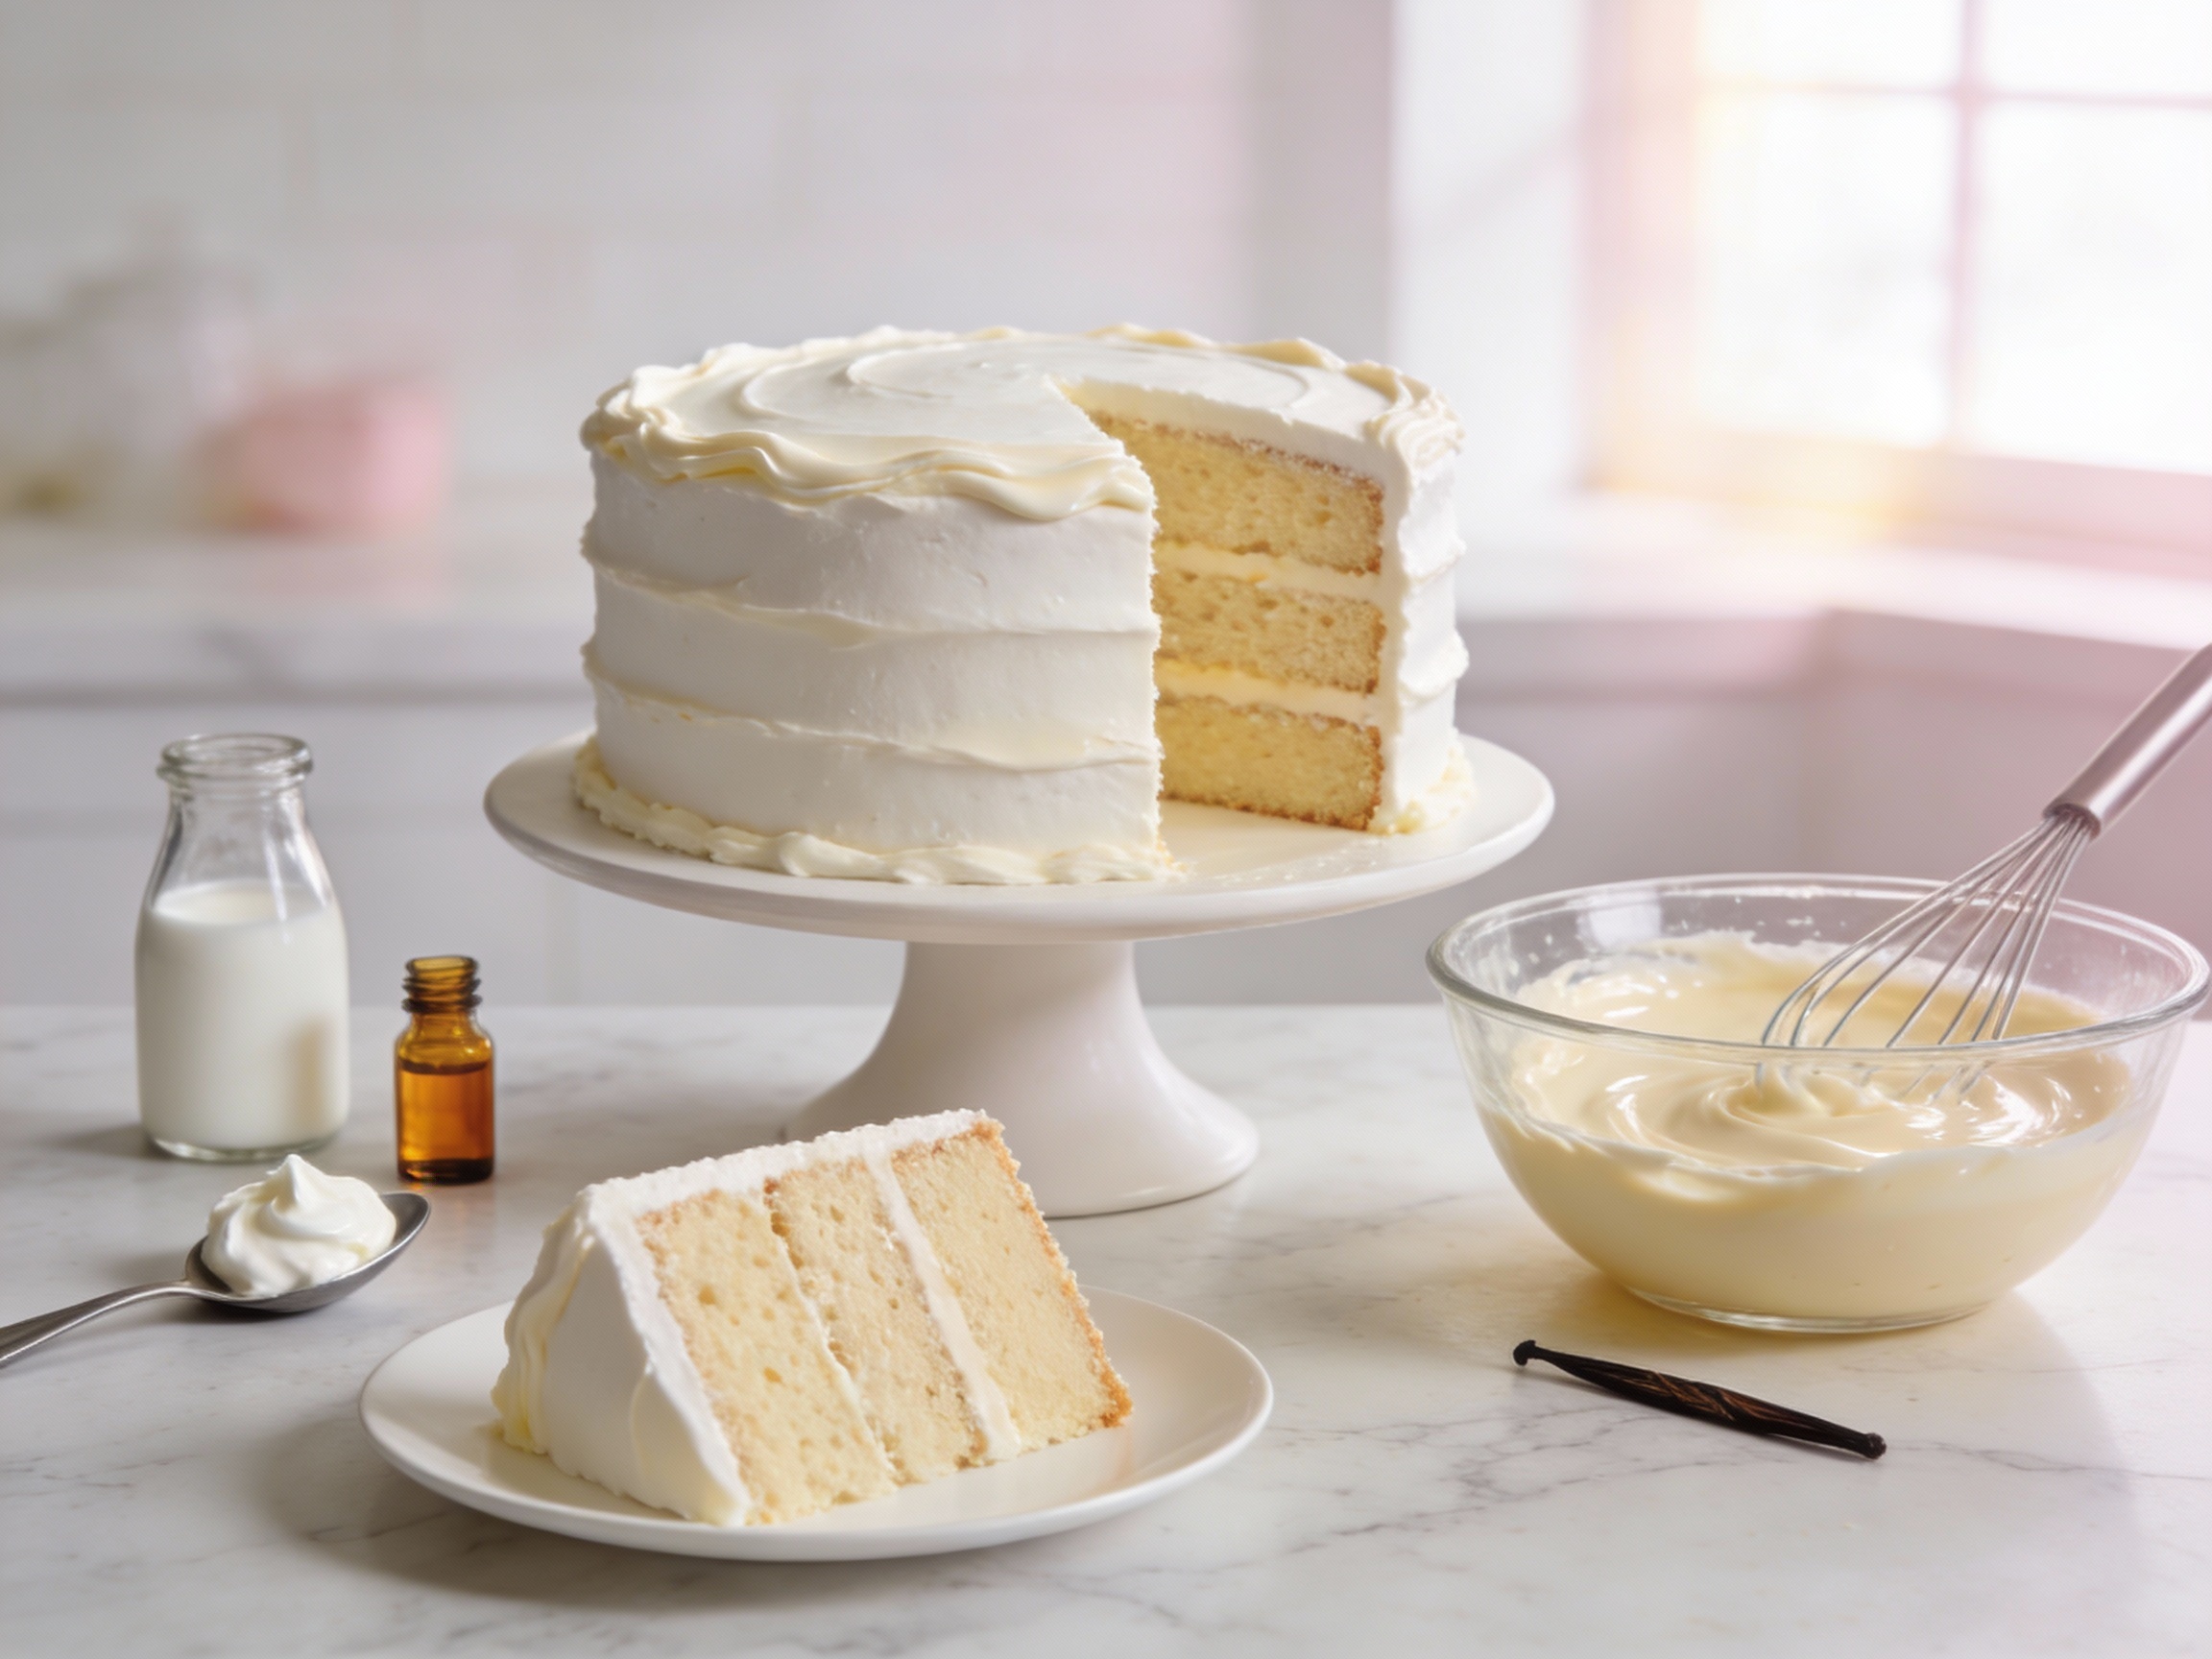
- Level and stack. For layer cakes, level domes once fully cool. Brush layers with simple syrup (equal parts sugar and water) if you want extra moisture insurance.
- Frost like a pro. Do a crumb coat and chill 10–15 minutes, then apply the final coat. For a wedding-style finish, use almond-infused syrup and a vanilla buttercream.
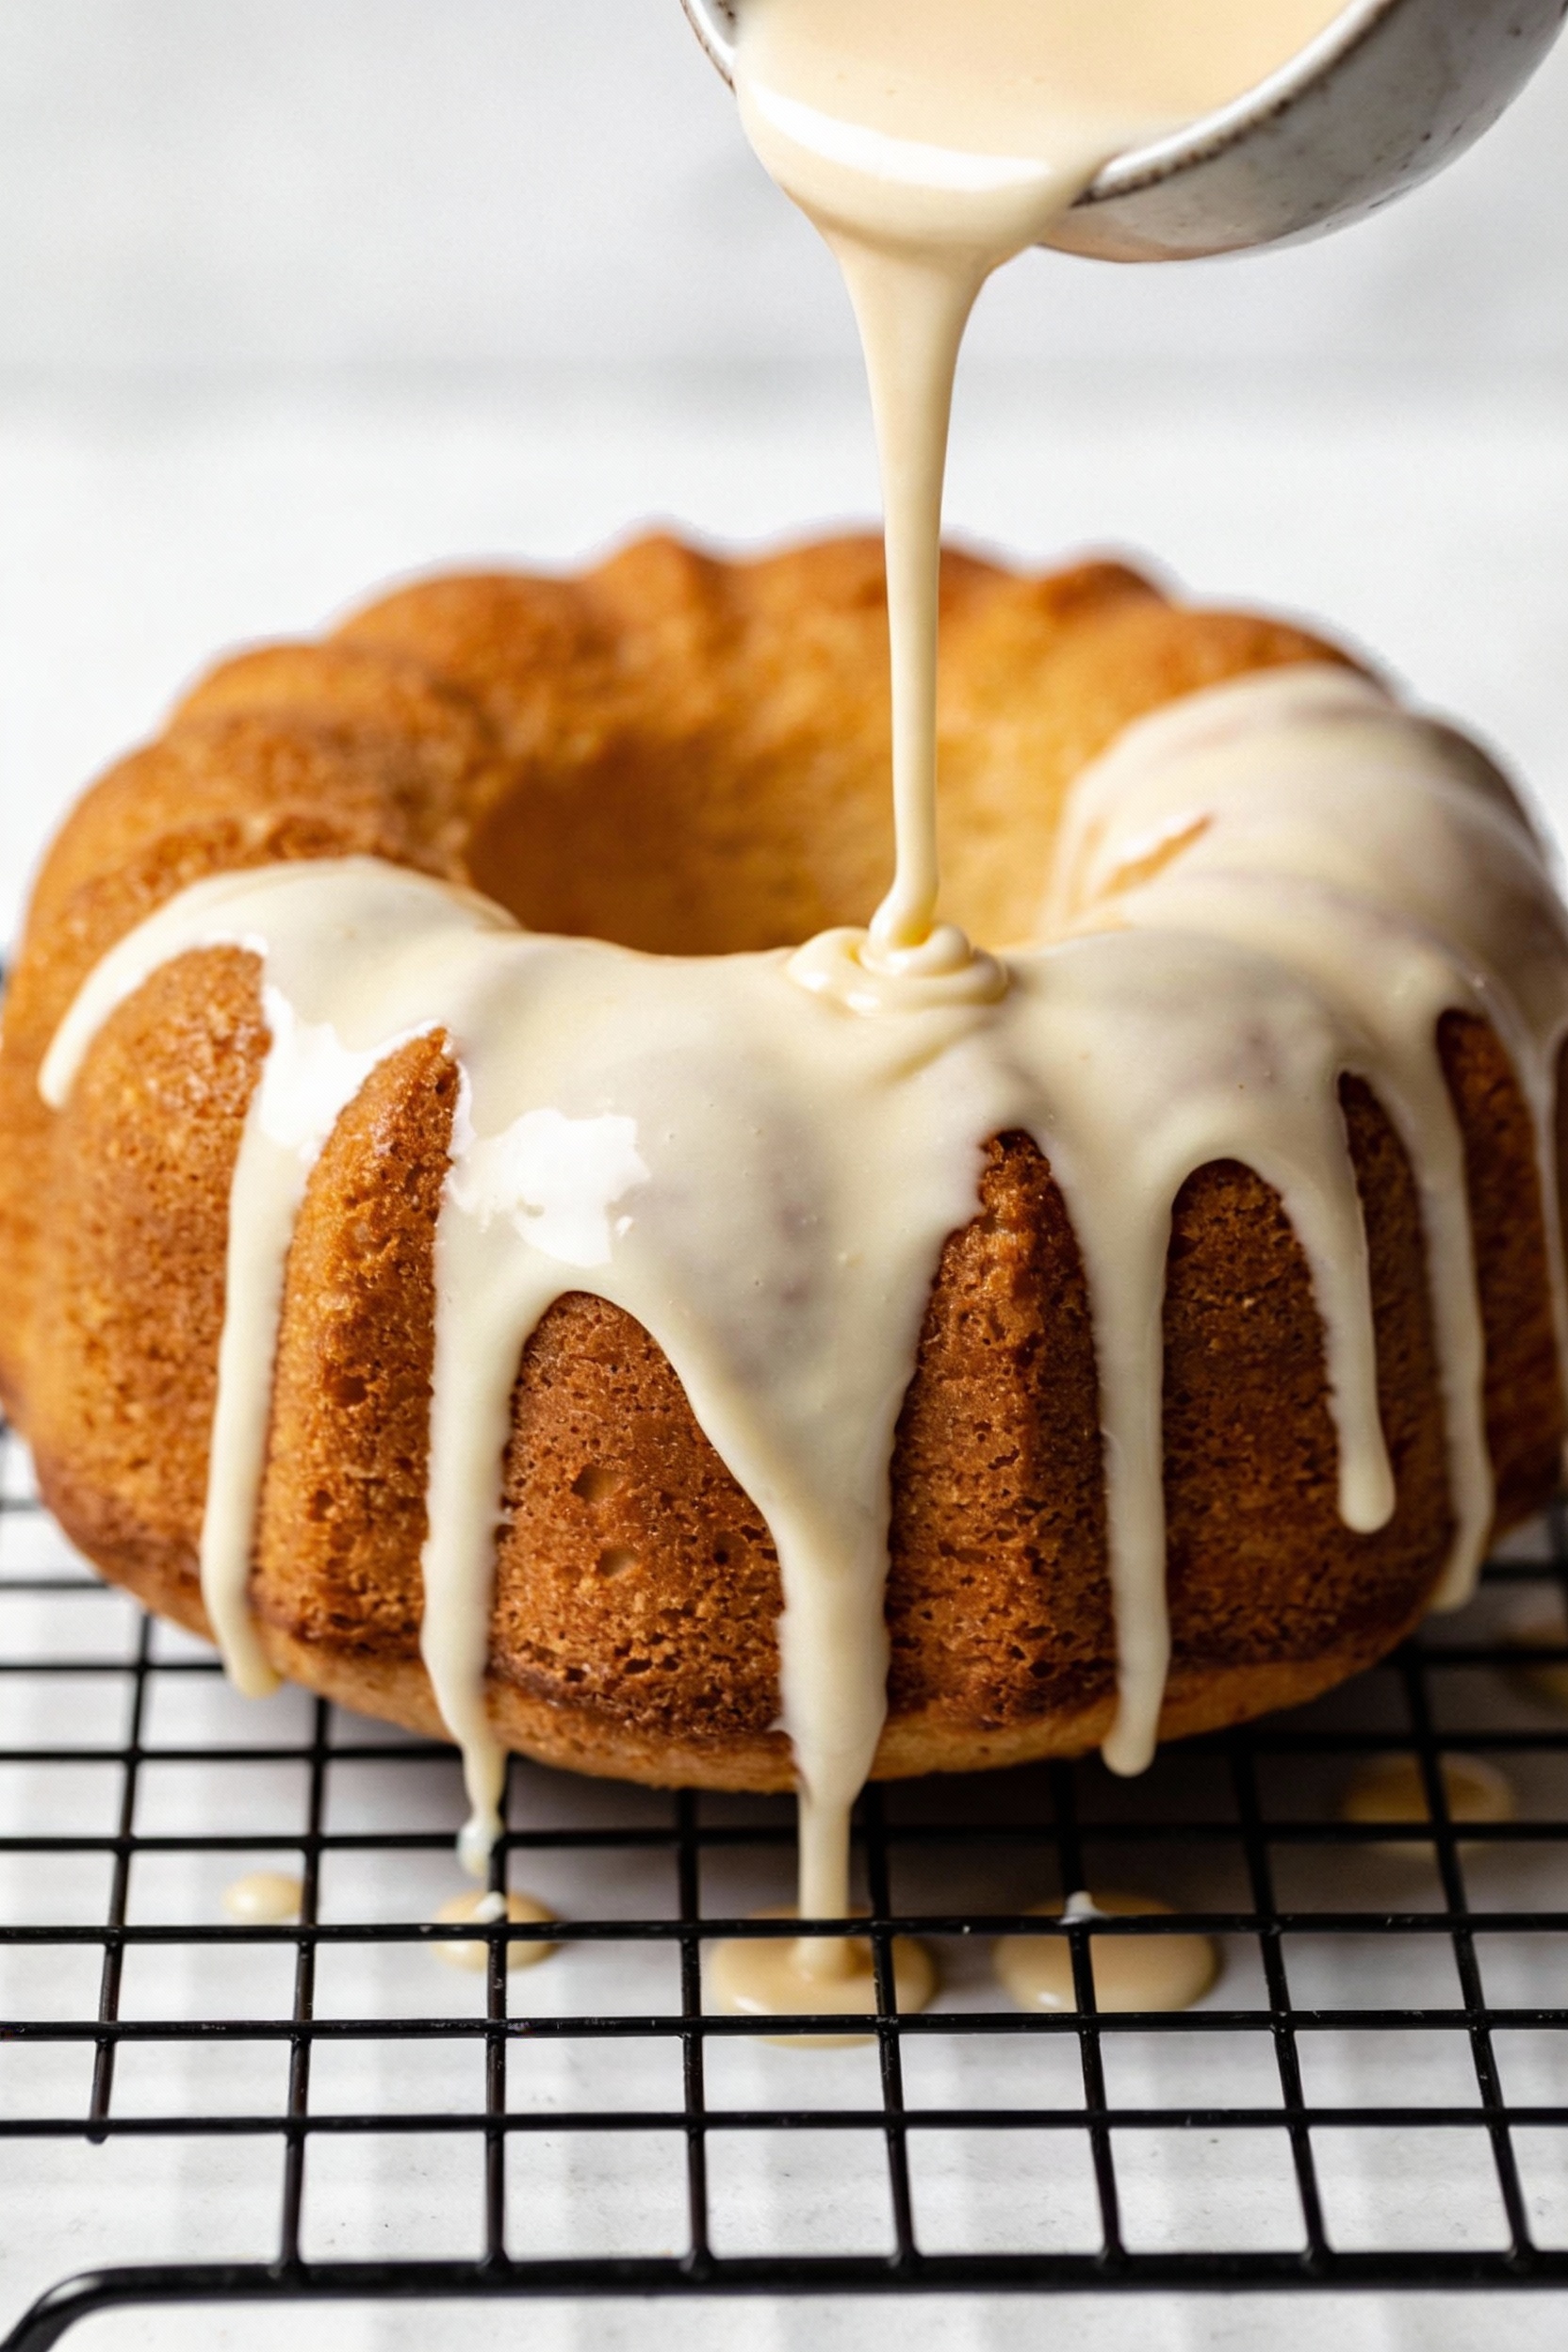
- Glaze quick bakes. For snack cakes or Bundts, whisk powdered sugar with milk and vanilla to a pourable glaze. Drizzle over a mostly cooled cake for that glossy finish.
- Serve and store. Serve at room temp for best texture. If you refrigerated for frosting stability, allow 20–30 minutes at room temp before slicing.
li>Rest the batter (optional, but clutch). Let it sit 5–8 minutes. This hydrates starches and reduces doming. Stir gently once before pouring.
Storage Tips
Room temperature is best for unfrosted or buttercream-frosted bakes. Store in an airtight container up to 3 days. Keep out of direct sun and away from strong odors, which cakes absorb like gossip.
Cream cheese or whipped cream frostings need refrigeration. Chill up to 4 days, but bring slices to room temp before serving so the crumb tastes soft and the flavors bloom.
Freezing is your friend for make-ahead. Wrap unfrosted layers tightly in plastic, then foil, and freeze up to 2 months. Thaw wrapped at room temperature to prevent condensation.
For leftovers, slice and wrap individually. You’ll get perfect lunchbox treats, and IMO, a midnight snack that “doesn’t count” if you eat it standing at the counter.
Why This is Good for You
Time is your scarcest ingredient. Using a reliable base lets you focus on flavor and presentation—where your effort actually earns compliments. The result is a consistent crumb that stacks, slices, and transports without drama.
It’s also budget-friendly. You’re paying for predictability and leveraging pantry items (sour cream, milk, extracts) to hit bakery-level textures. That means less waste, fewer re-bakes, and a better ROI on your Saturday afternoon.
Creatively, it’s freeing. You can test bold flavors or fun fillings without worrying about structural failure. Whether you’re hosting, gifting, or just flexing on a bake sale, you’ll deliver pro results with less stress.
Pitfalls to Watch Out For
- Overmixing. This develops gluten and deflates air. Stir until just smooth—no marathon mixing.
- Too hot an oven. High heat domes and cracks. Use an oven thermometer, and aim for the lower end with Bundt pans.
- Cold ingredients. Cold dairy resists emulsification, leading to uneven crumb. Room temp is the move.
- Wet mix-ins. Juicy fruit can sink and bleed. Pat dry and toss with a spoon of mix or flour before folding.
- Underbaking “for moisture.” Gummy centers are not chic. Pull at the first clean crumbs, not wet batter.
- Skipping the rest. A short batter rest reduces tunneling and improves rise—worth the few minutes.
- Wrong pan prep. Grease and flour for Bundts; parchment for layers. Insurance beats prying cake out with a butter knife.
Different Ways to Make This
- Almond “wedding” cake: Swap half the vanilla for almond extract, add 1 tbsp almond flour, and brush layers with almond simple syrup.
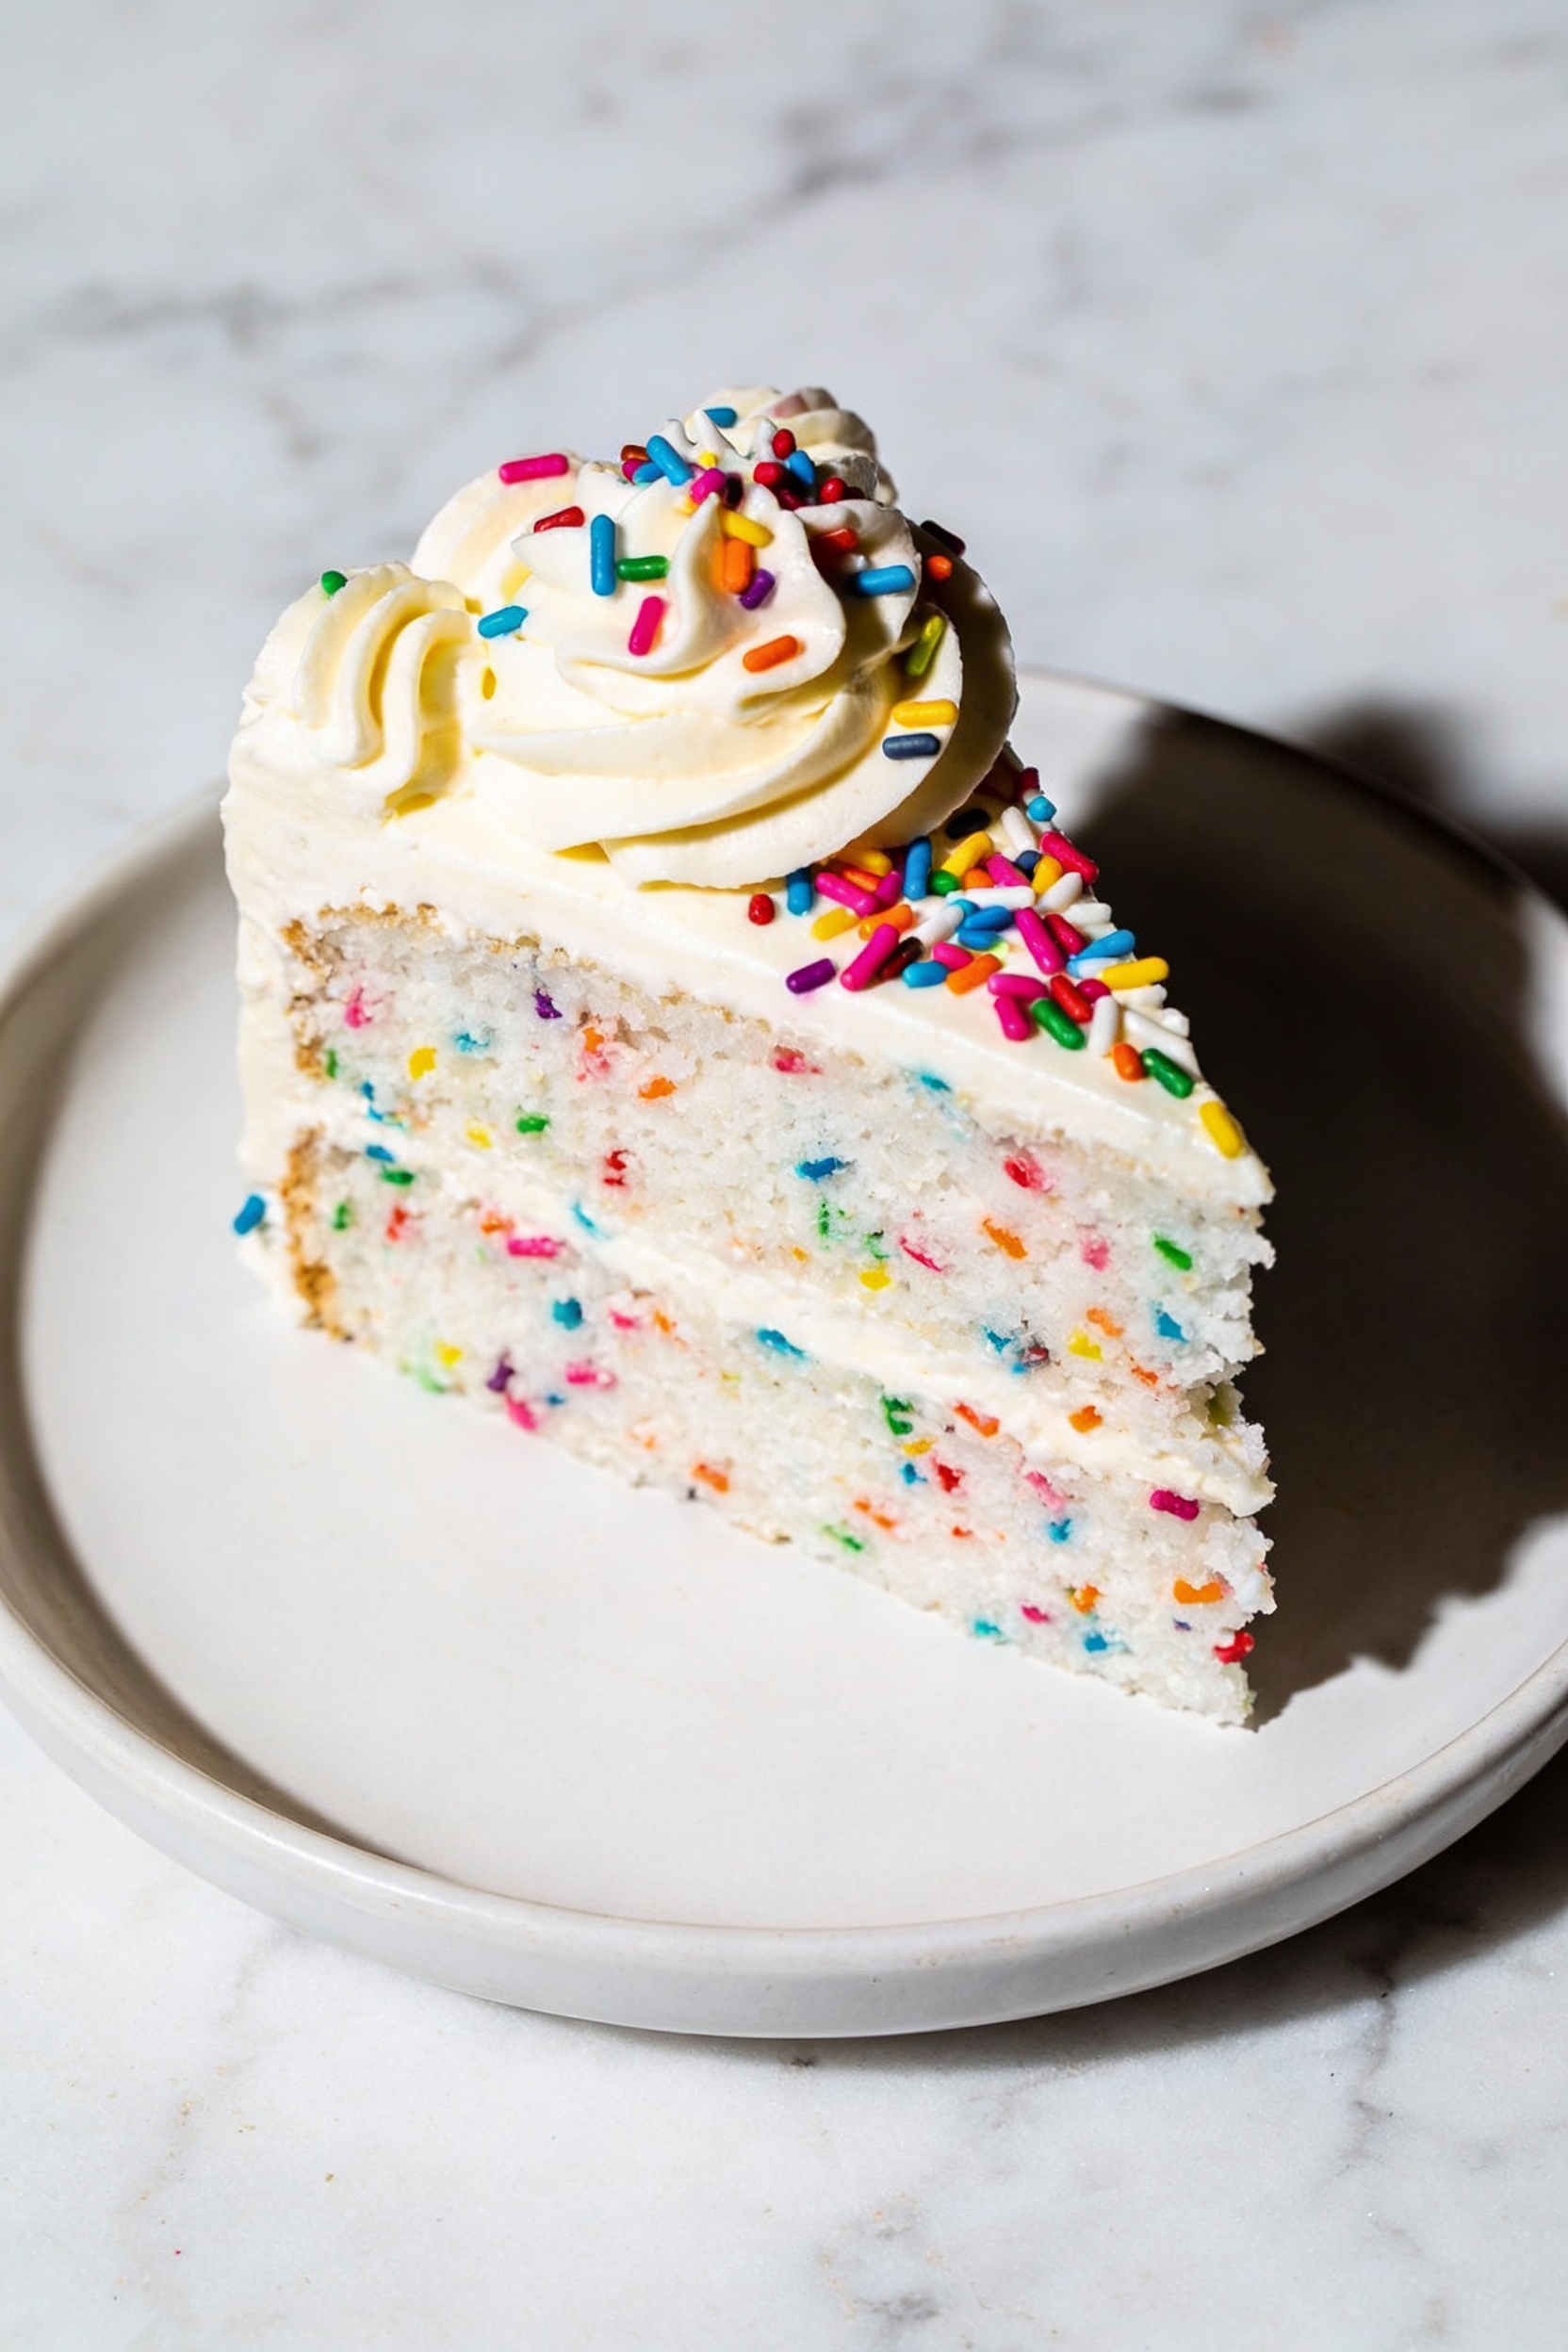
- Funfetti party cake: Fold in 1/2 cup rainbow sprinkles and add 1/2 tsp butter extract. Frost with vanilla buttercream and more sprinkles, obviously.
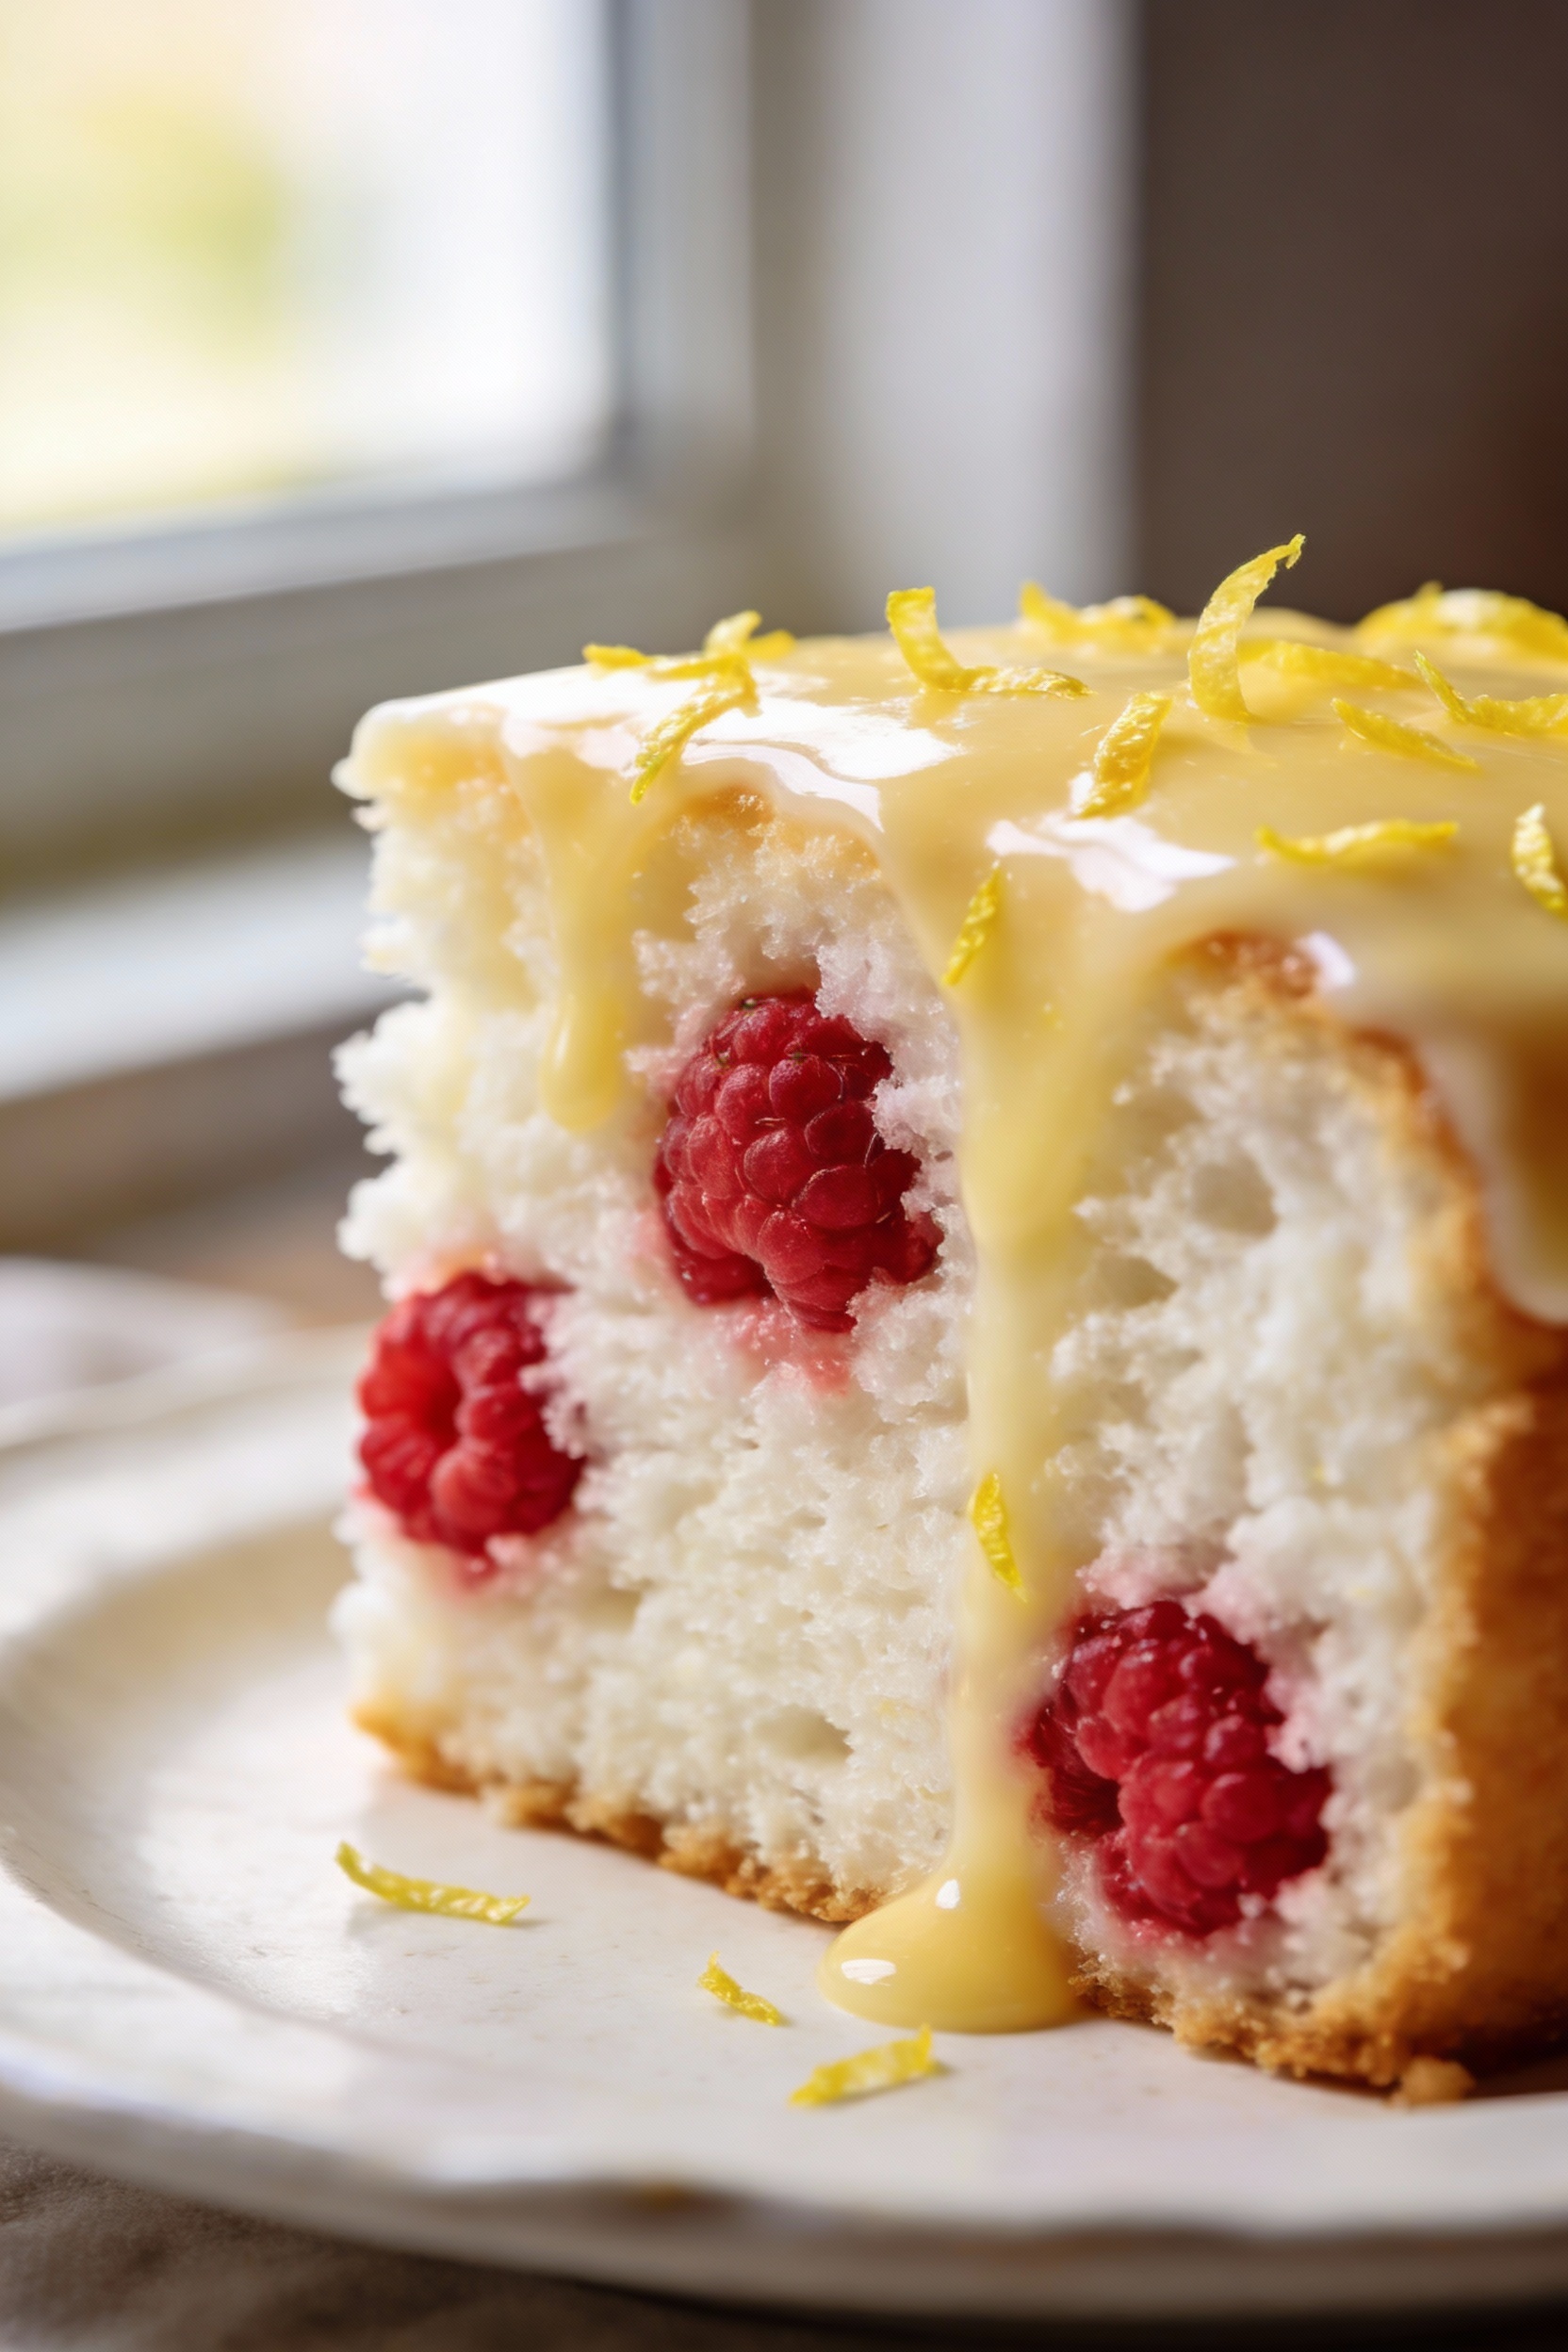
- Lemon raspberry: Add 2 tsp lemon zest and 1 tbsp juice; fold in 1 cup raspberries (patted dry). Finish with lemon glaze.
- Coconut cloud: Use canned coconut milk instead of dairy milk, fold in 1/2 cup shredded coconut, and frost with coconut whipped cream.
- Cookies & cream: Stir in 1 cup chopped chocolate sandwich cookies. Top with cream cheese frosting and cookie crumbs.
- Champagne cupcakes: Replace half the milk with sparkling wine. Frost with a champagne buttercream for New Year’s vibes.
- Cinnamon roll snack cake: Swirl in 1/4 cup brown sugar + 2 tsp cinnamon. Glaze with vanilla icing while warm.
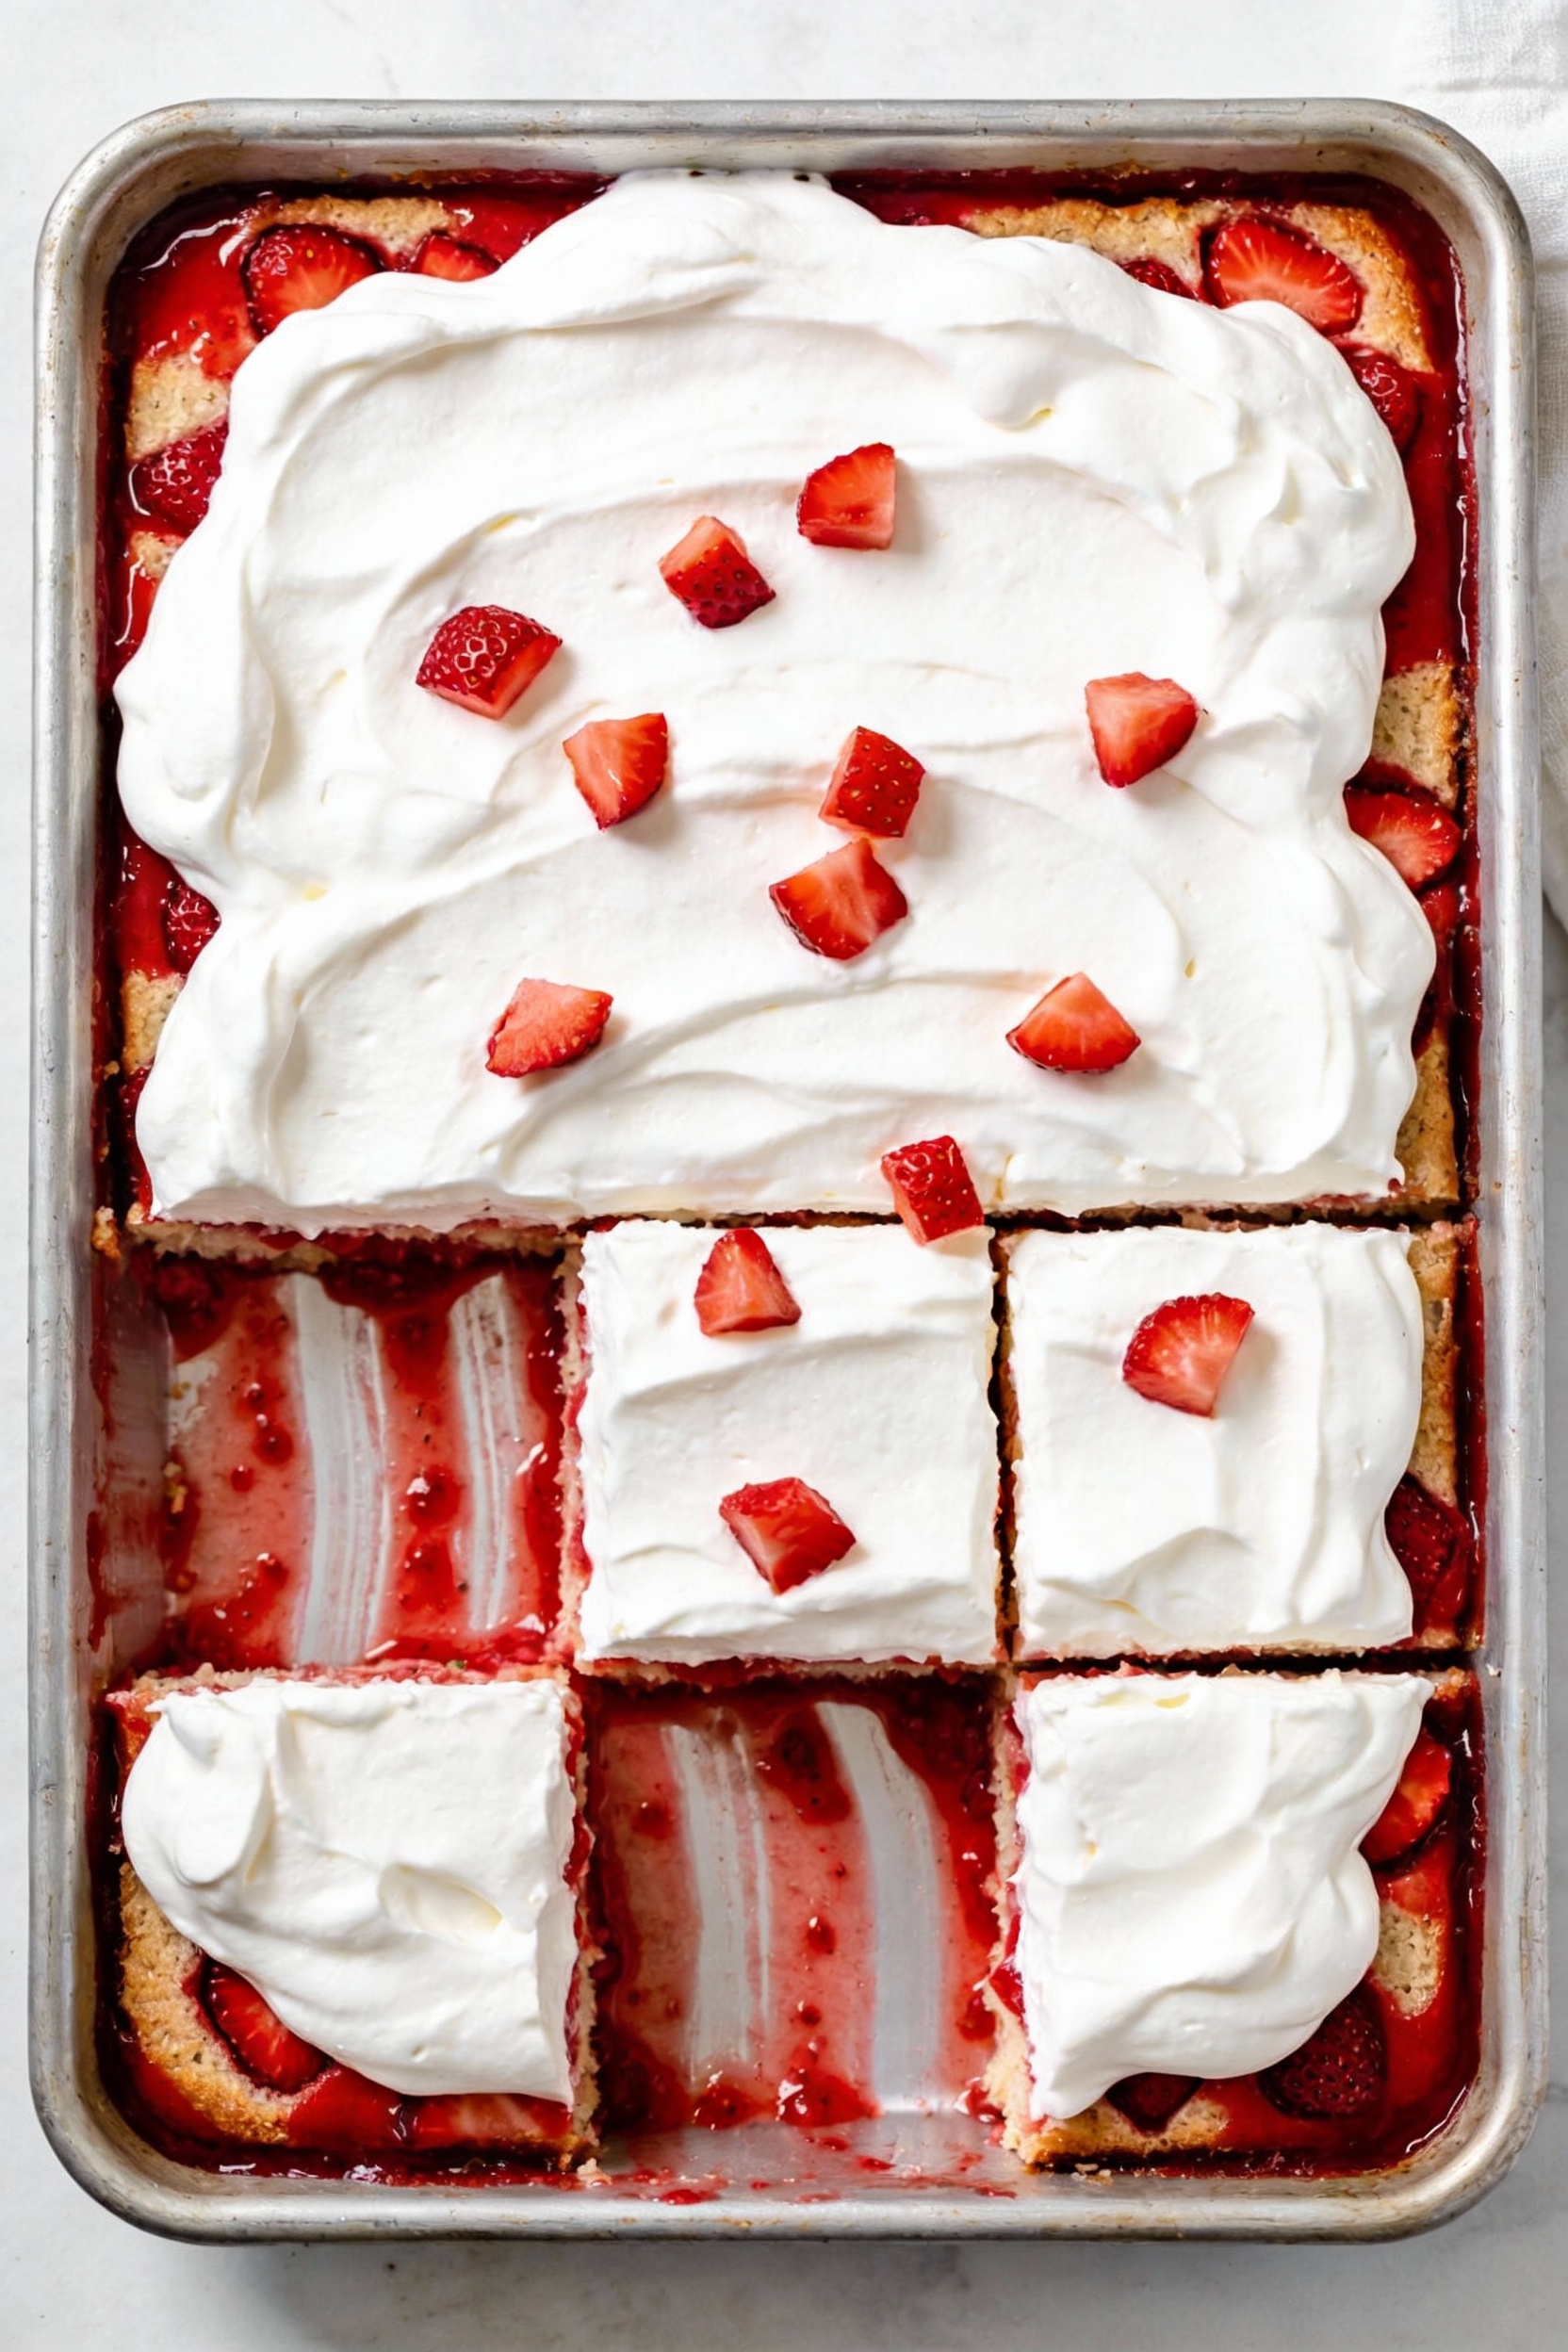
- Strawberries & cream poke cake: Bake in a 9×13, poke holes, pour over 1 cup strawberry puree + 2 tbsp sugar, chill, and top with whipped cream.
- Tres leches-ish: Bake, poke, then soak with 1 cup evaporated milk + 1/2 cup condensed milk + 1/2 cup whole milk. Chill and top with cinnamon whipped cream.
- Marble swirl: Reserve 1 cup batter, stir in 1 tbsp cocoa powder, and swirl into the pan for a dramatic slice.
- Bundt bakery style: Add 1/4 cup instant pudding, use melted butter, bake at 325°F until a skewer has moist crumbs, then glaze thick.
FAQ
Can I use whole eggs instead of just whites?
Yes. Two whole eggs plus one extra white is a great balance of richness and structure. Whole eggs add flavor and a slightly more yellow crumb; if you want a super-white cake for wedding aesthetics, stick to all whites.
How do I keep the cake ultra-white in color?
Use only egg whites, clear vanilla (if you have it), and oil instead of butter. Bake at 325–340°F to avoid excessive browning, and use light-colored pans. A thin layer of syrup or frosting will also mask light golden edges.
What’s the best swap: water to milk, or oil to butter?
Milk is the bigger win for moisture and flavor with minimal risk. Oil keeps the crumb soft for days; butter boosts flavor but can dry slightly faster. For the plushest texture, use milk plus oil; for richer taste, use milk plus melted butter.
How do I prevent mix-ins from sinking?
Use mini chips or small chunks, pat fruit dry, and toss add-ins with a tablespoon of dry mix before folding. Batter thickness matters too—pudding mix or sour cream thickens it so goodies stay suspended.
Can I make this dairy-free?
Yes. Use unsweetened almond or oat milk, and replace sour cream with a thick dairy-free yogurt. Choose oil over butter, and skip pudding mix unless you confirm it’s dairy-free. Expect a slightly lighter crumb—but still tender.
How do I adjust for different pan sizes?
For cupcakes, bake 16–20 minutes. For two 8-inch rounds, aim for 22–27 minutes. A 9×13 pan usually takes 25–32 minutes, and a Bundt can run 40–50. Always start checking early; visual cues beat the clock.
Can I reduce the sweetness?
Use a slightly tangy frosting (cream cheese or whipped cream) and add a pinch of salt to the batter. Citrus zest also balances sweetness. You can’t easily reduce sugar in the mix without affecting structure, but frosting is where you can dial it back.
How do I get flatter cake layers for stacking?
Lower the oven to 325°F, use baking strips or wrap the outside of pans with damp towel strips, and let the batter rest a few minutes before baking. Trim domes once cool and apply a crumb coat to lock crumbs before the final finish.
What if I overmixed the batter?
It happens. Add 1–2 tablespoons of milk to loosen slightly and let the batter rest 8–10 minutes to relax gluten. The texture may be tighter, but frosting and syrup can hide many sins. Consider using it for a trifle if it bakes up dense—still delicious.
Can I turn this into gluten-free treats?
Yes—start with a gluten-free white mix. Keep the same add-ins and moisture boosters. Because GF mixes can dry quickly, lean on sour cream and watch bake times closely, pulling as soon as a toothpick shows moist crumbs.
Final Thoughts
Great bakers don’t always make everything from scratch—they make smart decisions. With a few strategic tweaks, a humble box becomes your ticket to bakery-level texture and flavor, minus the stress and guesswork.
Pick a flavor path, prep your pans, and give yourself permission to “cheat” the right way. Your guests will taste the magic, not the shortcut. And if anyone asks for the recipe? Smile and say, “It’s all in the technique.”
Printable Recipe Card
Want just the essential recipe details without scrolling through the article? Get our printable recipe card with just the ingredients and instructions.