Sweet Snacks Recipes to Crush Cravings—no Oven Needed
Make fast, no-bake treats in minutes with pantry staples. Kid-approved, budget-friendly, perfect for late-night cravings or weekdays.
You want something sweet, right now, without babysitting an oven or wrecking your kitchen? Here’s the move: a mix-and-match no-bake base that turns into bars or bites in 10 minutes flat. Fewer ingredients, fewer dishes, more “oh wow” per minute. We’re talking chewy, chocolatey, crunchy options you can customize to fit your macros, your mood, and whatever’s hiding in your pantry. This is the snack hack you’ll actually use, not bookmark and forget.
What Makes This Recipe Awesome
- Zero oven, zero drama: Everything happens in a bowl and a microwave (or stovetop). Your kitchen stays cool, your snacks get done.
- Done in 10–15 minutes: Mix, press, chill. That’s it. The hardest part is not eating the dough straight from the bowl.
- Pantry-friendly: Oats, nut butter, and a sweetener are the base. Add-ins are optional, not mandatory. Translation: low stress, low cost.
- Custom macros: Want higher protein? Add a scoop. Lower sugar? Swap in mashed banana. Flex your goals without sacrificing flavor.
- Diet-inclusive: Easy to make gluten-free, vegan, and nut-free with simple subs. Everyone gets a bite.
- Kid-approved, adult-level good: Sweet but not cloying, chewy with a little crunch. Perfect for lunch boxes or late-night Netflix raids.
- Minimal cleanup: One bowl, one spoon, one pan. Your sink says thank you.
Shopping List – Ingredients
Makes about 18 bites (1 tablespoon each) or one 8-inch pan of bars.
Base Ingredients
- 2 cups rolled oats (old-fashioned or quick; certified GF if needed)
- 3/4 cup creamy nut or seed butter (peanut, almond, cashew, or sunflower seed butter for nut-free)
- 1/3 cup honey or pure maple syrup (maple for vegan)
- 2 tablespoons ground flaxseed (or chia seeds; helps bind and adds fiber)
- 1 teaspoon vanilla extract
- 1/4 teaspoon fine sea salt (balances sweetness—don’t skip)
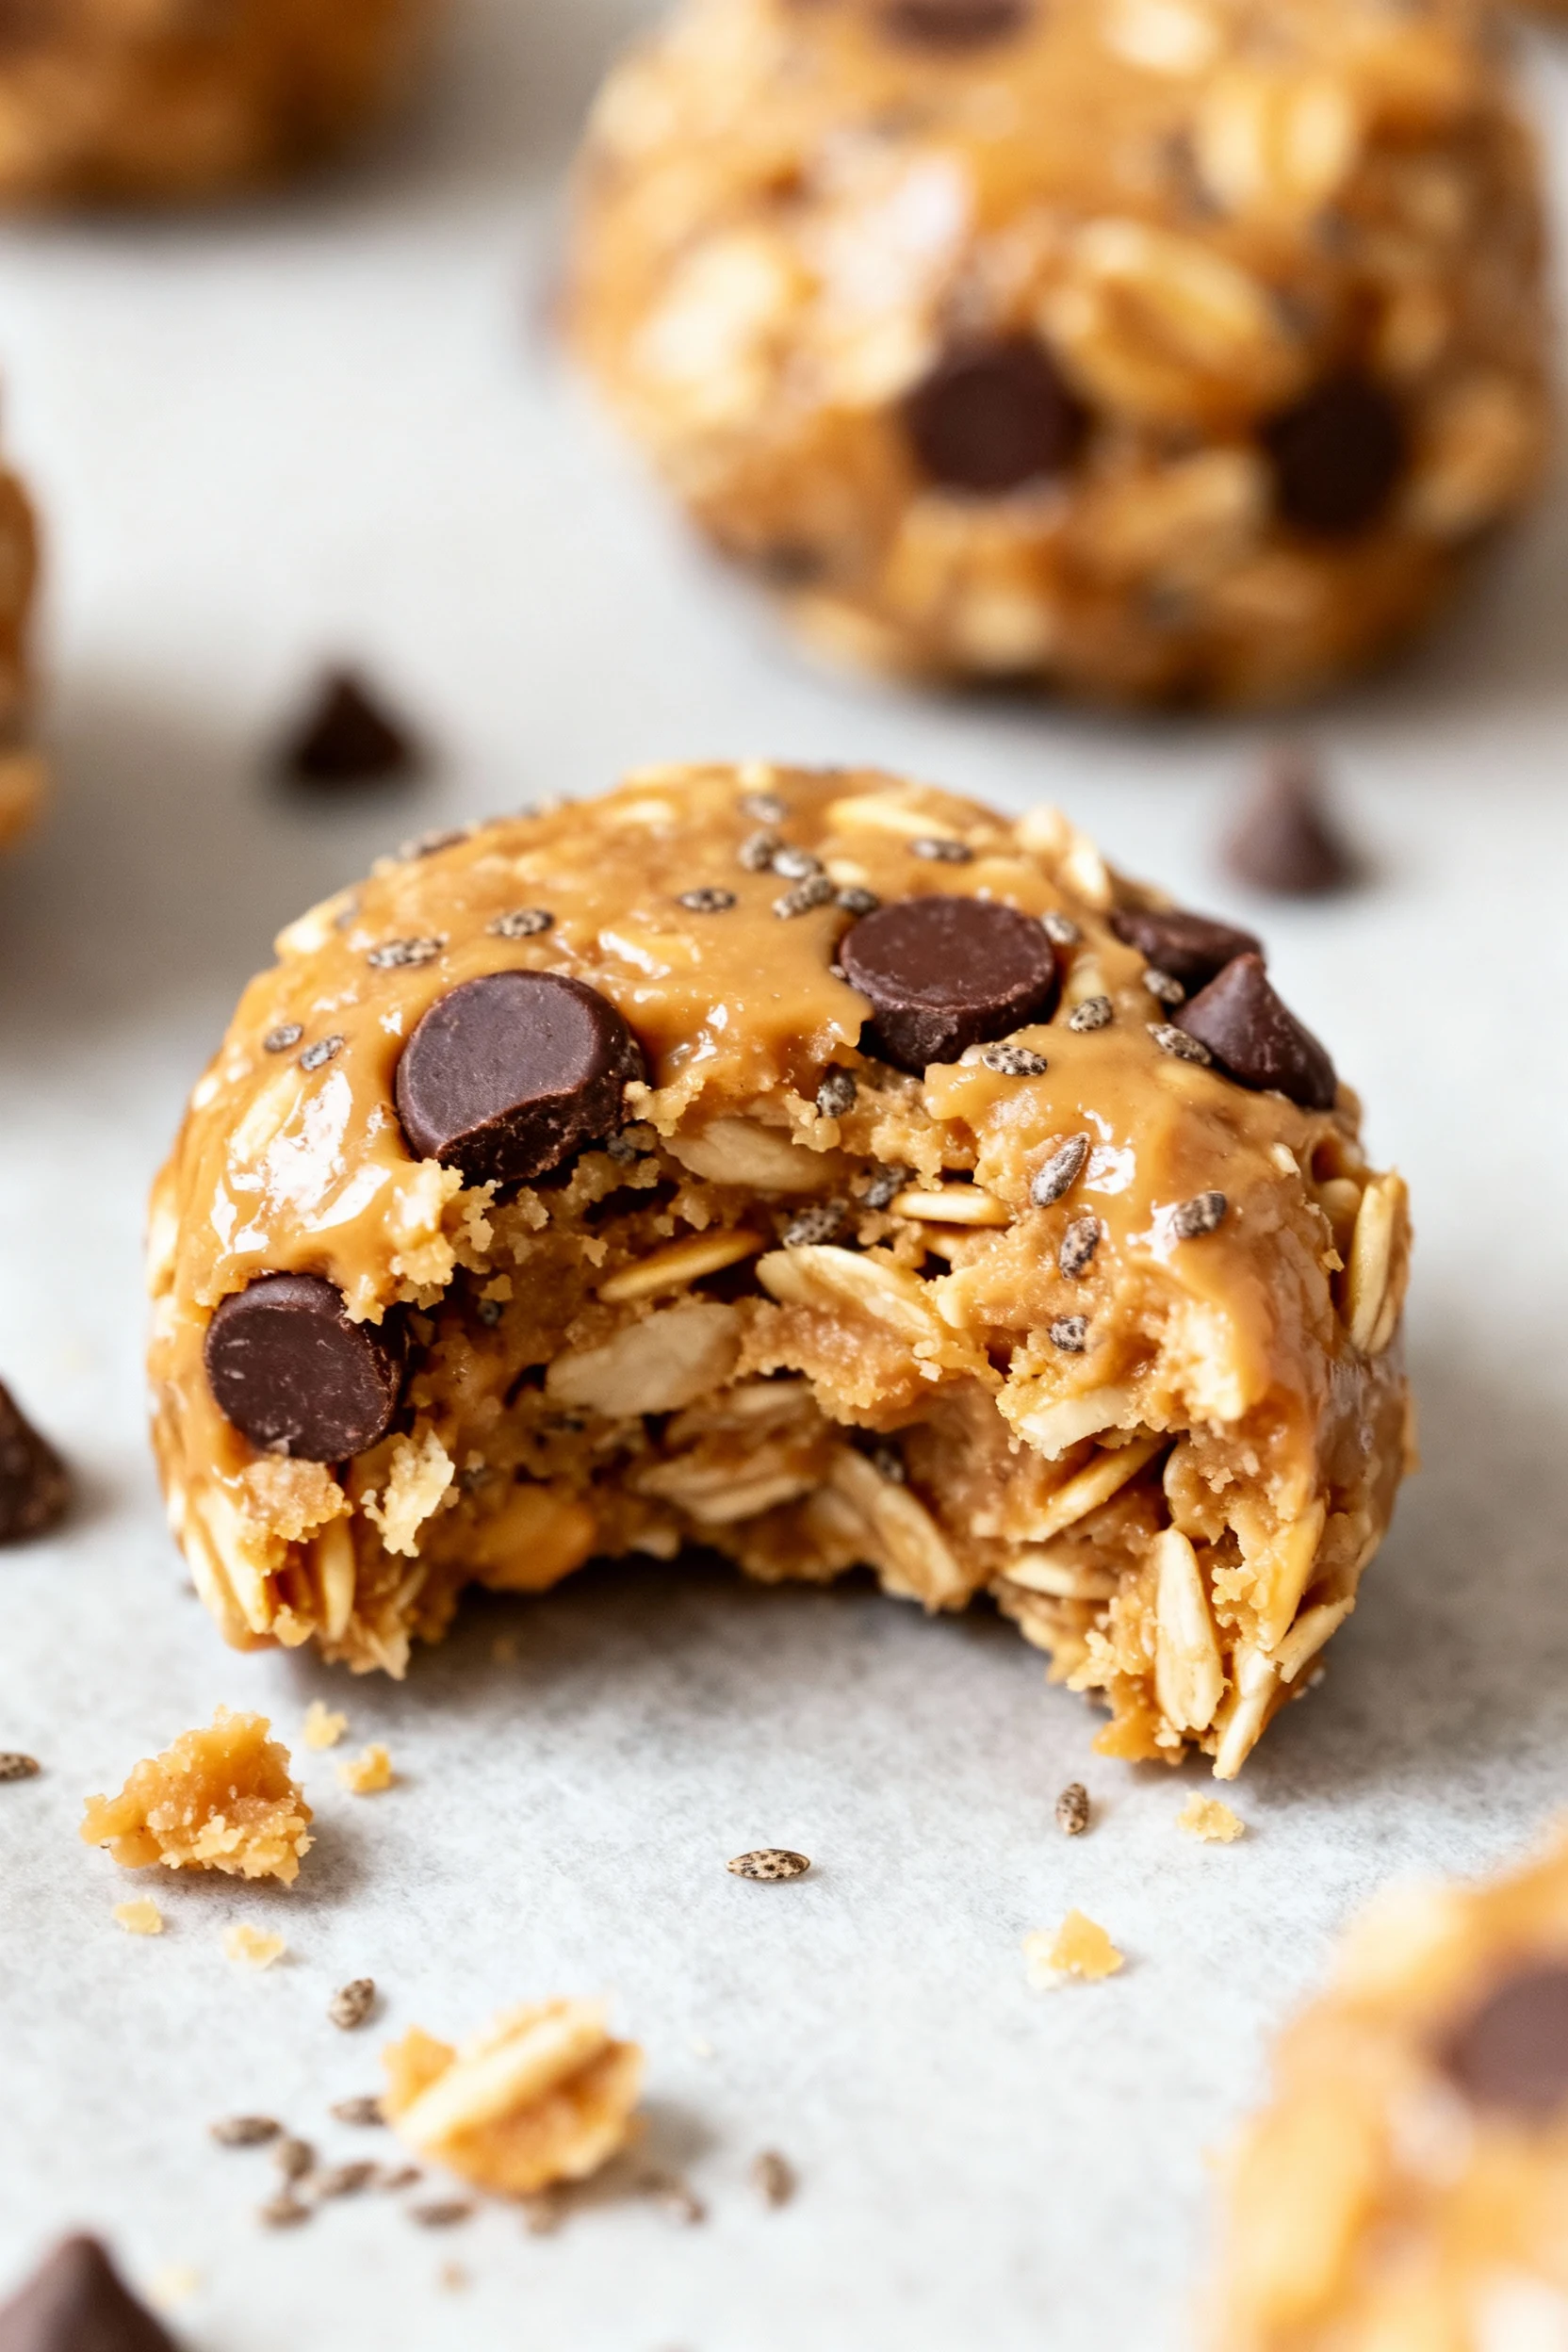
- 1/4 cup mini chocolate chips or chopped dark chocolate
Optional Add-Ins (choose 1–3)
- 2–3 tablespoons cocoa powder (for chocolate flavor)
- 1 scoop (25–30 g) protein powder (vanilla or chocolate)
- 1/3 cup dried fruit (raisins, cherries, cranberries, chopped apricots)
- 1/4 cup chopped nuts or seeds (walnuts, pecans, pumpkin seeds, sesame)
- 1/4 cup unsweetened shredded coconut
- 1–3 tablespoons milk (dairy or non-dairy), only if mixture seems dry
- Flaky salt for finishing, optional but glorious
The Method – Instructions
- Prep your pan or surface. For bars, line an 8-inch square pan with parchment, leaving overhang for easy removal. For bites, line a plate or sheet pan with parchment.
- Stir the dry stuff. In a large bowl, combine oats, ground flax, salt, and any dry add-ins (cocoa powder, protein powder, coconut). Give it a quick mix so everything’s evenly distributed.
- Warm the “glue.” In a microwave-safe bowl or small saucepan, gently warm the nut/seed butter with the honey/maple until slightly fluid (about 20–30 seconds in the microwave). Stir in vanilla. You want pourable, not hot.
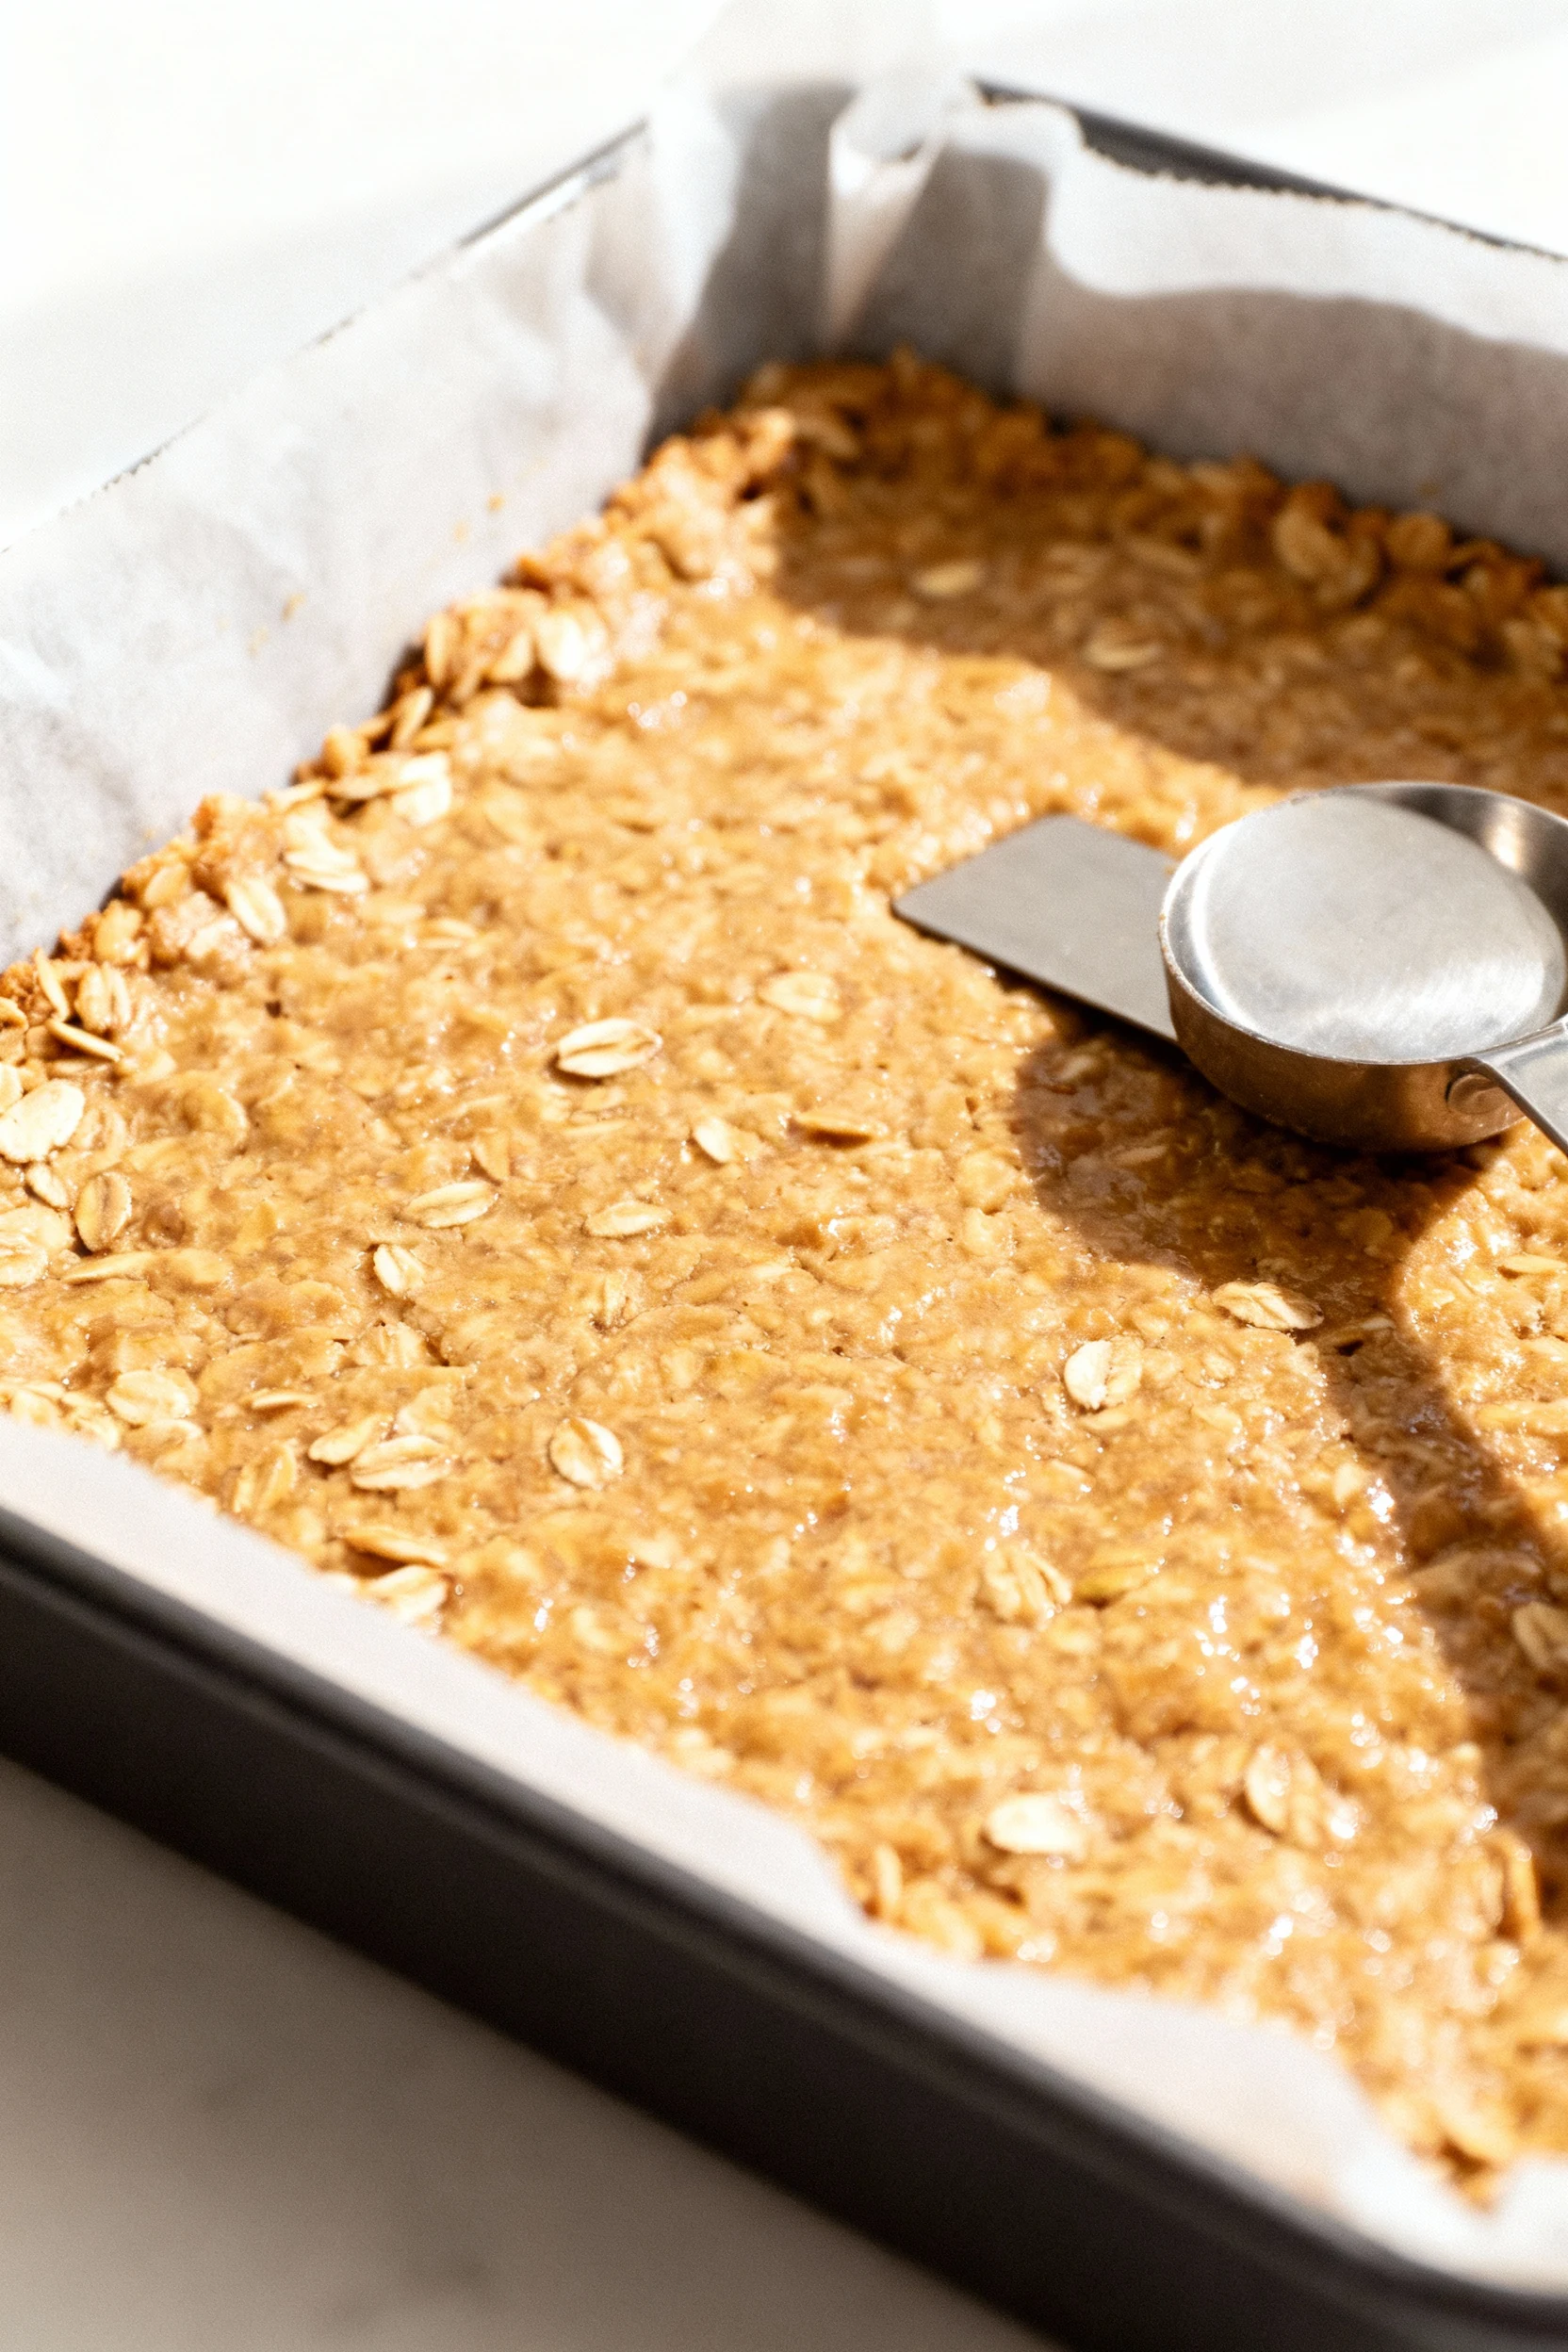
- Combine and adjust. Pour the warm mixture over the dry ingredients. Stir with a sturdy spoon until no dry pockets remain. If it looks crumbly, add milk 1 tablespoon at a time until it presses together like cookie dough.
- Fold in mix-ins. Stir in chocolate chips and any chunky add-ins (dried fruit, nuts). If the mixture is too warm and melts the chocolate, let it sit 3–4 minutes, then try again. Patience = pretty bites.
- Shape your snack.
- For bars: Scrape into the lined pan and press firmly with a spatula or the bottom of a measuring cup. Aim for an even, compact layer.
- For bites: Chill the bowl for 10 minutes, then scoop and roll tablespoons into balls. A cookie scoop makes this painless.
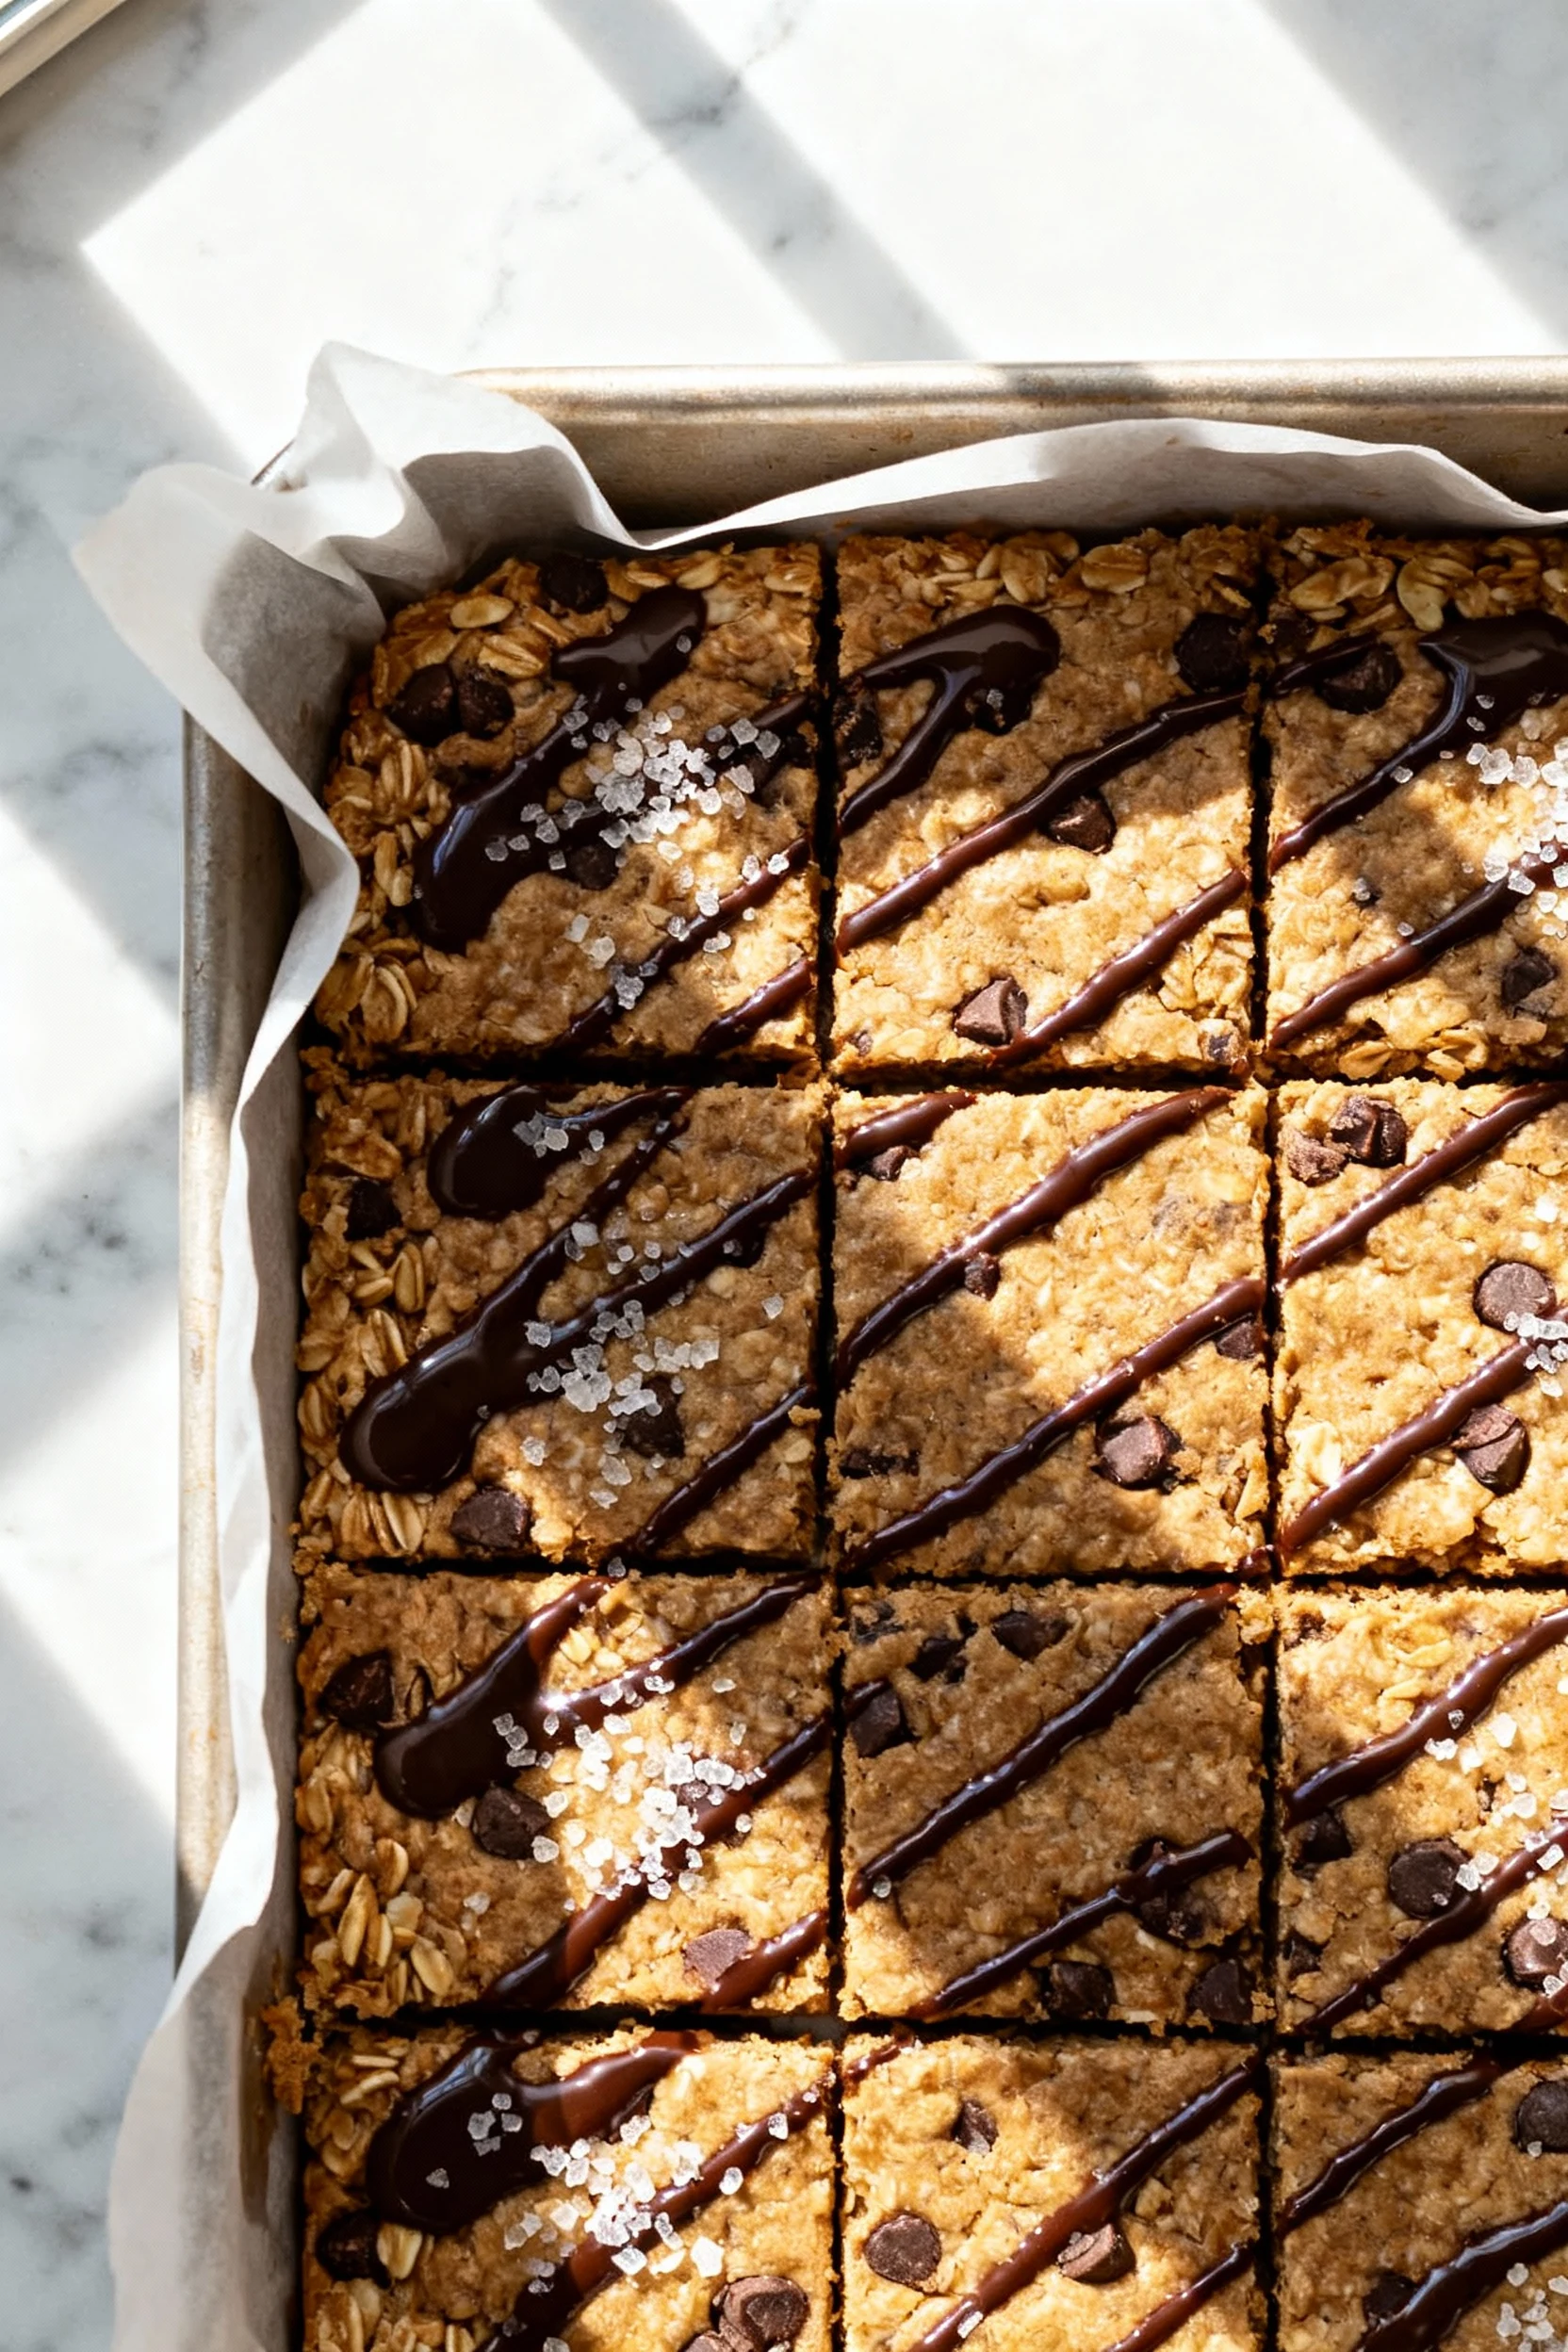
- Optional glow-up. Melt a few extra chocolate chips (20 seconds at a time, stirring) and drizzle over the top. Finish with a pinch of flaky salt if you’re feeling fancy.
- Chill to set. Refrigerate 20–30 minutes until firm. Slice bars into 12–16 pieces. Store as directed below and try not to eat half the batch immediately (no judgment if you do).
Keeping It Fresh
These are built for grab-and-go, but storage matters if you like your snacks soft and chewy instead of sad and stale.
- Room temp: Up to 2 days in a cool kitchen, in an airtight container. Great for lunch boxes.
- Fridge: 1 week in a sealed container. They stay firm but not rock-hard.
- Freezer: 2–3 months. Freeze on a sheet, then bag. Thaw 10 minutes on the counter or 30 seconds in the fridge if you’re patient (you’re not).
- Lunch-pack tip: Wrap bars in parchment or stash bites in silicone cups. Keeps them from fusing into one mega-bar. Unless you’re into that.

Why This is Good for You
- Better carbs: Oats bring soluble fiber that supports steady energy and satisfaction. No 3 p.m. sugar crash drama.
- Healthy fats: Nut/seed butter provides monounsaturated fats for long-lasting fullness and flavor that actually tastes like dessert.
- Protein on demand: You control the grams—add a scoop of protein or lean into the nuts and seeds. Simple.
- Smarter sweet: Honey or maple syrup is used strategically, not recklessly. It’s sweet but not cloying, and you can blend with mashed banana for lighter sugar.
- Micronutrient bonus: Flax and chia add omega-3s and fiber; dried fruit adds iron and potassium. That’s a lot of win for one bowl.
What Not to Do
- Don’t use steel-cut oats. They’re too tough and won’t hydrate. Rolled or quick oats only.
- Don’t eyeball the “glue.” Too little sweetener/nut butter and the mix crumbles; too much and it won’t set. Measure, then adjust 1 tablespoon at a time.
- Don’t skip the chill. Ten to thirty minutes firms everything up. If you roll bites while the mix is warm, expect sticky hands and chaos.
- Don’t drown it in wet add-ins. Big scoops of pumpkin puree or jam will break the structure. If you add wet, add more oats/flax to rebalance.
- Don’t microwave chocolate into oblivion. Heat in short bursts and stir. Burnt chocolate tastes like sorrow.
- Don’t forget the salt. A pinch makes the flavors pop. Bland snacks are a crime, IMO.
- For infants under 1: Skip honey. Use maple syrup or date syrup instead. FYI: it’s a safety thing, not a trend.
Variations You Can Try
- Classic Chocolate Chip Cookie Dough: Add 2 tablespoons almond flour, 1 tablespoon cocoa butter or coconut oil (optional), and extra mini chips. Vanilla is your friend here.
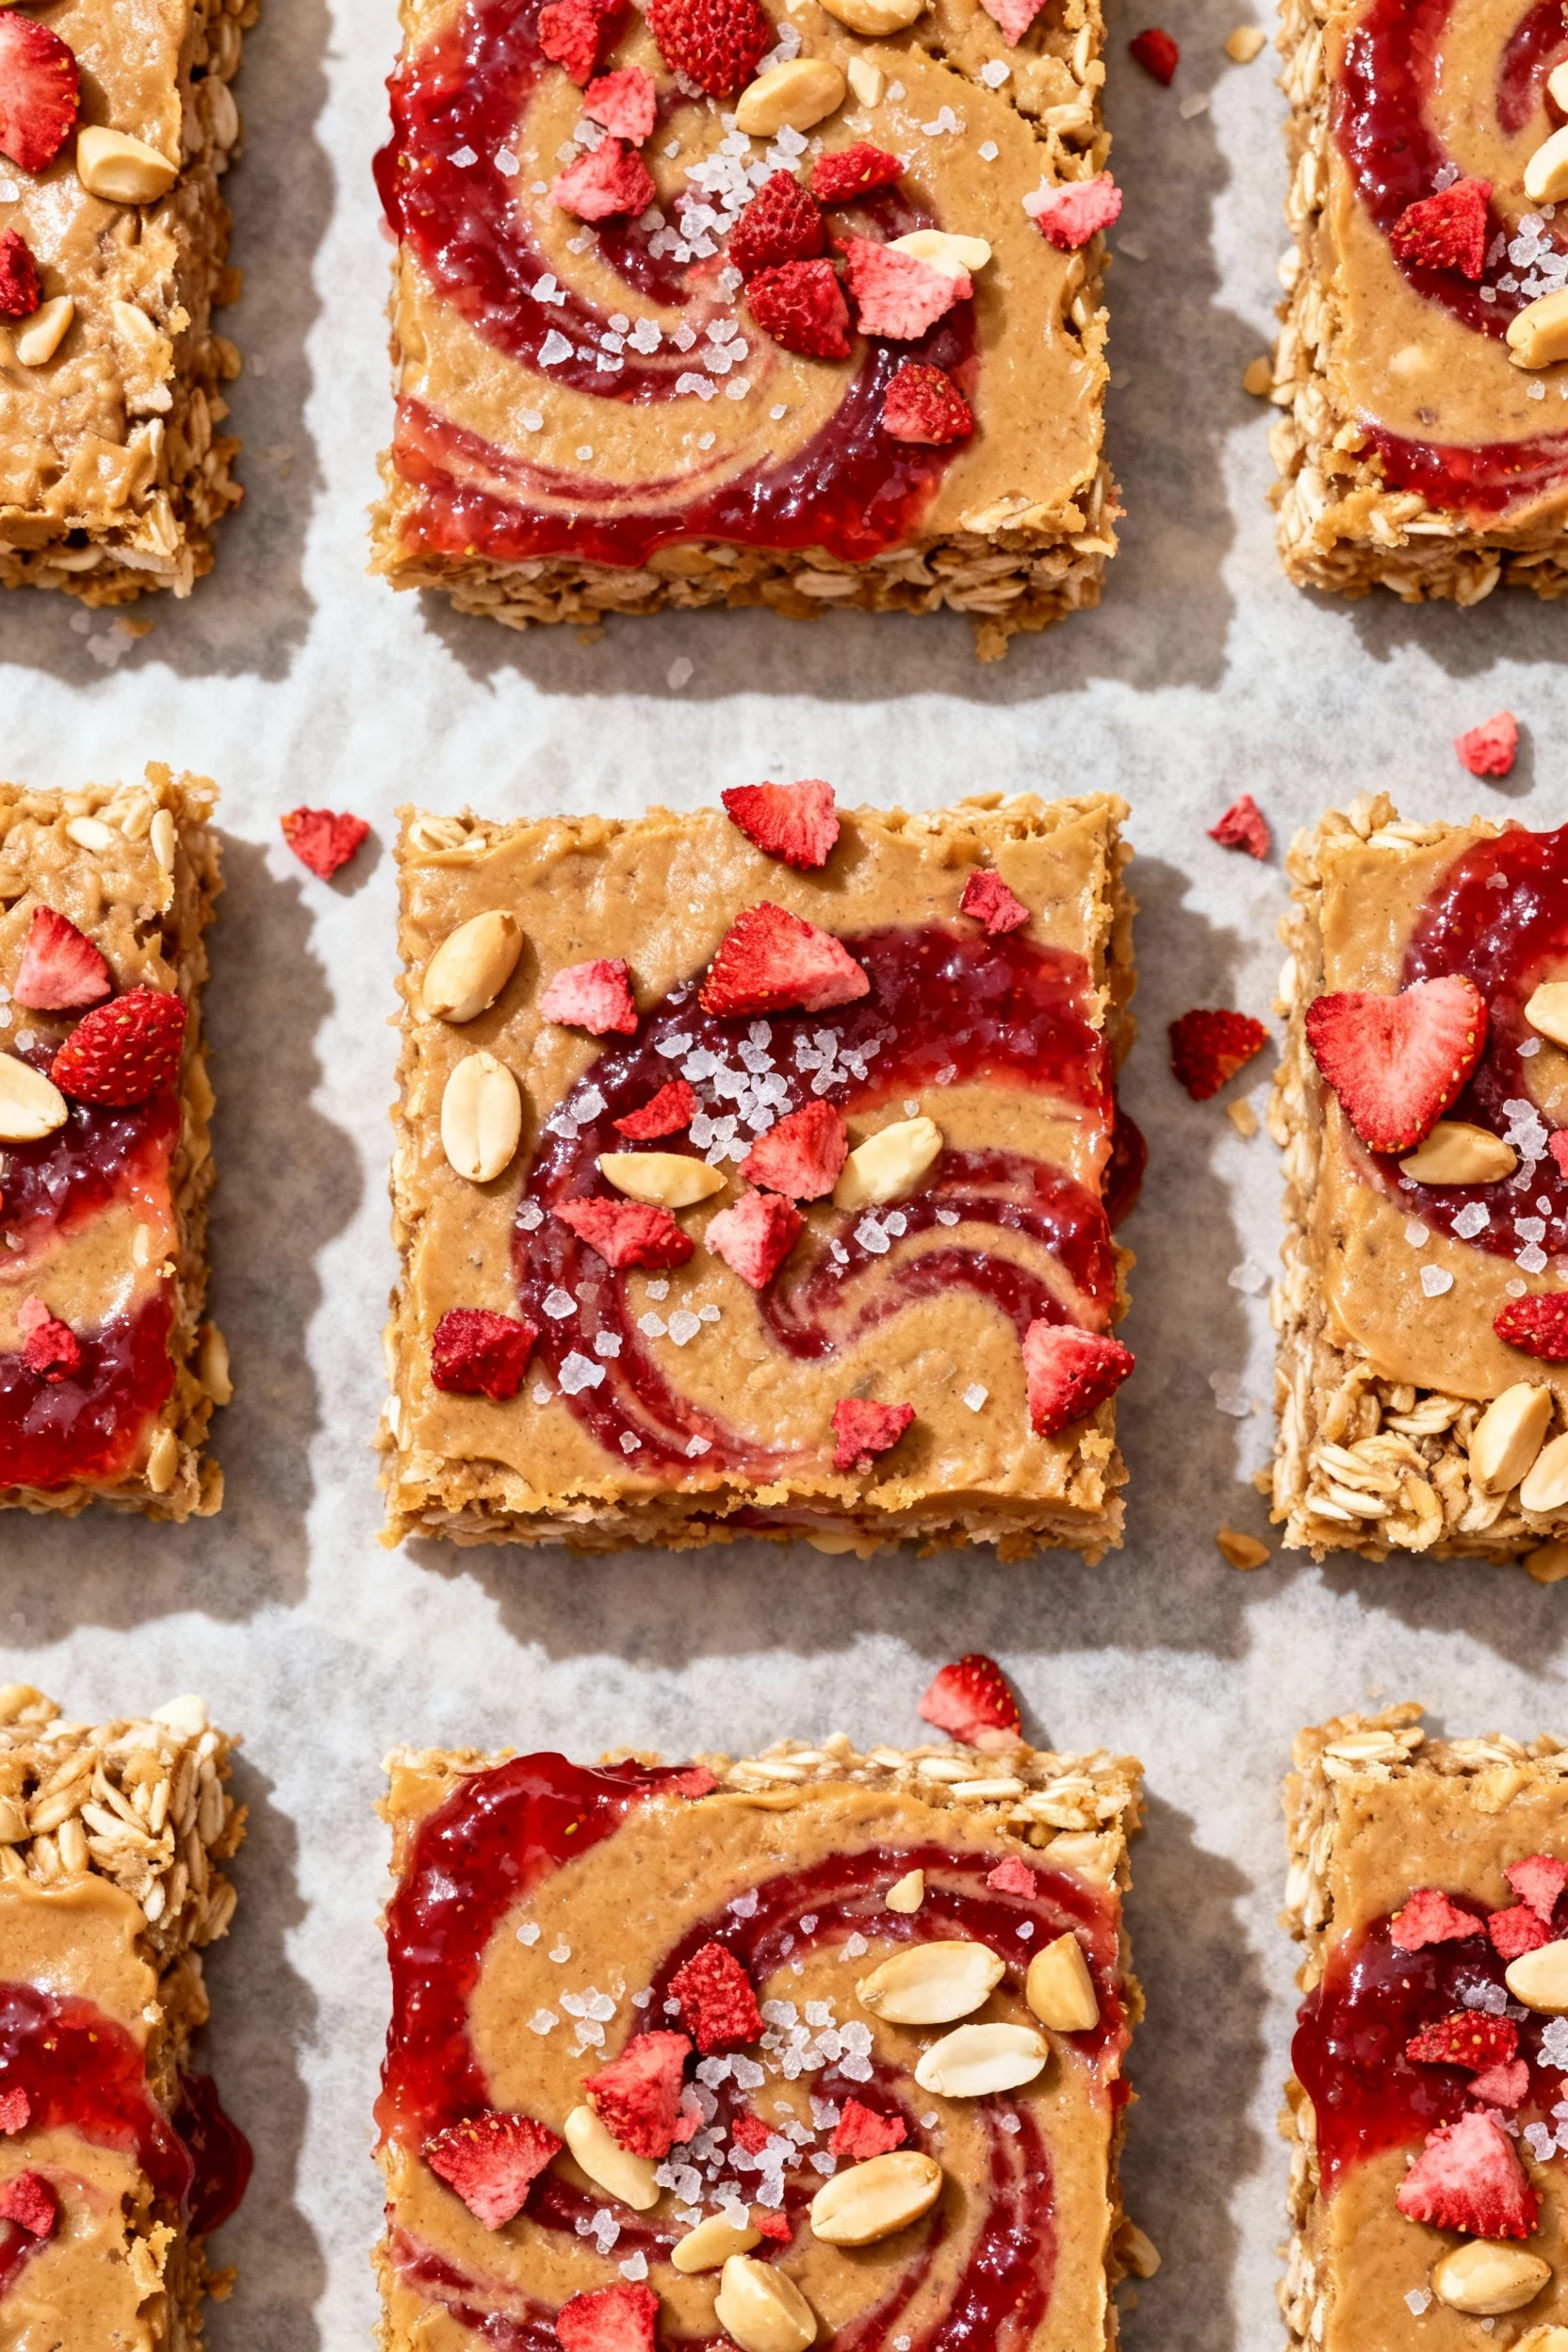
- PB&J Bites: Use peanut butter, fold in 1/3 cup crushed freeze-dried strawberries, and swirl in 2 tablespoons natural jam. Press into bars for the full sandwich vibe.
- Mocha Crunch: Stir in 1 tablespoon espresso powder and 2 tablespoons cocoa powder; swap chocolate chips for cacao nibs for serious crunch.
- S’mores Bars: Replace 1/2 cup oats with 1/2 cup crushed graham crackers; fold in mini marshmallows and chocolate chunks. Flaky salt on top is non-negotiable.
- Lemon Coconut Bliss: Use cashew butter, add 2 teaspoons lemon zest and 1/2 cup shredded coconut; white chocolate chips if you’re feeling bold.
- Tahini Date Halva: Use tahini, 2 tablespoons date syrup, and 1/4 cup chopped dates; finish with toasted sesame seeds. Subtly sweet, wildly satisfying.
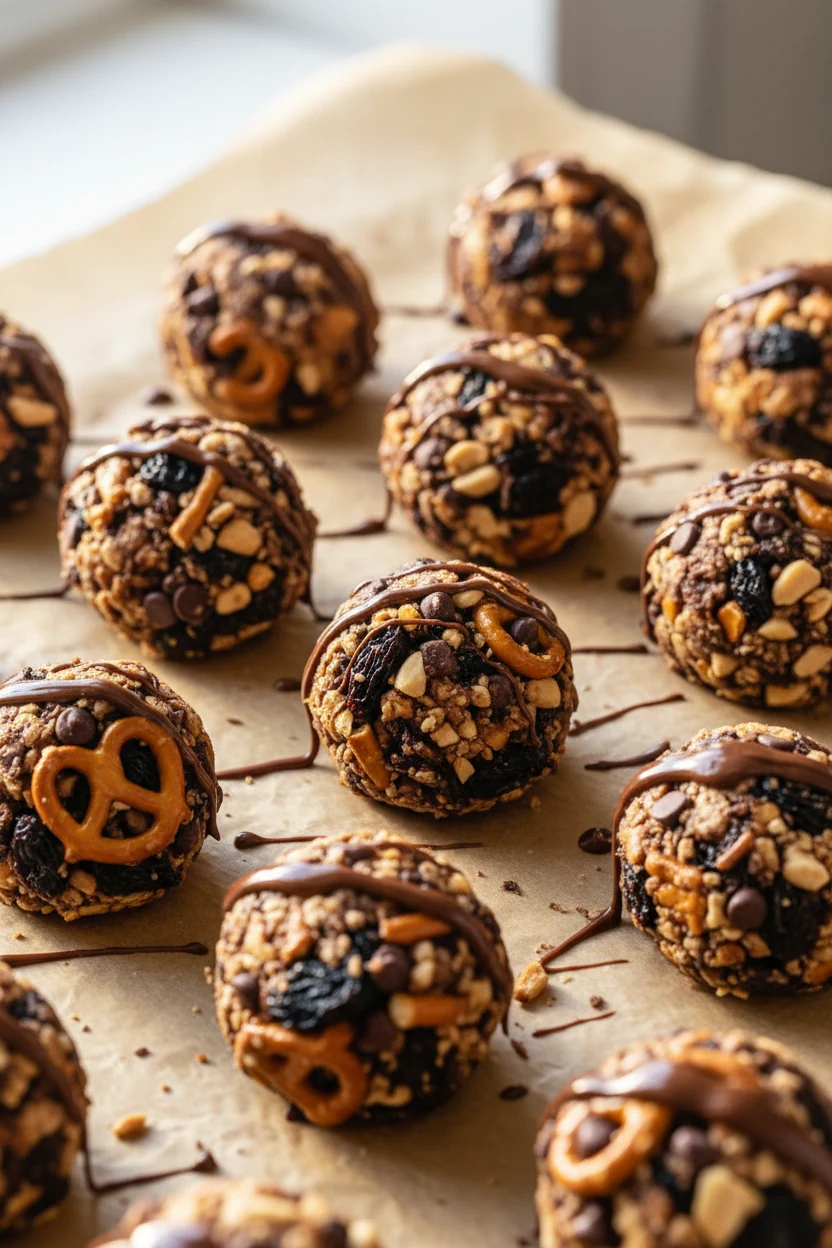
- Trail Mix Energy Bites: Add 1/4 cup raisins, 1/4 cup chopped peanuts, and a handful of pretzel bits. Salty-sweet perfection.
- Birthday Cake: Use cashew butter, 1 teaspoon almond extract, and 2 tablespoons rainbow sprinkles; white or yogurt chips for the win.
- Salted Caramel (the cheat code): Use almond butter, 2 tablespoons date syrup, and a drizzle of melted dark chocolate; finish with flaky salt.
- Pumpkin Spice (seasonal flex): Add 1/4 cup pumpkin puree and 1 teaspoon pumpkin pie spice; add 1/4–1/3 cup extra oats to balance moisture. Chocolate chips optional but recommended.
- Chocolate Orange: 2 tablespoons cocoa powder plus 2 teaspoons orange zest; dark chips make it grown-up dessert tier.
- High-Protein: Add 1 scoop protein powder; if dry, loosen with 1–2 tablespoons milk. Aim for a cookie-dough texture, not sand.
- Nut-Free School Safe: Use sunflower seed butter, chocolate chips labeled nut-free, and pumpkin seeds for crunch. Everyone gets a treat.
FAQ
Can I use instant or steel-cut oats?
Use rolled or quick oats. Instant can work in a pinch but gets softer. Steel-cut are a hard no—they stay gritty and won’t bind without cooking.
How do I fix a mixture that’s too dry or too wet?
If it’s crumbly, add milk (dairy or non-dairy) 1 tablespoon at a time, or a little more honey/maple. If it’s too wet, add more oats or 1 tablespoon ground flax at a time. You’re aiming for moldable, not sticky.
What can I use instead of nut butter?
Sunflower seed butter works great and is school-friendly. Tahini gives a more savory, halva-like flavor. In a pinch, blend soft dates with a spoonful of coconut oil for a sticky, sweet binder (very good, TBH).
Can I make these vegan and gluten-free?
Yes. Use certified gluten-free oats and swap honey for maple syrup or date syrup. Also check your chocolate chips—many brands are accidentally vegan, some aren’t.
Can I reduce the sweetener?
Yes, but reduce thoughtfully. Replace part of the honey/maple with 1/3 to 1/2 cup mashed banana or unsweetened applesauce, then add extra oats/flax as needed. Taste as you go so you don’t end up with “health food” vibes no one wants.
How long do they need to chill?
Bars and bites set in about 20–30 minutes in the fridge. In a rush? Freeze for 10 minutes and you’re good to go. The chill step helps them slice cleanly and hold shape.
Can I freeze them for meal prep?
Absolutely. Freeze on a tray, then transfer to a zip-top bag or container for 2–3 months. They’re perfect for instant snacks or emergency dessert moments (which are real, FYI).
Are these safe for toddlers?
Generally yes, with a couple notes: skip honey for kids under 1, chop dried fruit small, and choose nut-free versions if needed. Always factor in allergies and choking hazards.
Can I bake this mixture?
You could, but that’s not the point of this recipe. If you want baked bars, reduce the syrup slightly and bake at 325°F/165°C for 15–20 minutes. Expect a different texture.
Final Thoughts
You don’t need a culinary degree or a Saturday afternoon to make snacks that slap. You need a bowl, a spoon, and a game plan that actually fits your life. This base gives you both speed and flexibility, so you can hit your craving window without wrecking your routine. Make a batch now, stash half in the freezer, and thank your past self tomorrow when hunger shows up early and uninvited.
Printable Recipe Card
Want just the essential recipe details without scrolling through the article? Get our printable recipe card with just the ingredients and instructions.