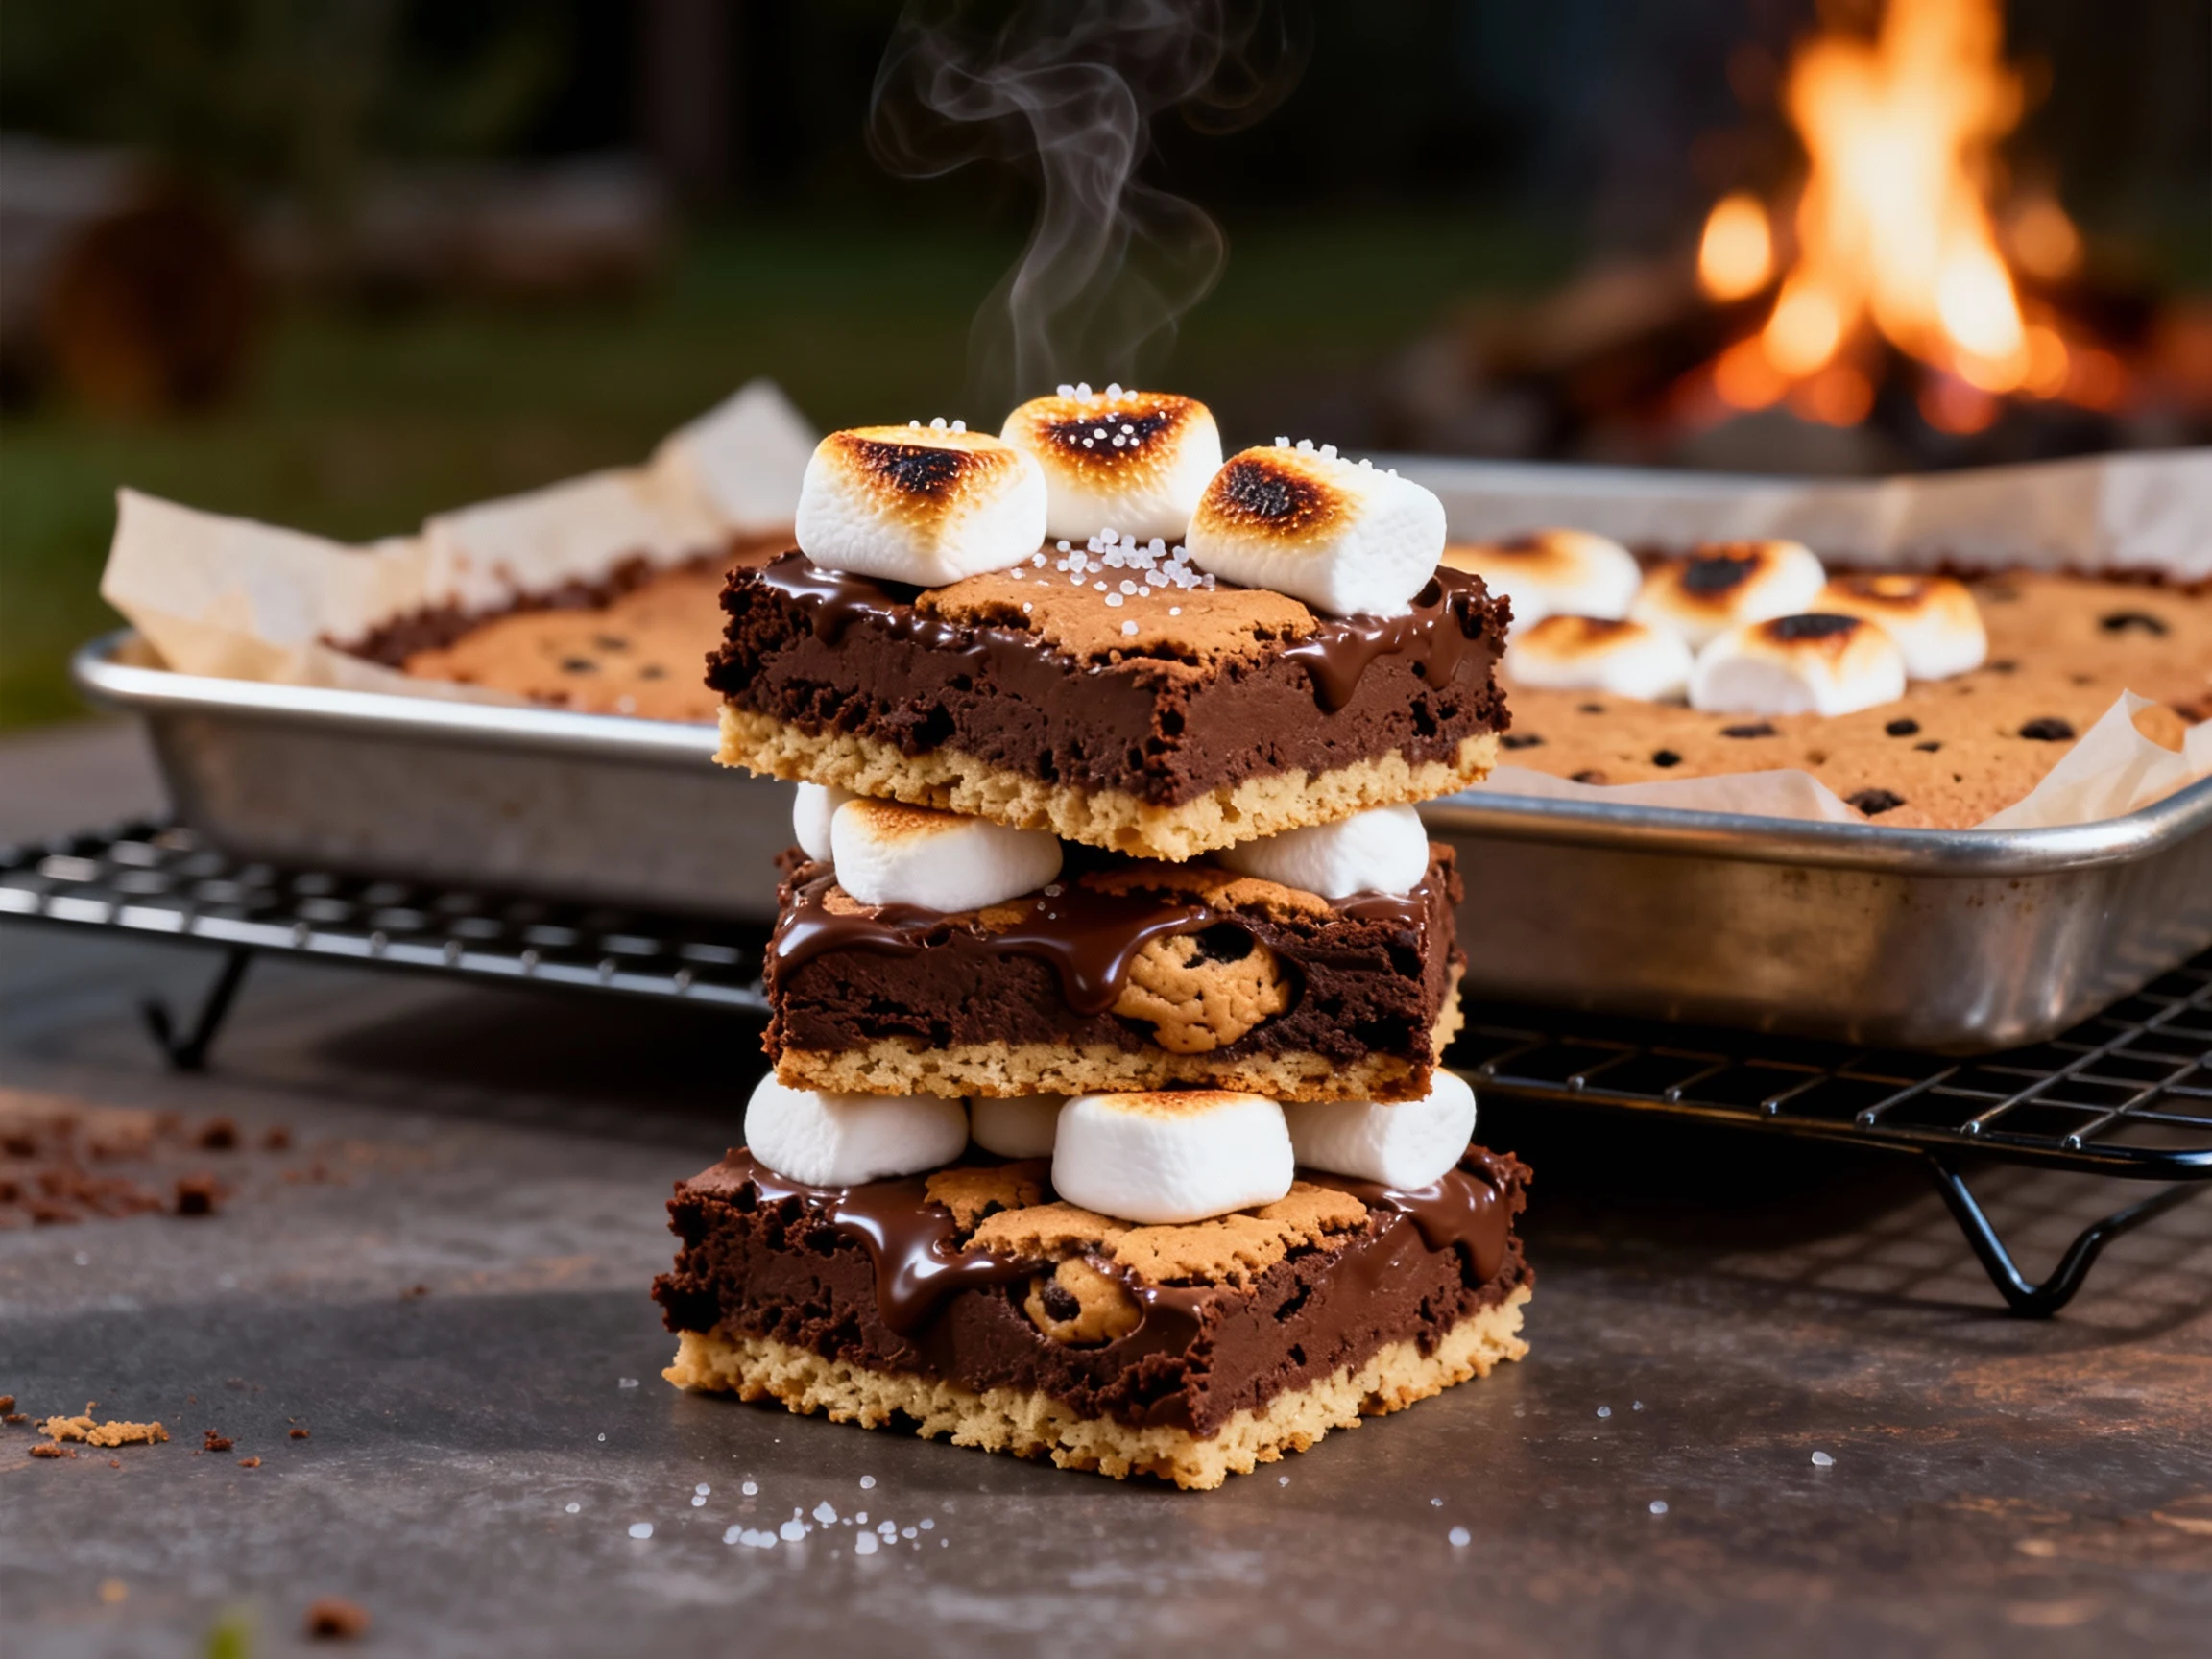
S’mores Brookies With Marshmallow & Graham Crust — Bakery Bars
Campfire flavor meets bake-sale swagger: gooey layers, one bowl, no mixer, and 30-minute prep for crowd-pleasing bar cookies.
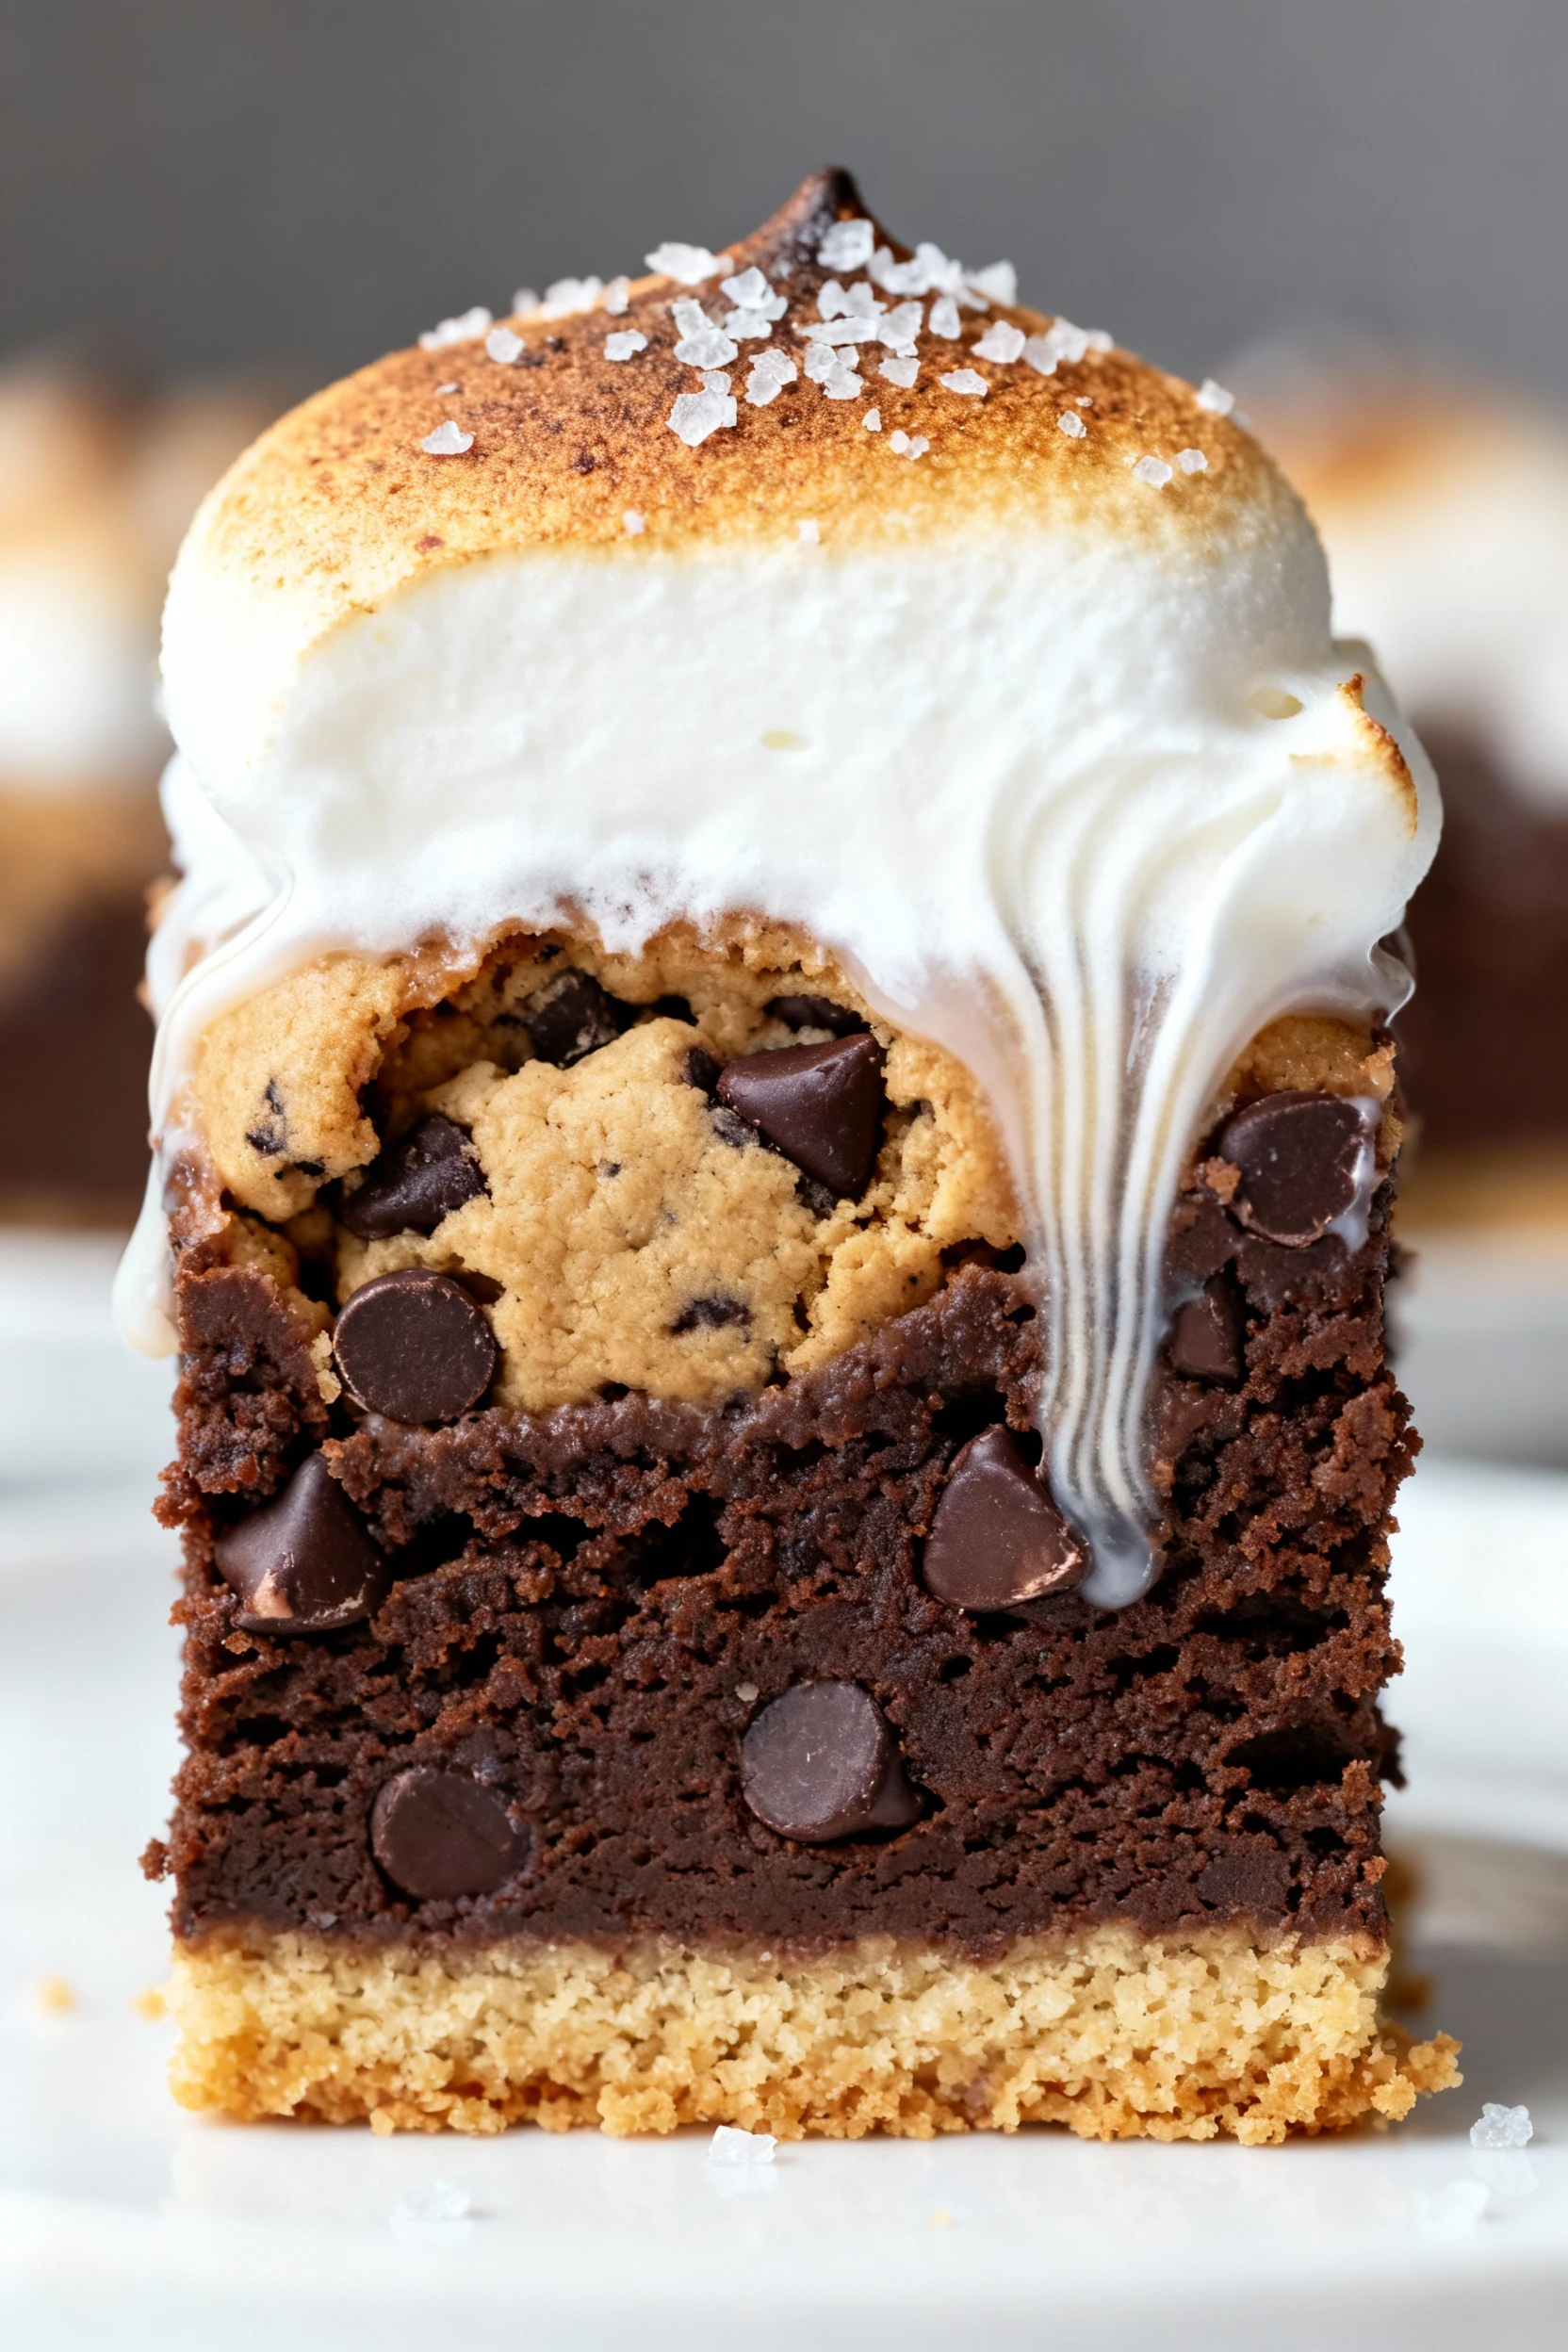
Everyone craves “second-helping” desserts, but few want the mess. Enter the ultimate bar: graham cracker crunch, fudgy brownie, chewy cookie, and toasty marshmallow in every bite. It eats like a s’more, stacks like a brownie, and wins like a bakery flex. You’ll make it in one pan, with pantry staples, in less time than it takes to wrangle a fire pit. Spoiler: you’ll need napkins and self-control.
Why This Recipe Works
- Triple-layer texture = guaranteed craveability. A buttery graham base supports a dense brownie, studded with pools of cookie dough and ribbons of marshmallow. Crunch + fudge + chew keeps every bite interesting.
- Smart layering prevents soggy crust. A quick par-bake sets the graham so it stays crisp under the moist brownie batter. No sad, damp bottoms here.
- Two quick batters, minimal bowls. Melted-butter brownie batter and small-batch cookie dough mix fast with a whisk and spatula. No mixer required, FYI.
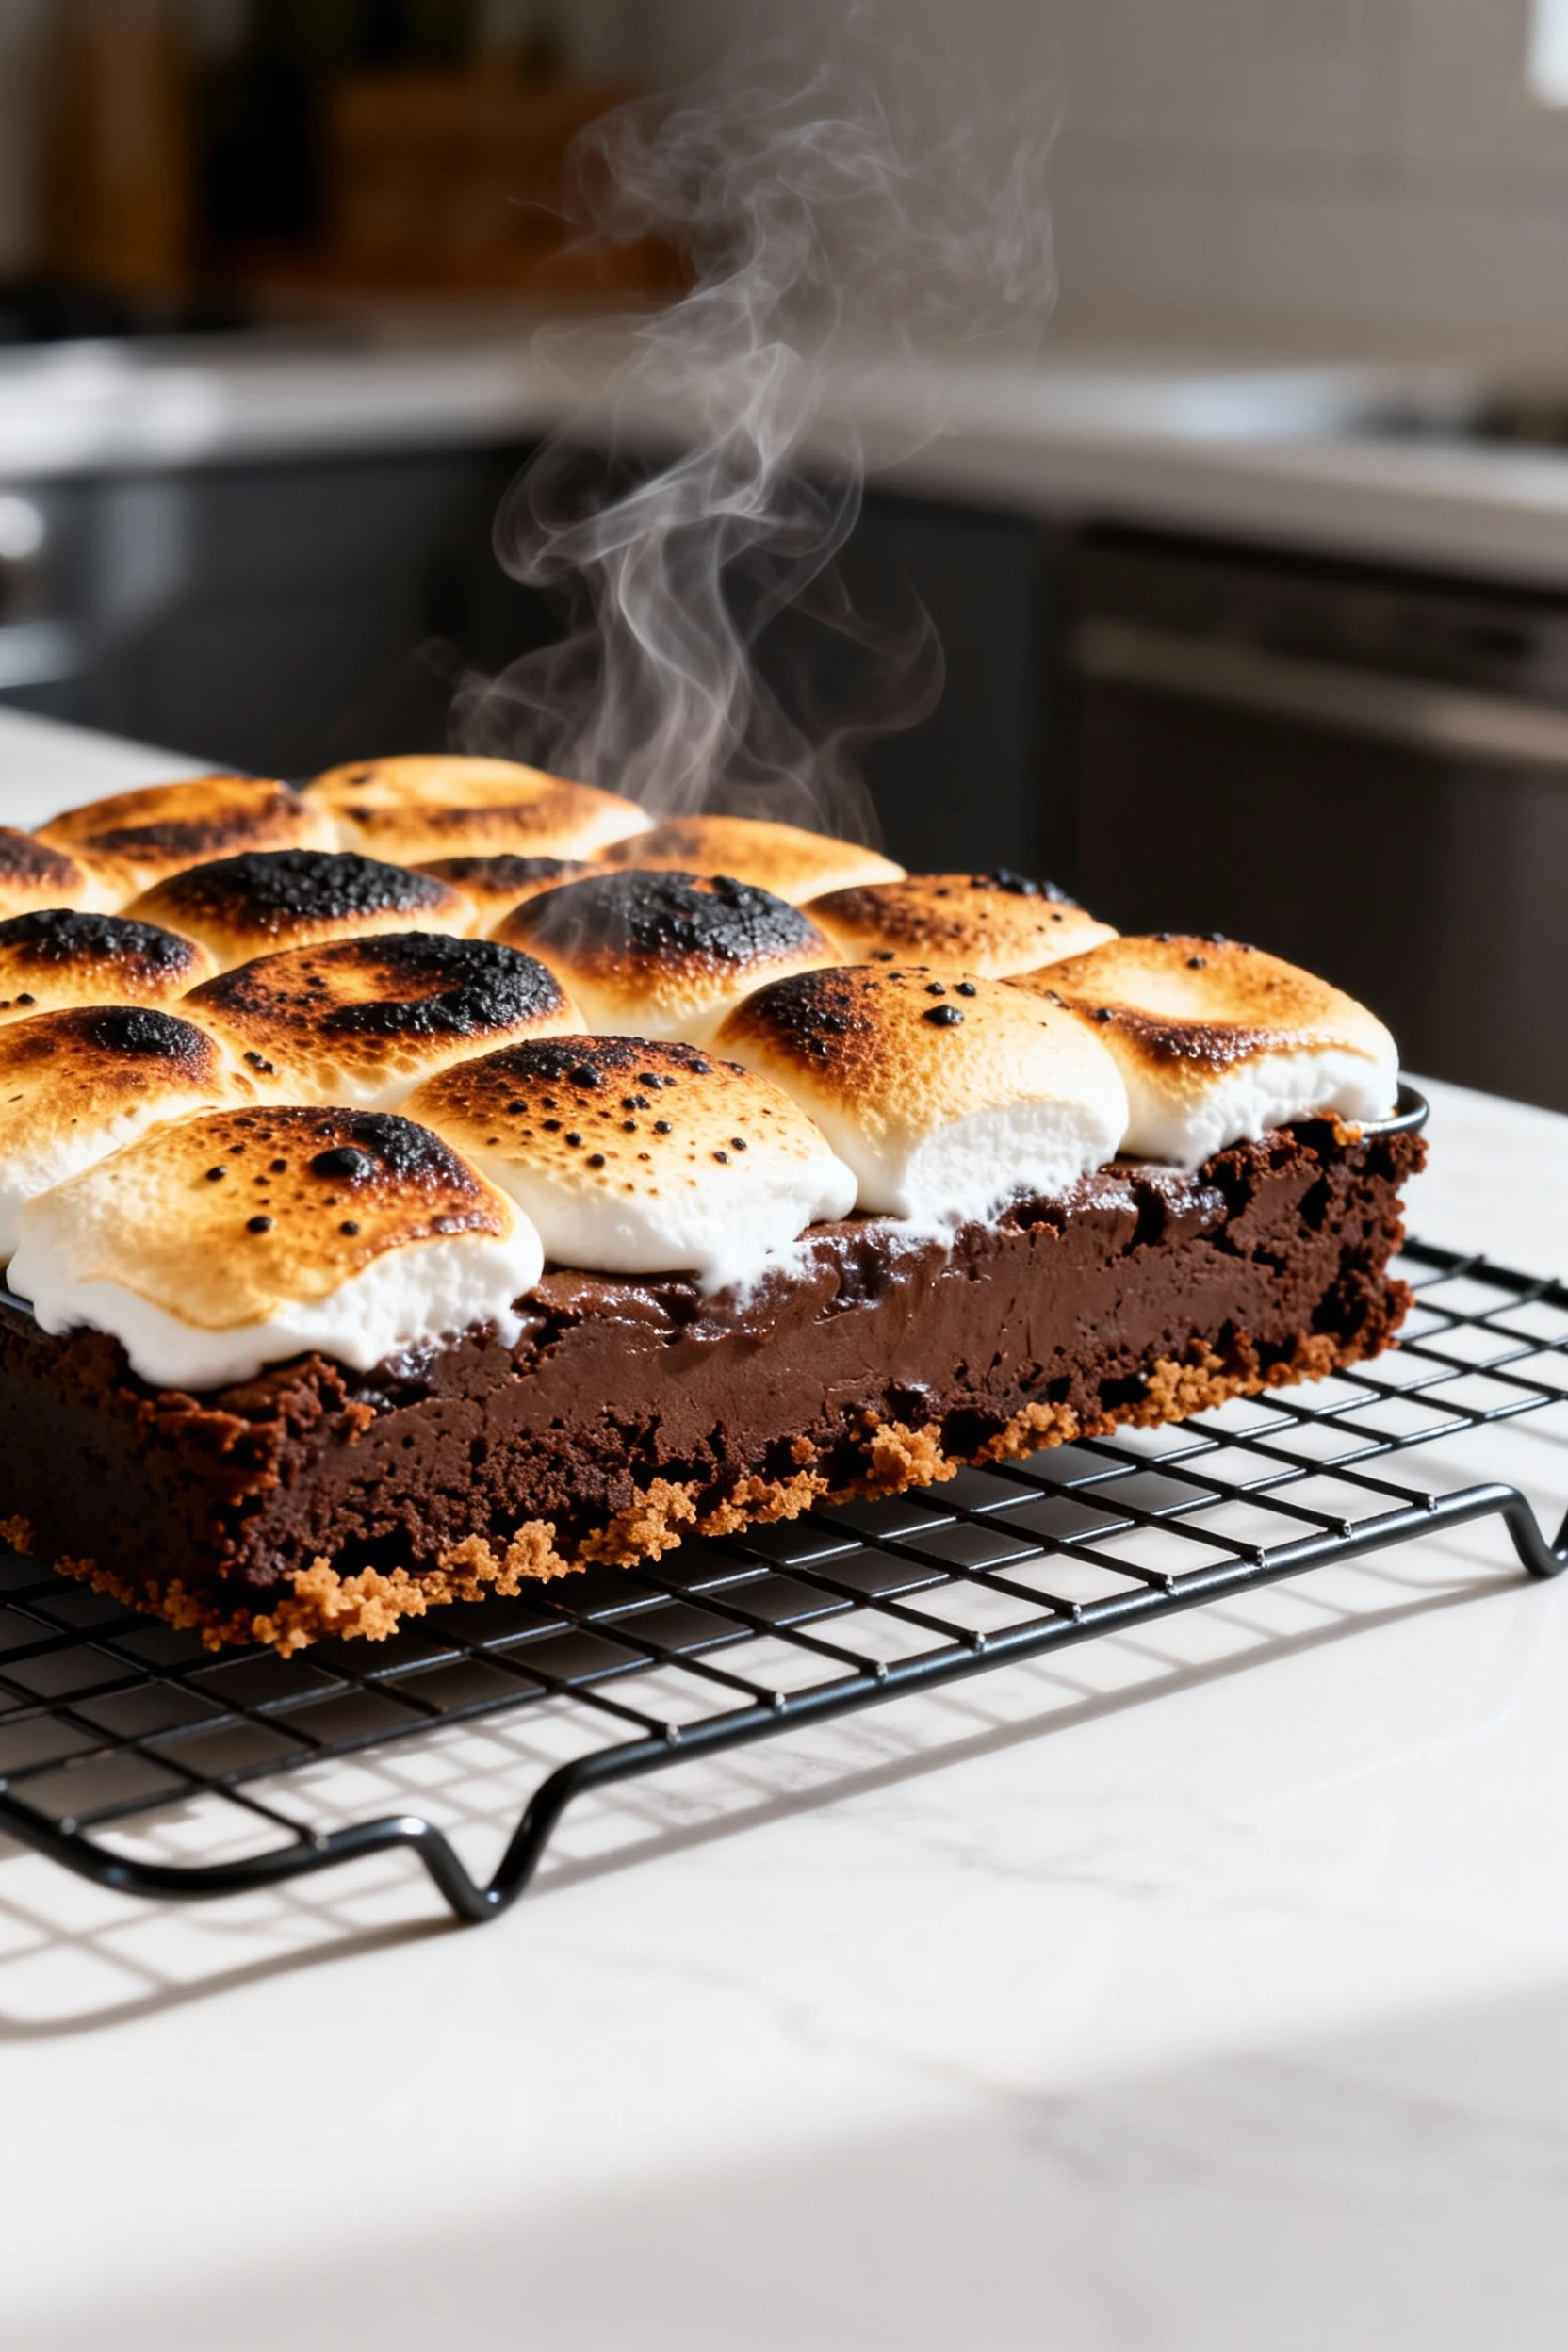
- Broil finish = campfire vibes. A short, hot blast toasts the marshmallows and adds caramelized depth you usually only get outdoors.
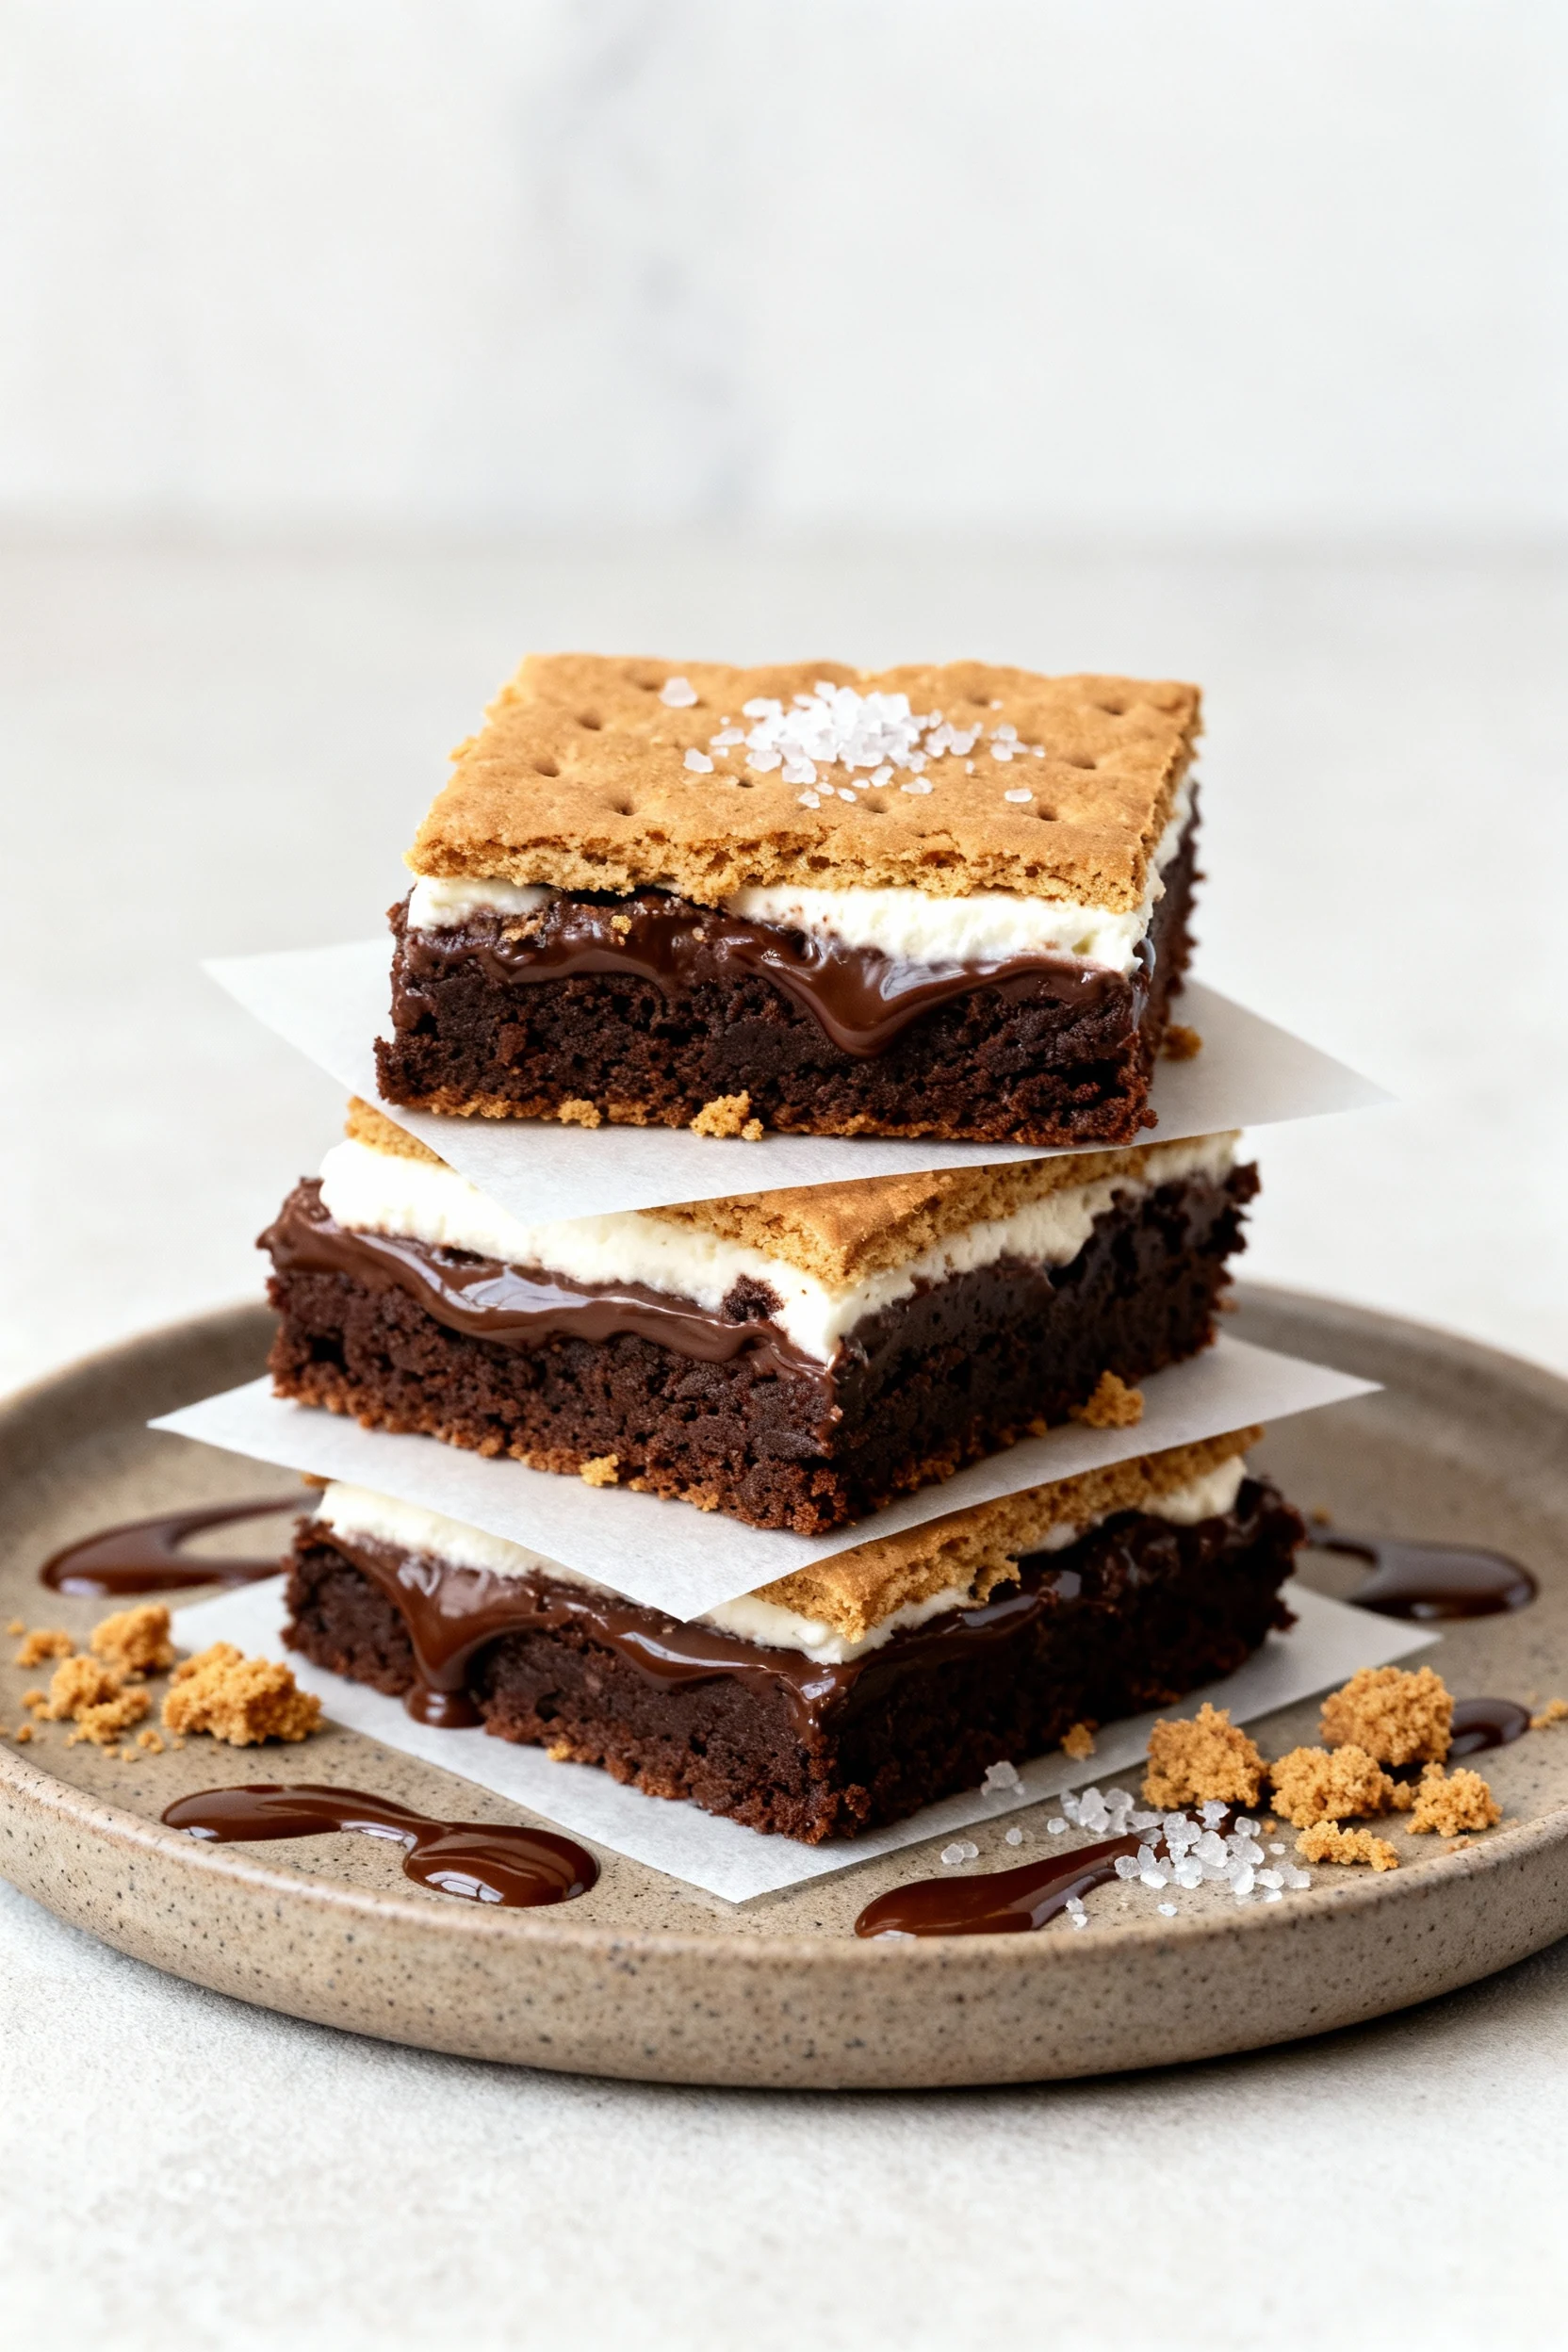
- Stable slices for parties. The crust and structure hold shape so you can stack and share without chocolate chaos (well, mostly).
Shopping List – Ingredients
- For the Graham Crust:
- 2 cups (200 g) graham cracker crumbs
- 2 tbsp (25 g) light brown sugar
- 7 tbsp (100 g) unsalted butter, melted
- 1/4 tsp fine salt
- For the Brownie Layer:
- 1/2 cup (113 g) unsalted butter, melted and slightly cooled
- 3/4 cup (150 g) granulated sugar
- 1/4 cup (50 g) light brown sugar
- 1/2 cup (50 g) unsweetened cocoa powder
- 1 tsp espresso powder (optional, boosts chocolate)
- 2 large eggs, room temp
- 2 tsp vanilla extract
- 3/4 cup (95 g) all-purpose flour
- 1/2 tsp fine salt
- 1/4 tsp baking powder
- 1/2 cup (85 g) semi-sweet chocolate chips or chunks
- For the Cookie Dough:
- 1/2 cup (113 g) unsalted butter, softened
- 1/2 cup (100 g) light brown sugar
- 1/4 cup (50 g) granulated sugar
- 1 large egg yolk
- 1 tsp vanilla extract
- 3/4 cup (95 g) all-purpose flour
- 1/4 tsp baking soda
- 1/4 tsp fine salt
- 1/2 cup (85 g) semi-sweet chocolate chips
- For the Marshmallow Layer & Topping:
- 1 cup (about 120 g) marshmallow creme/fluff
- 1 1/2 cups (about 75 g) mini marshmallows
- Flaky sea salt, for finishing (optional but excellent)
- Pan: 9×13-inch (23×33 cm) metal baking pan, parchment-lined
Cooking Instructions
- Prep the pan and oven. Heat oven to 350°F (177°C). Line a 9×13-inch metal pan with parchment, leaving overhang for easy lifting. Lightly grease the parchment.
- Build the graham crust. Stir crumbs, brown sugar, melted butter, and salt until the mixture feels like damp sand. Press firmly into the pan using the bottom of a measuring cup for even compression. Par-bake 8 minutes, then cool 5 minutes while you make the batters.
- Mix the brownie batter. In a large bowl, whisk melted butter, granulated sugar, and brown sugar until glossy. Whisk in cocoa and espresso powder. Add eggs one at a time, whisking 20 seconds after each, then whisk in vanilla. Fold in flour, salt, baking powder, and chocolate chips until just combined. Don’t overmix; streaks disappear fast.
- Make the cookie dough. In a medium bowl, cream softened butter with brown and granulated sugars using a spatula or spoon until smooth and slightly fluffy. Mix in egg yolk and vanilla. Fold in flour, baking soda, salt, and chips until a soft dough forms.
- Assemble the layers. Spread the brownie batter evenly over the par-baked crust. Scoop the cookie dough by teaspoonfuls and dot it over the brownie layer (no need to press flat). Warm the marshmallow creme 10–15 seconds in the microwave so it loosens, then drizzle in ribbons between and over the cookie dough mounds.
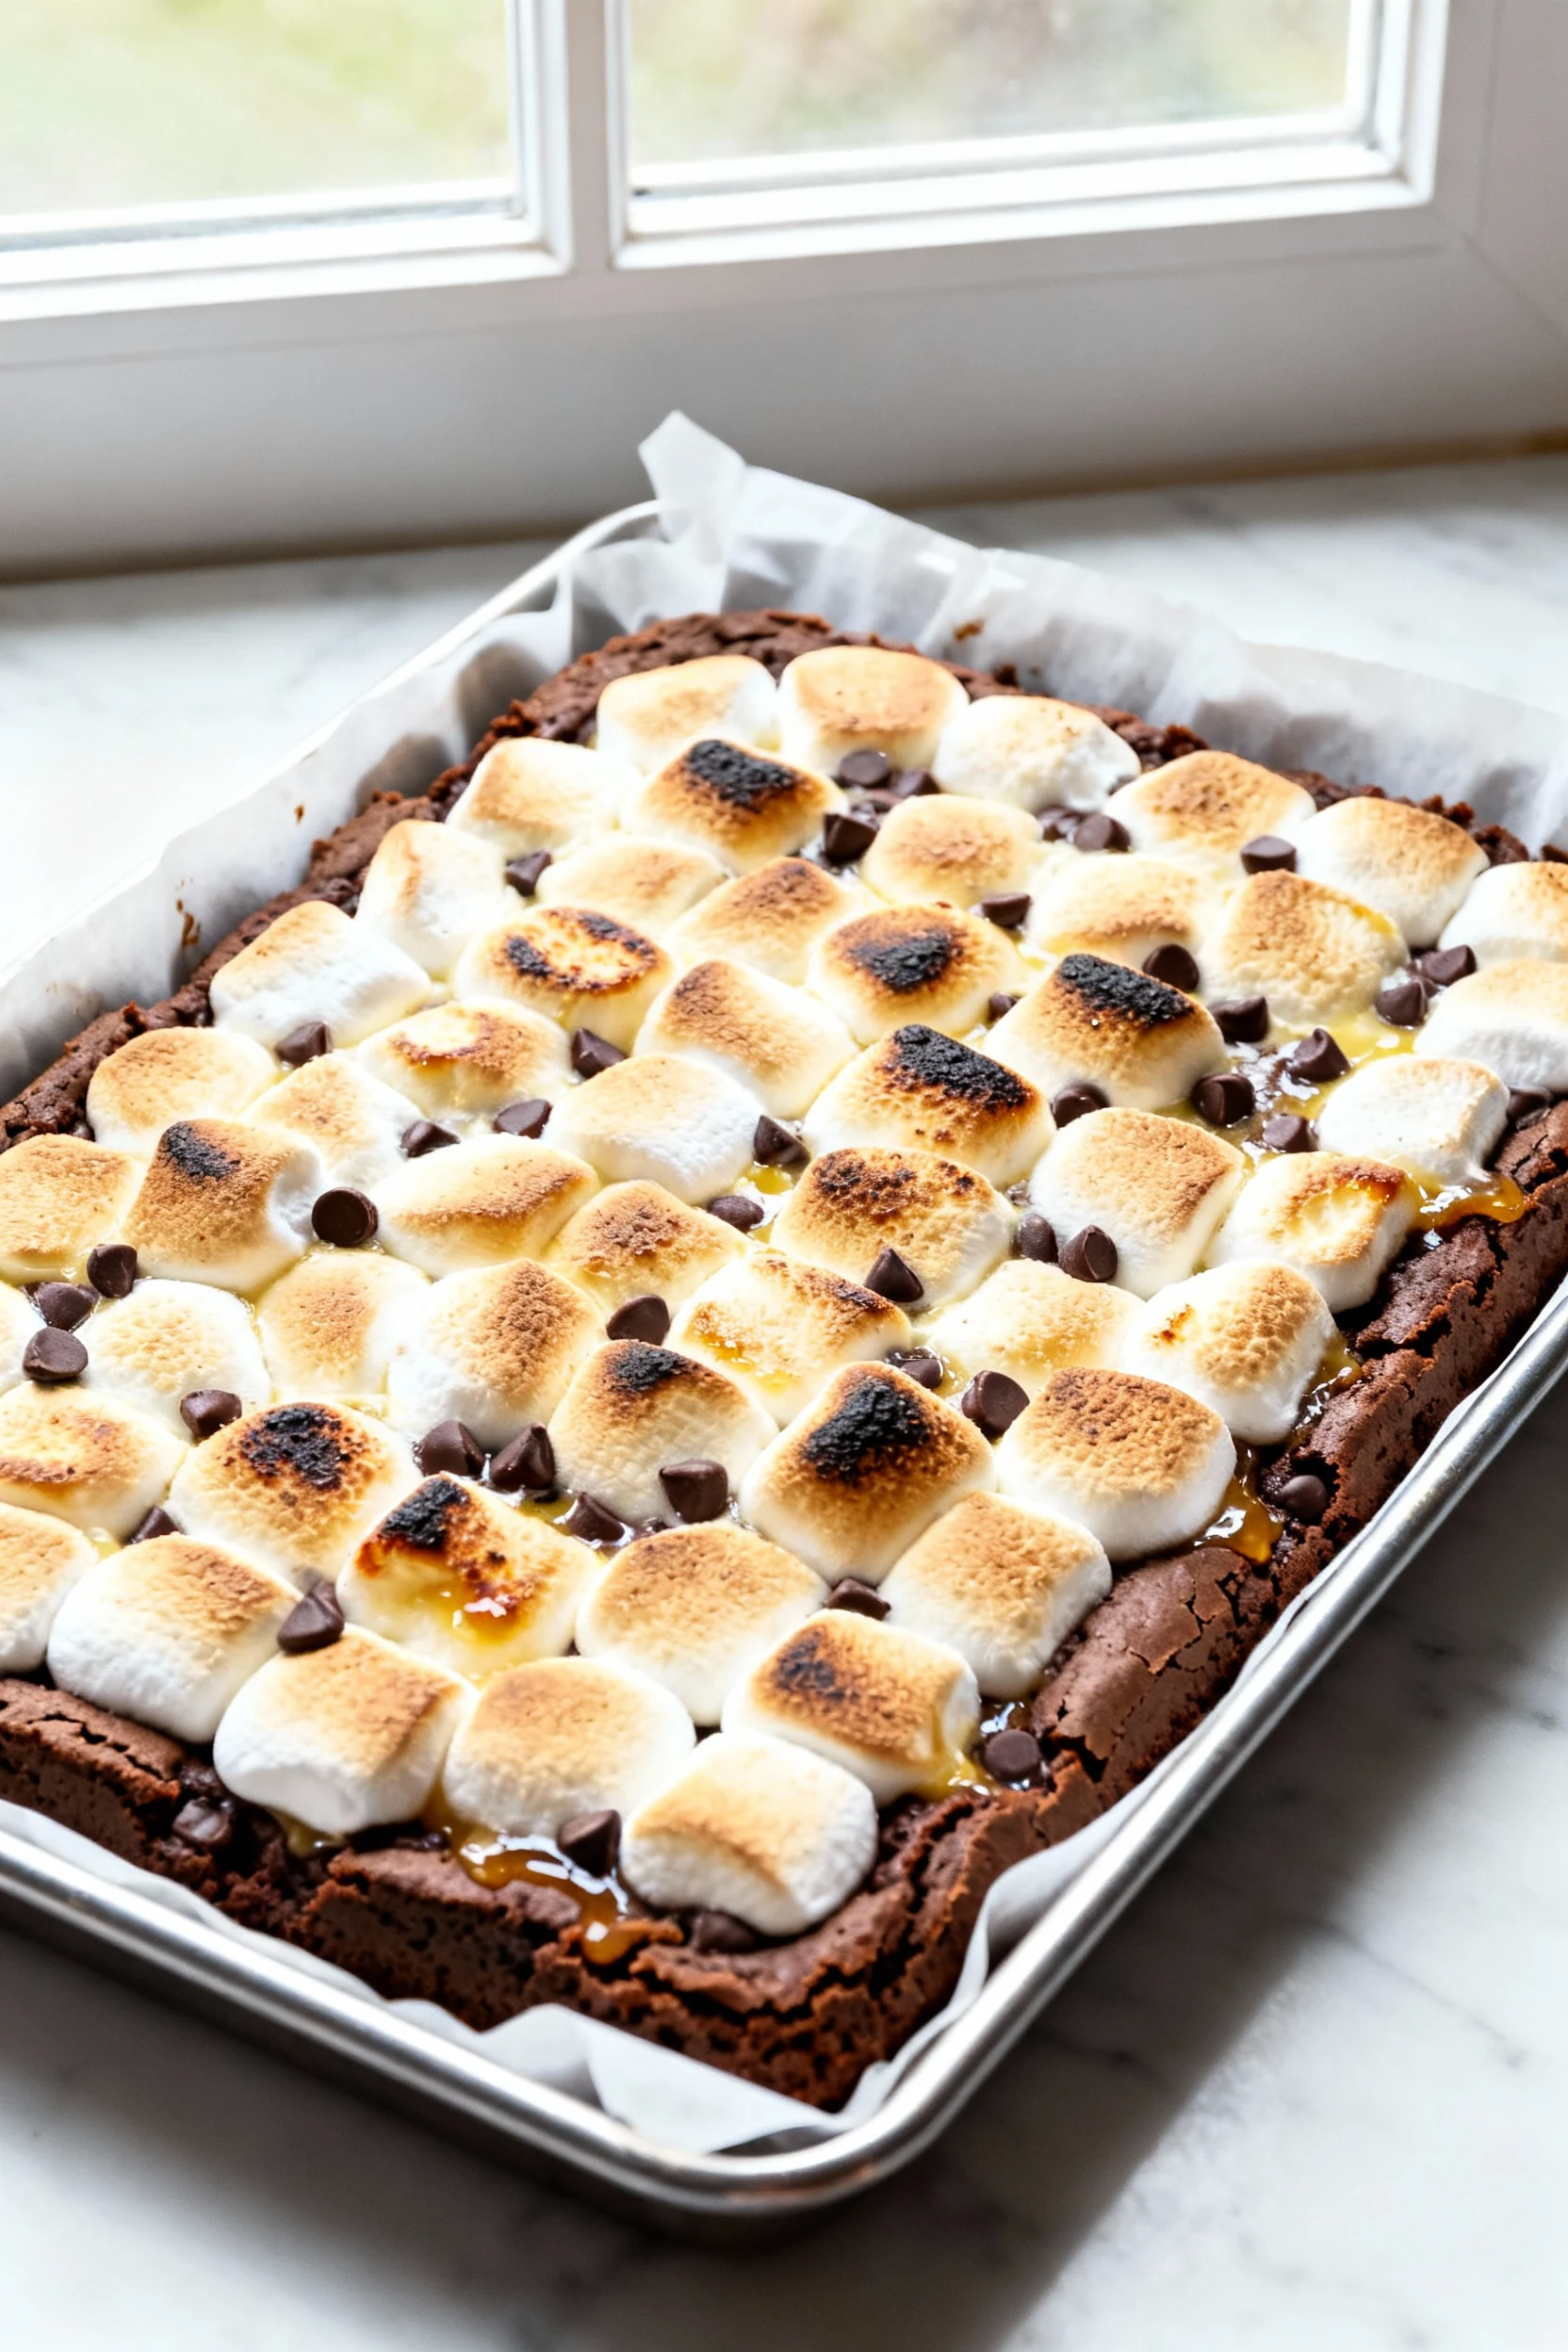
- Add the topper. Scatter mini marshmallows over the surface. If you like, add a few extra chocolate chunks. Lightly sprinkle flaky salt for contrast.
- Bake to set. Bake on the center rack for 22–28 minutes until the edges look set and a tester in the brownie portion comes out with moist crumbs (not wet batter). The marshmallows will puff dramatically—this is your “ooh-ahh” moment.
- Toast for campfire drama. Switch to broil on high and toast the top for 30–60 seconds, watching like a hawk. Pull as soon as marshmallows turn golden with a few charred kisses. No broiler? Use a kitchen torch and spot-toast.
- Cool and slice clean. Cool in the pan on a rack for at least 1 hour (2 hours for super neat squares). Lift out using parchment; cut with a hot, clean knife, wiping between cuts. If marshmallow sticks, oil the blade lightly.
- Serve. Finish with a pinch of flaky salt if you skipped earlier and serve slightly warm or at room temp. Expect requests for “just one more.”
Preservation Guide
- Room temperature: Store in an airtight container for up to 2 days. Place parchment between layers to prevent marshmallow cling.
- Refrigerator: Keeps well for 4–5 days. The chill firms the layers; rewarm a square in the microwave for 10–15 seconds to revive the goo.
- Freezer: Wrap bars individually in plastic, then stash in a zip-top bag for up to 2 months. Thaw at room temp 30–45 minutes, or warm briefly to soften. For a toasty top after thawing, broil 20–30 seconds (watch closely).
- Transport tips: Keep them in a snug tin with parchment dividers. Warm weather? Pop an ice pack nearby; chocolate melts faster than your willpower.
Why This is Good for You
Joy counts. These bars deliver communal, memory-rich eating—the kind that pulls people to a table. Sharing dessert feeds connection, and connection lowers stress. That’s not woo-woo; that’s real life.
Dark chocolate brings perks. Cocoa offers flavanols and magnesium, which support mood and focus. You’re not eating a salad, but you’re not exactly losing here, either.
Built-in portion control. Bars let you serve tidy squares. You choose the size and the moment. Pair with fruit or coffee and you’ve got balance, IMO.
Whole-grain-ish crunch. Graham crackers add a hint of whole-grain texture and flavor, which plays up satisfaction so you stop at “enough,” not “oops.”
Avoid These Mistakes
- Skipping the par-bake. If you don’t set the crust first, the brownie layer can soak it and turn it soft.
- Overmixing the batters. Too much stirring toughens the cookie and brownie. Fold just until there are no dry streaks.
- Overbaking the whole pan. Pull when a tester shows moist crumbs. Waiting for a dry tester dries out the brownie and ruins the goo factor.
- Neglecting the broiler. A quick toast builds that signature s’more flavor. But babysit it—30 seconds can turn golden to charred beyond salvation.
- Slicing too hot. Warm marshmallow equals sticky chaos. Cool fully, then cut with a hot, clean knife for crisp edges.
- Using a glass pan without adjusting. Glass bakes slower and can overbrown edges. If using glass, reduce oven temp by 25°F and add a few minutes as needed.
Recipe Variations
- Gluten-Free: Use certified GF graham crumbs and a 1:1 gluten-free flour blend for both batters. Add an extra tablespoon of milk to the cookie dough if it feels dry.
- Dairy-Free: Swap in plant butter and dairy-free chocolate. Use a gelatin-free vegan marshmallow for topping and a vegan marshmallow creme substitute. Texture stays clutch.
- Peanut Butter Swirl: Warm 1/3 cup creamy peanut butter and drizzle over the brownie layer before adding cookie dough. Swirl gently with a knife.
- Caramel Crunch: Scatter 1/2 cup chopped toffee or drizzle 1/3 cup thick caramel between cookie dollops. Finish with extra flaky salt for that sweet-salty snap.
- Skillet Party: Press crust and bake layers in a well-greased 12-inch cast-iron skillet. Reduce bake time by 3–5 minutes; serve warm, scoop-style.
- Mini Marshmallow Mosaic: Skip fluff entirely and double the minis on top. Bake as directed and toast to finish—cleaner slices, low-key less sticky.
- 8×8 Pan (Small Batch): Halve all ingredients and bake 25–30 minutes. You’ll get thicker bars with big, gooey energy.
FAQ
Can I use a boxed brownie mix for the brownie layer?
Yes. Prepare the mix as directed for a 9×13 pan, then proceed with the graham crust, dolloped cookie dough, and marshmallows. The mix will be slightly sweeter; add a pinch more salt or use dark chocolate chips to balance.
Do I need marshmallow creme, or can I just use mini marshmallows?
You can skip the creme and use only minis on top. The creme adds gooey ribbons inside the bars, which amps up the s’more vibe. If you omit it, load up the minis and toast well for flavor.
How do I keep the graham crust from crumbling?
Use enough melted butter, press the crumbs firmly, and par-bake. If your crumbs seem dry, add another tablespoon of butter. Also let the crust cool 5 minutes before adding batter so it sets slightly.
My marshmallows burned under the broiler. What did I do wrong?
Broilers vary and run hot. Keep the pan on the middle rack, leave the door cracked, and watch constantly. Pull the moment you see golden patches—30 seconds can change everything under broil heat.
How do I get clean, bakery-style squares?
Cool completely, then use a long, sharp knife dipped in hot water and wiped dry between cuts. A light spritz of neutral oil on the blade keeps marshmallow from clinging. Patience = sharp corners.
Can I make these bars a day ahead?
Absolutely. Bake, cool, and store airtight at room temp overnight. If the top softens, re-toast briefly under the broiler (15–20 seconds) before serving to refresh that toasty finish.
What if I only have a glass baking dish?
Lower the oven to 325°F (163°C) and add a few minutes to the bake time. Glass heats slowly but holds heat, so this prevents overbrowned edges and underdone centers.
The Bottom Line
These bars pack a campfire, a brownie pan, and a cookie jar into one ridiculously satisfying square. The graham crust keeps it crisp, the brownie keeps it fudgy, the cookie keeps it chewy, and the marshmallow brings the drama. They’re easy enough for a weeknight and impressive enough for any bake sale. Make a batch, watch them vanish, and accept your new reputation as the dessert person—because, honestly, you earned it.
Printable Recipe Card
Want just the essential recipe details without scrolling through the article? Get our printable recipe card with just the ingredients and instructions.