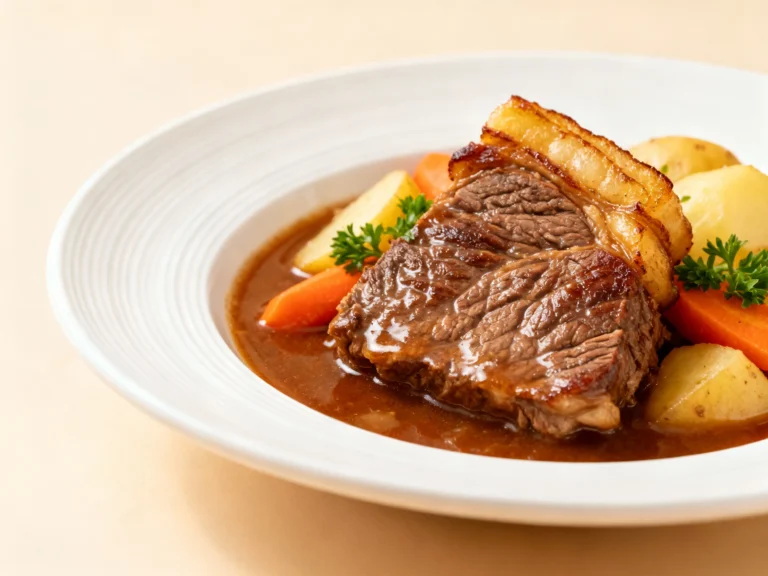
Korean Beef Stew That Tastes Slow Cooked in 45 Minutes
Weeknight-friendly, deeply savory comfort with tender beef, glossy broth, and pantry staples—no long simmer, just big flavor fast.
You want rich, spoon-tender beef and a broth so glossy it looks Photoshopped—without babysitting a pot all afternoon. Deal. This version stacks classic Korean flavors with smart technique, so you get serious depth in under an hour. We’re talking gochujang heat, soy-driven umami, and that signature hint of sweetness that keeps you chasing one more bite.
The secret playbook? Sear for crust, bloom your pastes, and use a quick tenderizer trick the pros swear by. Add Korean radish and mushrooms for body, then finish with sesame oil so the aroma hits before the spoon does. Your kitchen will smell like you worked for hours; your clock will say otherwise.
Why This Recipe Works
- Hard sear = fast flavor. Browning the beef builds fond, which turns into a savory base once you deglaze. No fond, no flavor—simple as that.
- Bloomed gochujang and aromatics. Stir-frying the paste with garlic and ginger unlocks heat, sweetness, and depth you won’t get by just stirring it into liquid.
- Asian pear (or apple) equals quick tenderizer. A little grated fruit adds enzymes and natural sugars that tenderize and round out the salty heat. IMO, it’s the stealth move that makes this taste slow-cooked.
- Umami boosters, not shortcuts. Soy sauce, a splash of fish sauce, and mushrooms layer savory notes so the broth tastes complex without hours of simmering.
- Two-stage simmer protects texture. Beef starts first; hearty veg join later. Everything finishes tender at the same time, no mushy carrots allowed.
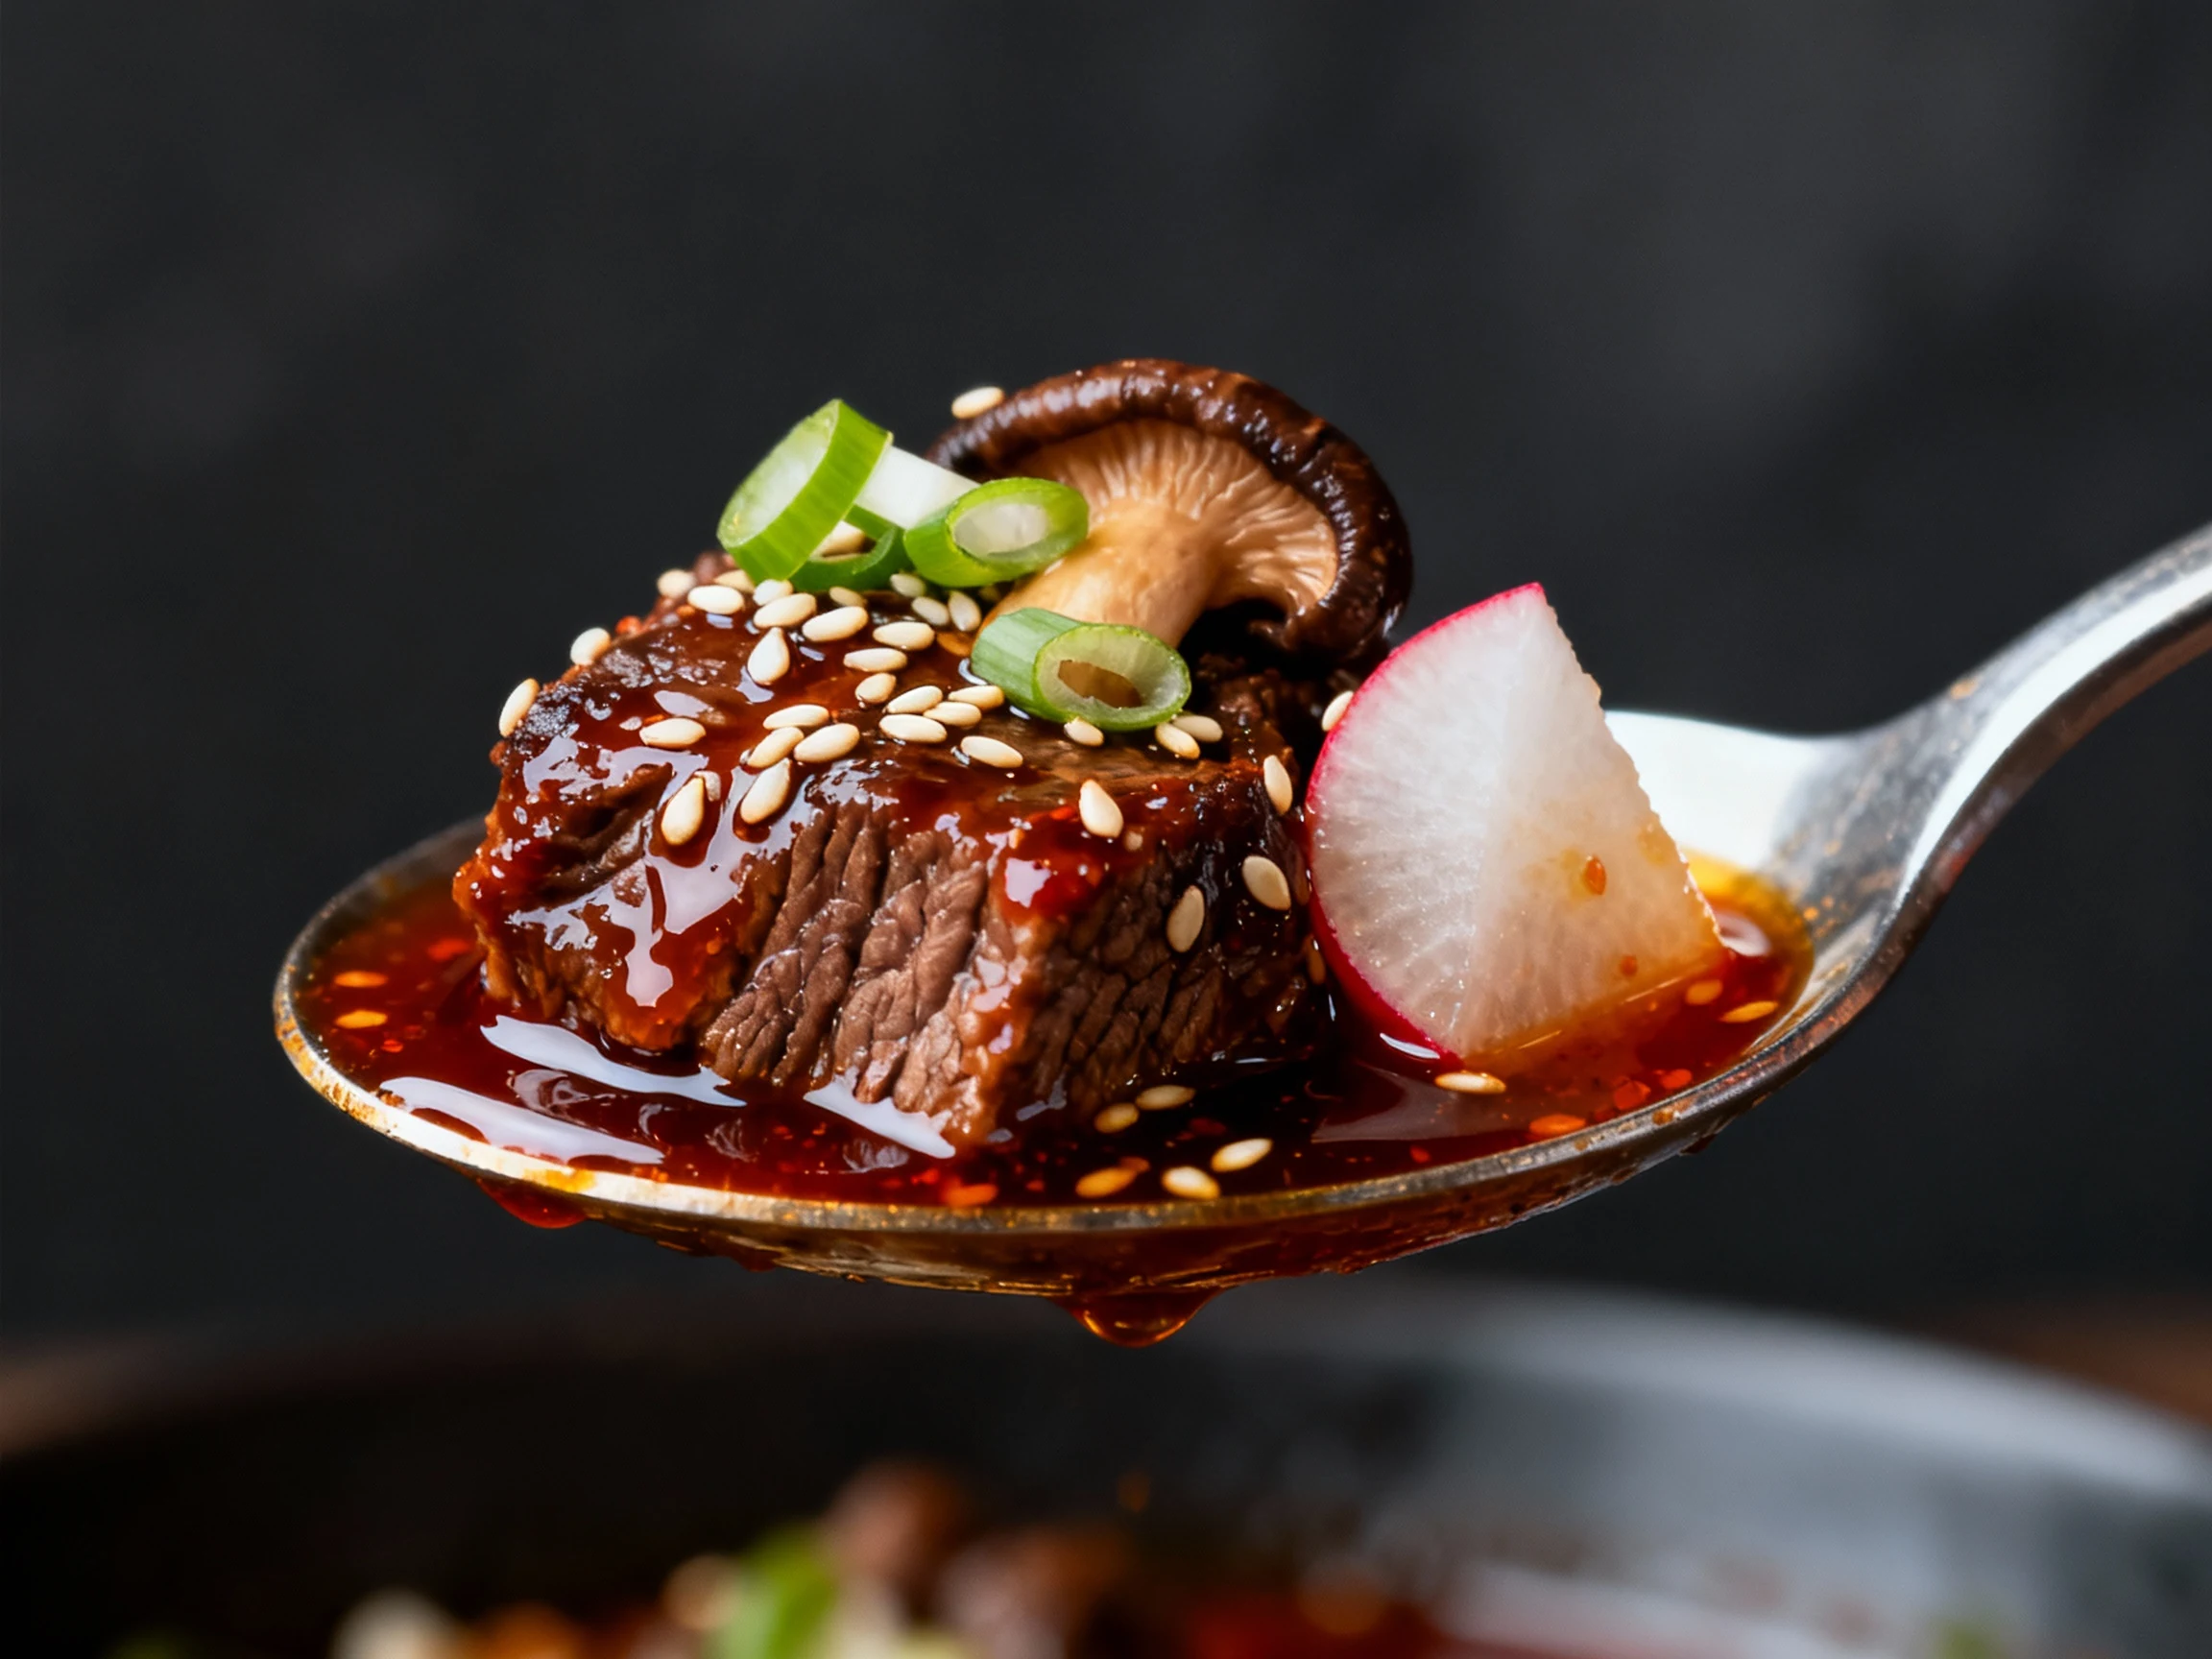
- Glossy finish. A brief uncovered simmer (or tiny slurry) concentrates the broth to that restaurant-style sheen. You’ll see it, then you’ll taste it.
Ingredients Breakdown
Beef and aromatics
- 2 pounds beef chuck, cut into 3/4–1-inch cubes (marbling matters for tenderness).
- 1 teaspoon kosher salt and 1/2 teaspoon black pepper for seasoning.
- 1/2 teaspoon baking soda (optional) for rapid tenderizing—sprinkle and toss just before searing.
- 1 large yellow onion, sliced.
- 6 cloves garlic, minced.
- 1 tablespoon fresh ginger, finely grated.
Flavor base and liquids
- 2 tablespoons gochujang (Korean chili paste) for heat and body.
- 1 teaspoon doenjang (optional) for deeper, earthy umami.
- 3 tablespoons low-sodium soy sauce; add 1 tablespoon dark soy if you want a deeper color.
- 1–2 tablespoons brown sugar or honey, to taste.
- 2 tablespoons mirin or dry rice wine.
- 1 teaspoon fish sauce (optional)—tiny amount, big umami.
- 3 cups low-sodium beef broth (or water plus an anchovy-dashi packet). FYI: broth saltiness varies, so season at the end.
- 1 small Asian pear (or half a sweet apple), grated.
- 1 tablespoon rice vinegar for brightness at the finish.
- 1 teaspoon toasted sesame oil for aroma at the finish.
Vegetables and add-ins
- 8 ounces Korean radish (mu) or daikon, peeled, 3/4-inch chunks.
- 2 medium carrots, peeled, chunked.
- 6 ounces shiitake mushrooms, stems removed, caps halved.
- 1 small potato, peeled, 3/4-inch chunks (optional if you’re using lots of radish).
- 1–2 scallions, thinly sliced for garnish.
- 1 teaspoon toasted sesame seeds for finishing.
- Optional starchy add-ins: 1 cup Korean rice cakes (tteok) or a handful of soaked glass noodles (dangmyeon).
Finishing and optional thickener
- 1 teaspoon cornstarch + 1 tablespoon water (optional) if you want a slightly thicker, glossy broth.
- Neutral oil for searing (2 tablespoons).
The Method – Instructions
- Prep the beef. Pat the cubes dry. Toss with salt, pepper, and baking soda if using. Grate the pear and prep all vegetables so you can move fast later.
- Sear in batches. Heat 1 tablespoon oil in a heavy pot over medium-high until shimmering. Add a single layer of beef and sear 2–3 minutes per side until well browned; don’t crowd or stir early. Transfer to a bowl and repeat with remaining oil and beef.
- Soften aromatics in the fond. Lower heat to medium. Add onion with a pinch of salt; cook 3 minutes, scraping up brown bits. Stir in garlic and ginger; cook 30–45 seconds until fragrant.
- Bloom the pastes. Add gochujang (and doenjang if using). Stir and cook 1 minute to darken slightly and smell toasty. This step unlocks serious flavor.
- Deglaze smartly. Splash in mirin. Scrape the pot bottom to dissolve fond. Let the alcohol cook off for 30 seconds.
- Build the braising liquid. Return beef (and juices). Add soy sauce, brown sugar/honey, fish sauce, grated pear, and broth. Stir. It should smell like a tiny restaurant in your kitchen.
- Start the simmer. Bring to a boil, then reduce to a brisk simmer. Cover and cook 12–15 minutes, stirring once or twice. Keep it lively but not raging.
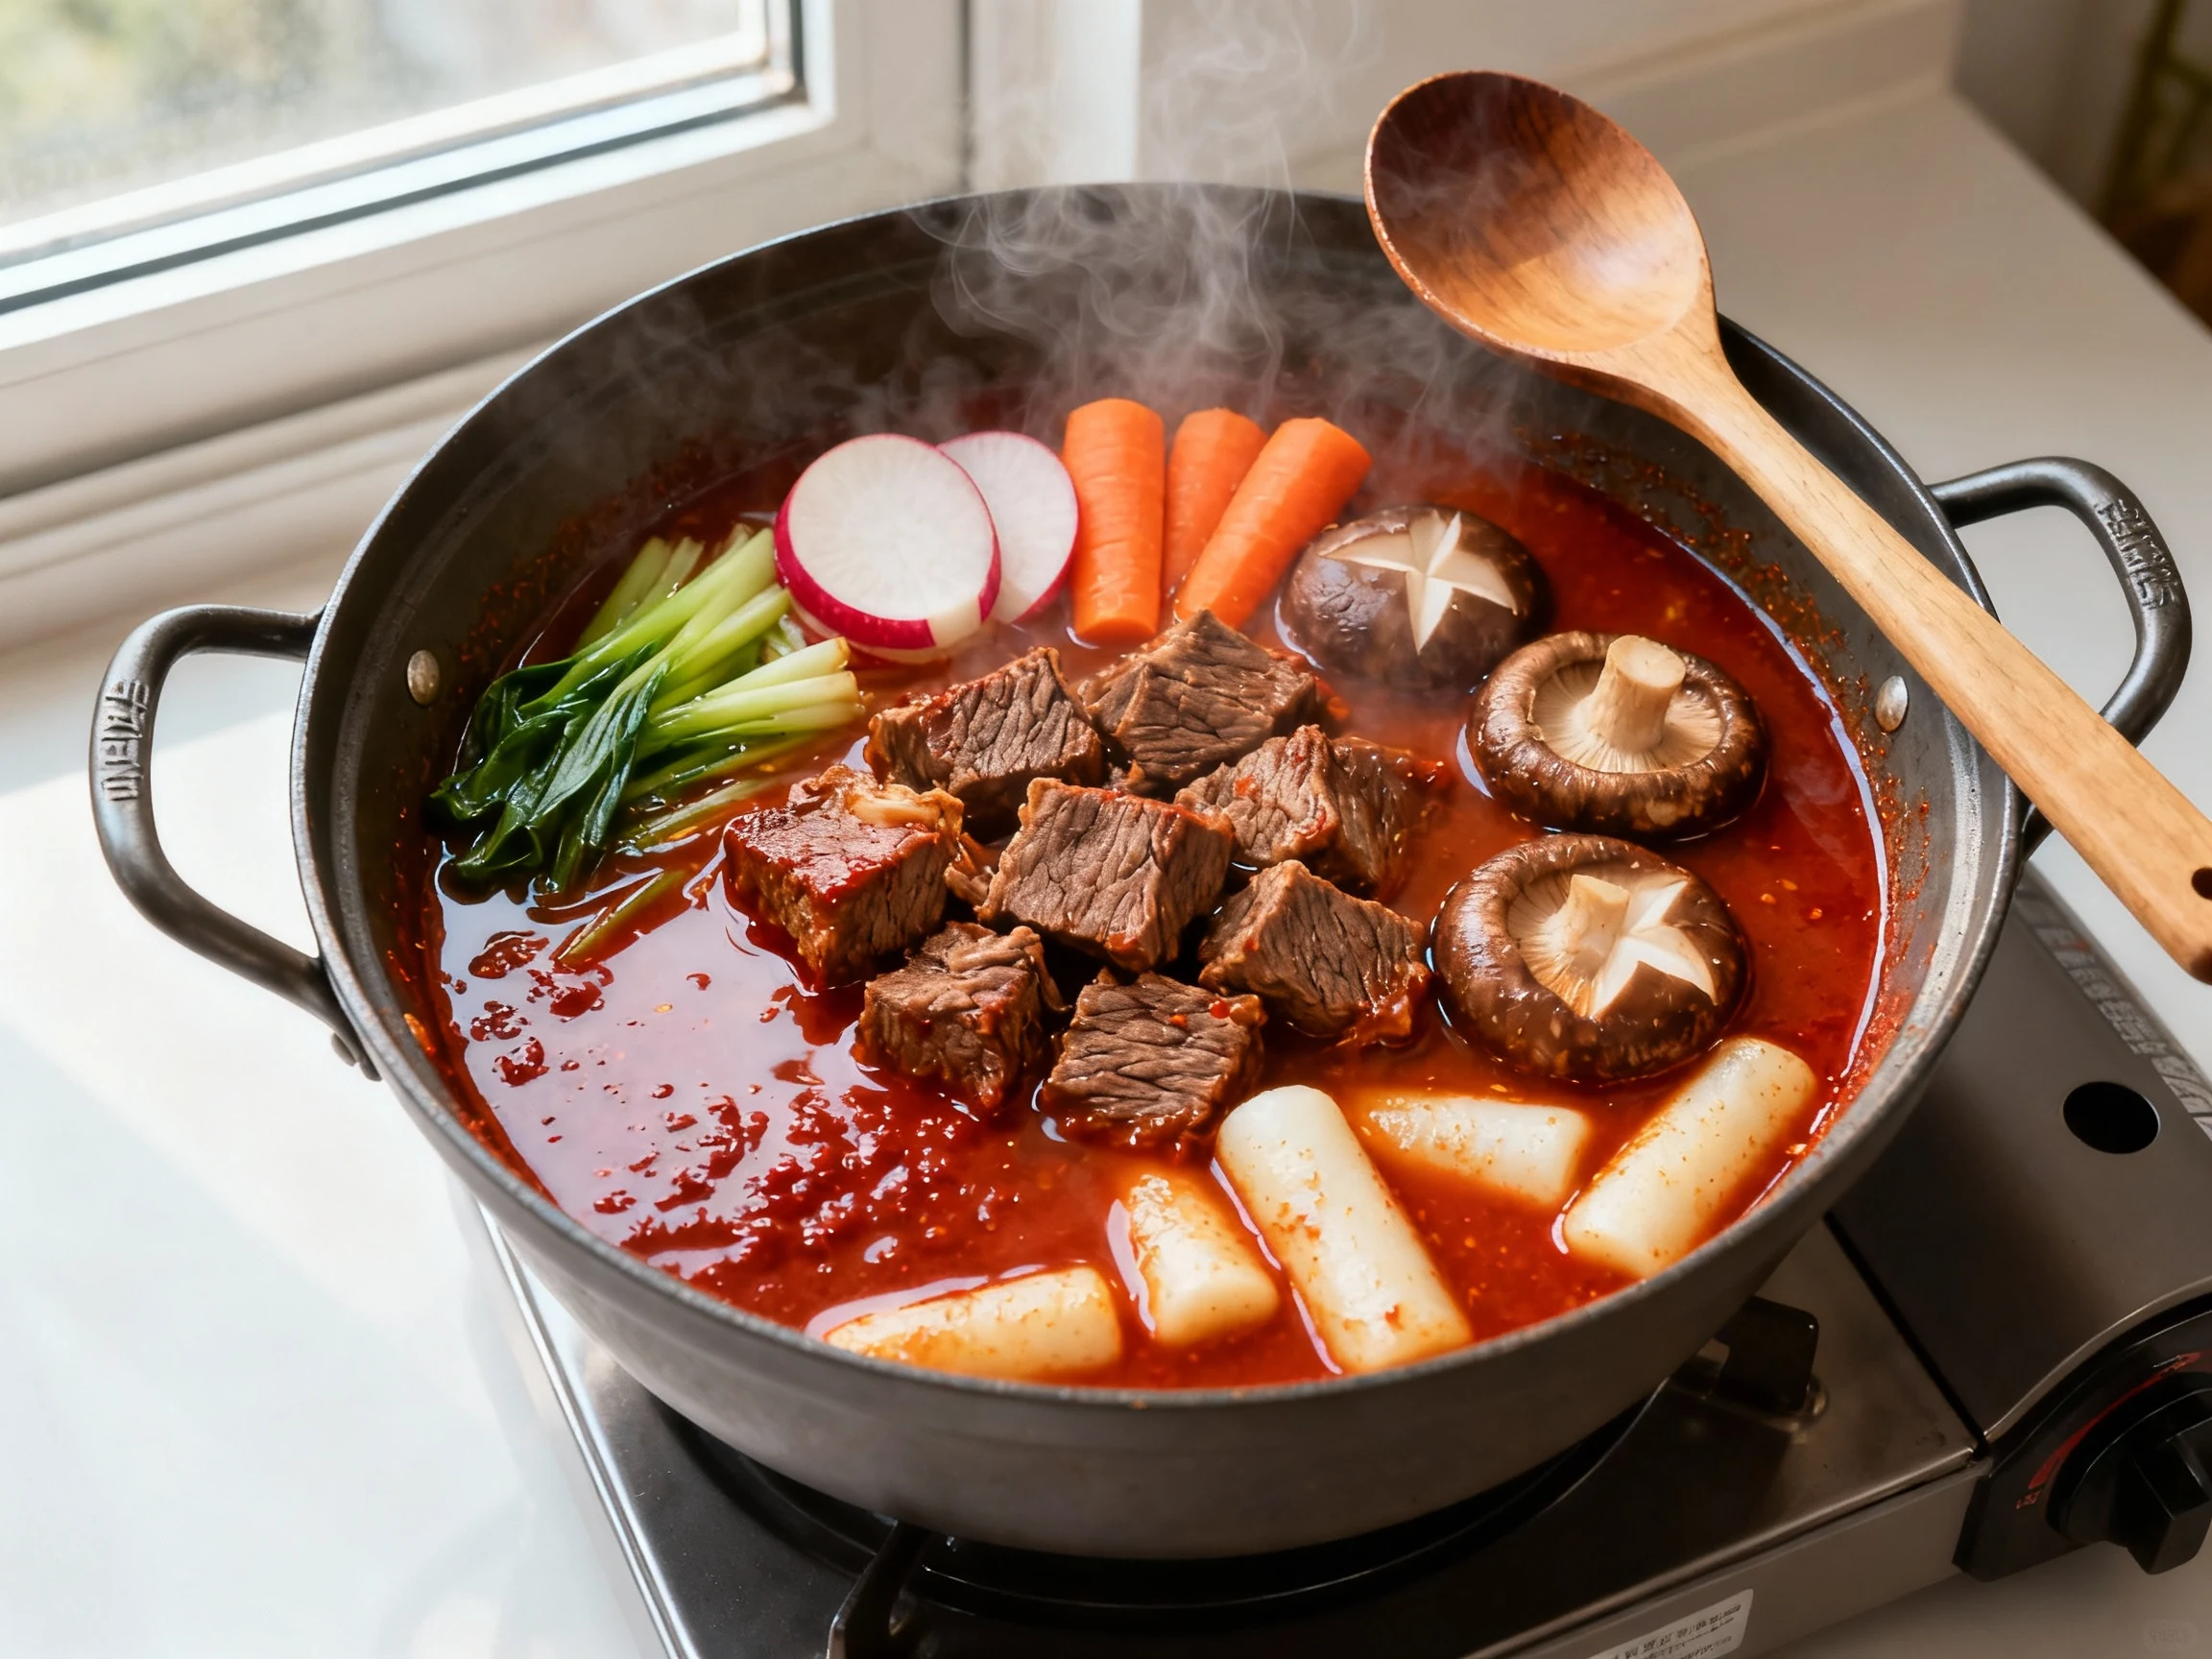
- Add hearty veg. Stir in radish and carrots. If using potatoes, add them too. Cover and cook another 12–15 minutes until beef is tender and veg are just soft.
- Add mushrooms (and optional add-ins). Stir in shiitakes. If using rice cakes or soaked glass noodles, add now. Simmer uncovered 5–7 minutes until mushrooms are tender and the liquid reduces slightly.
- Adjust and gloss. Taste. Add rice vinegar for brightness and more soy or sugar to balance salt/sweet/heat. For a shinier, slightly thicker broth, stir in the cornstarch slurry and simmer 1 minute.
- Finish with aroma. Kill the heat. Stir in sesame oil. Garnish with scallions and sesame seeds. Stand back and admire that sheen.
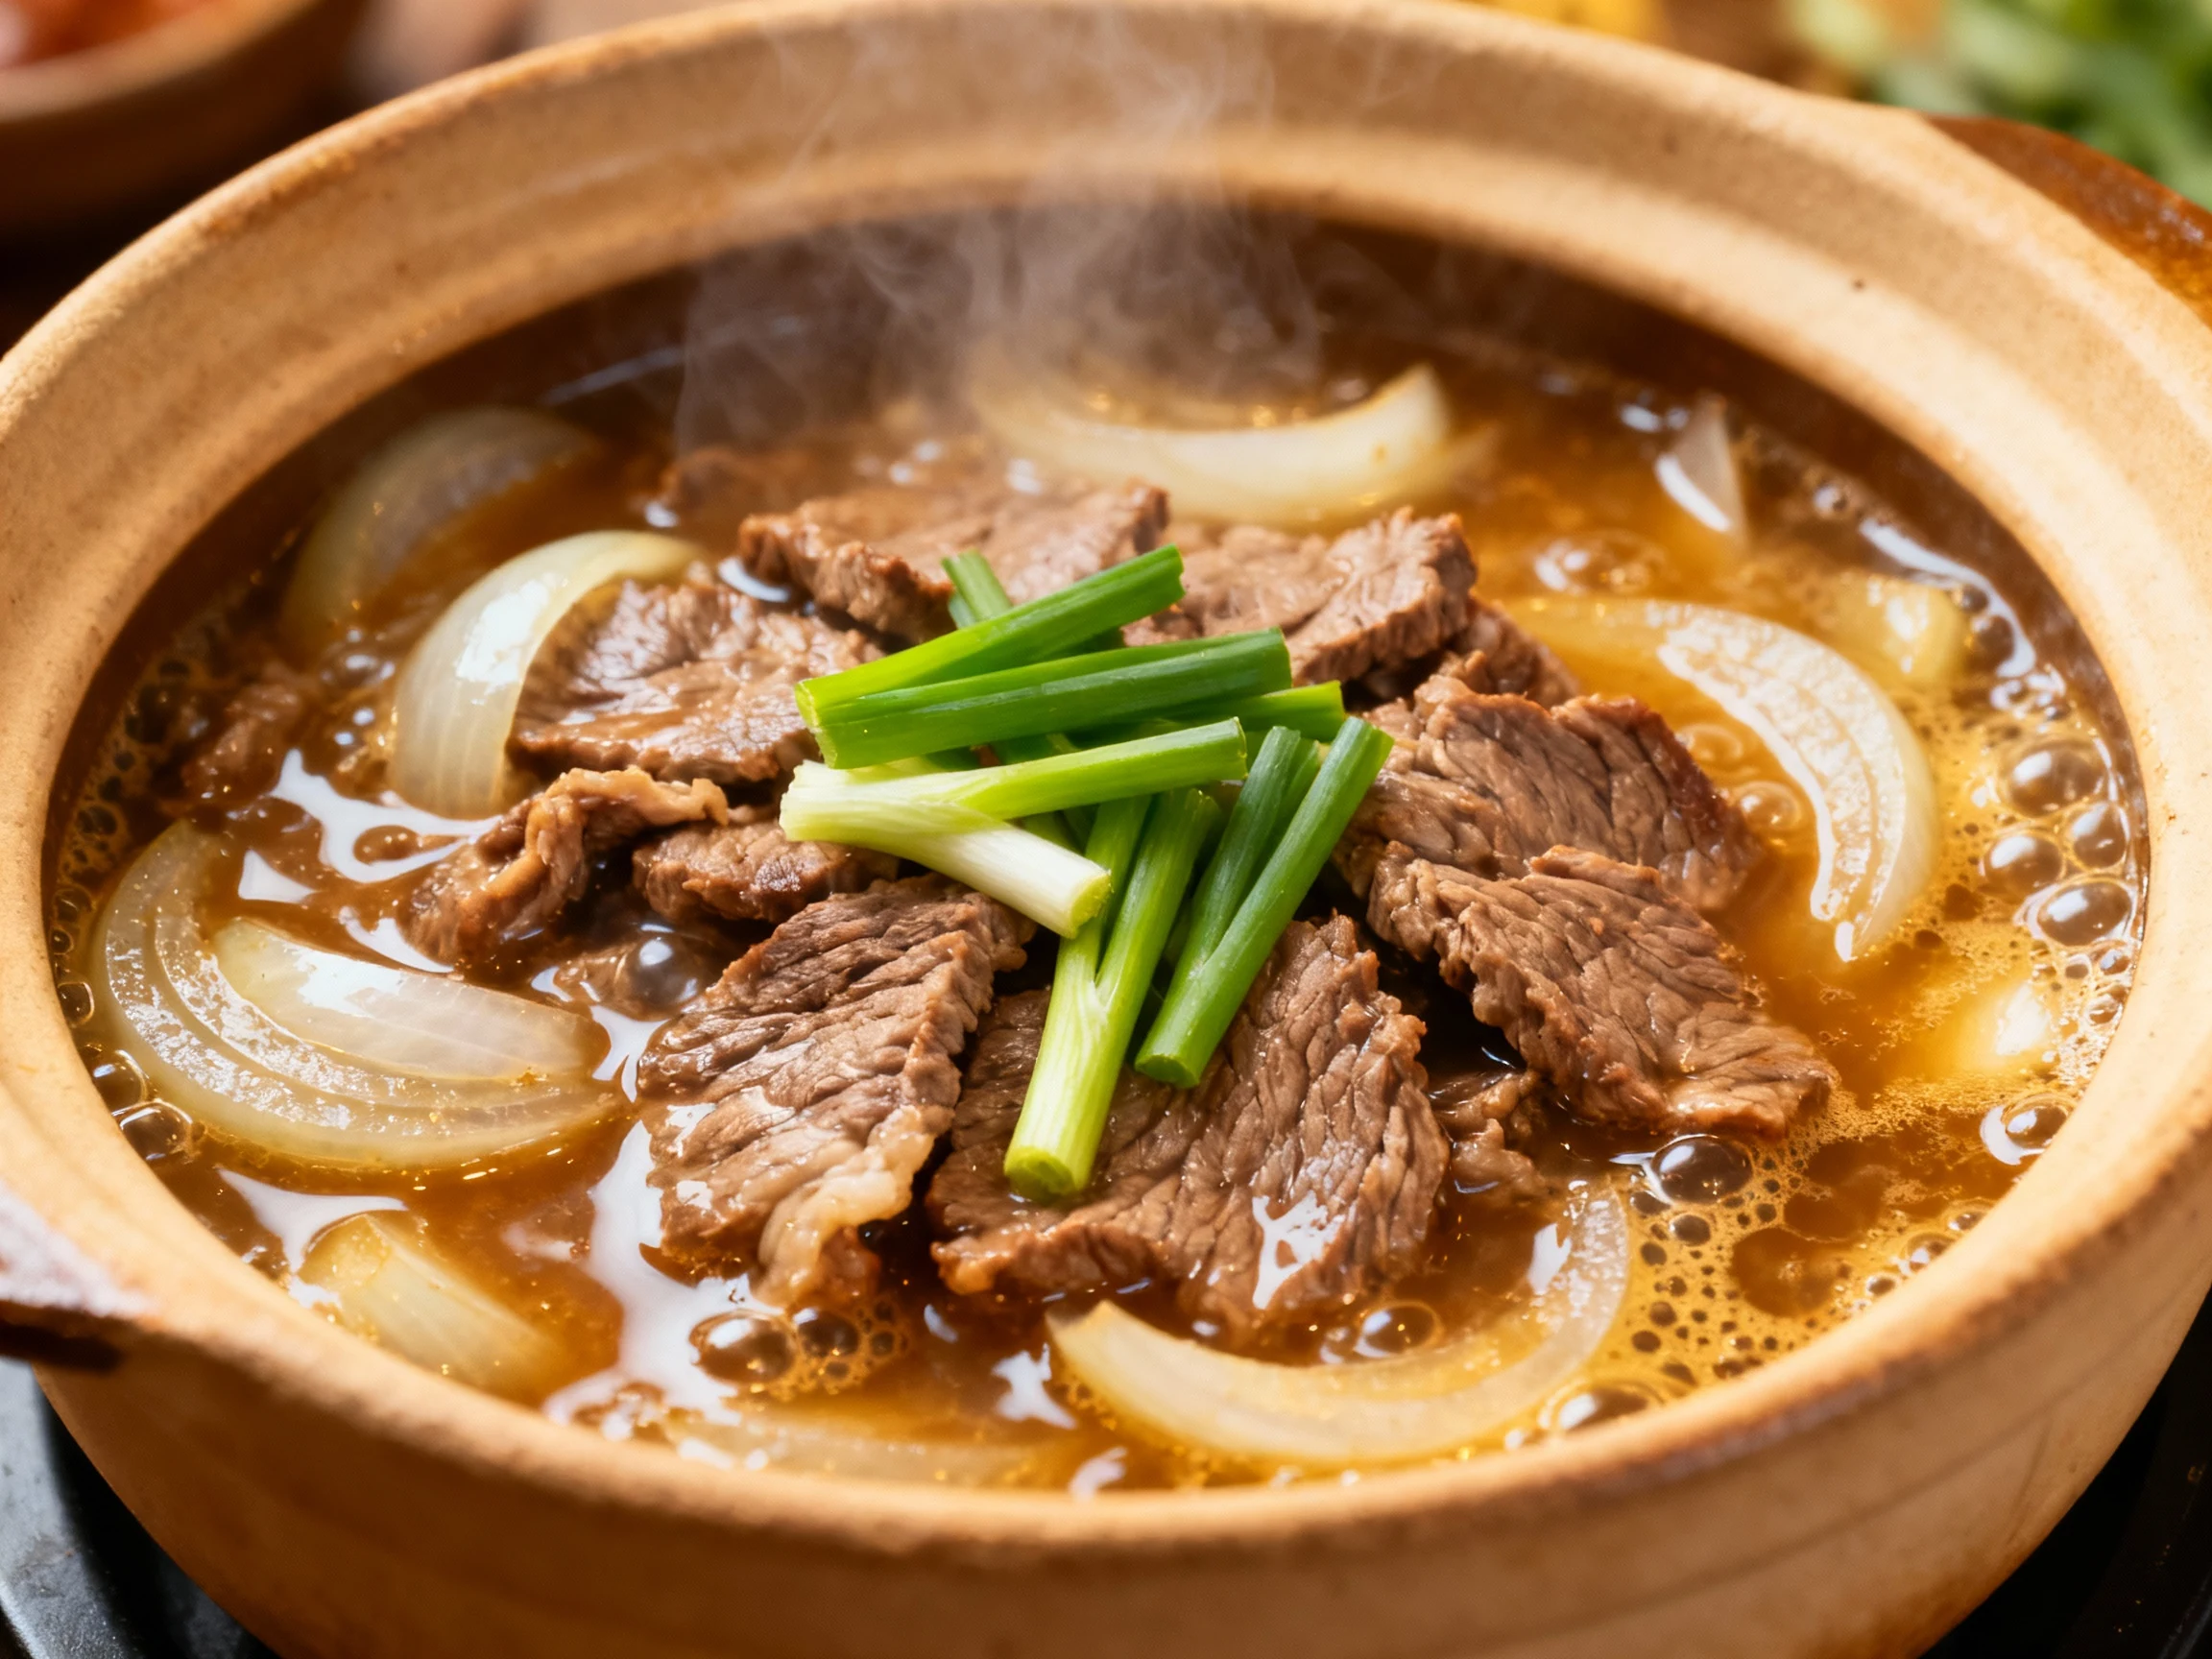
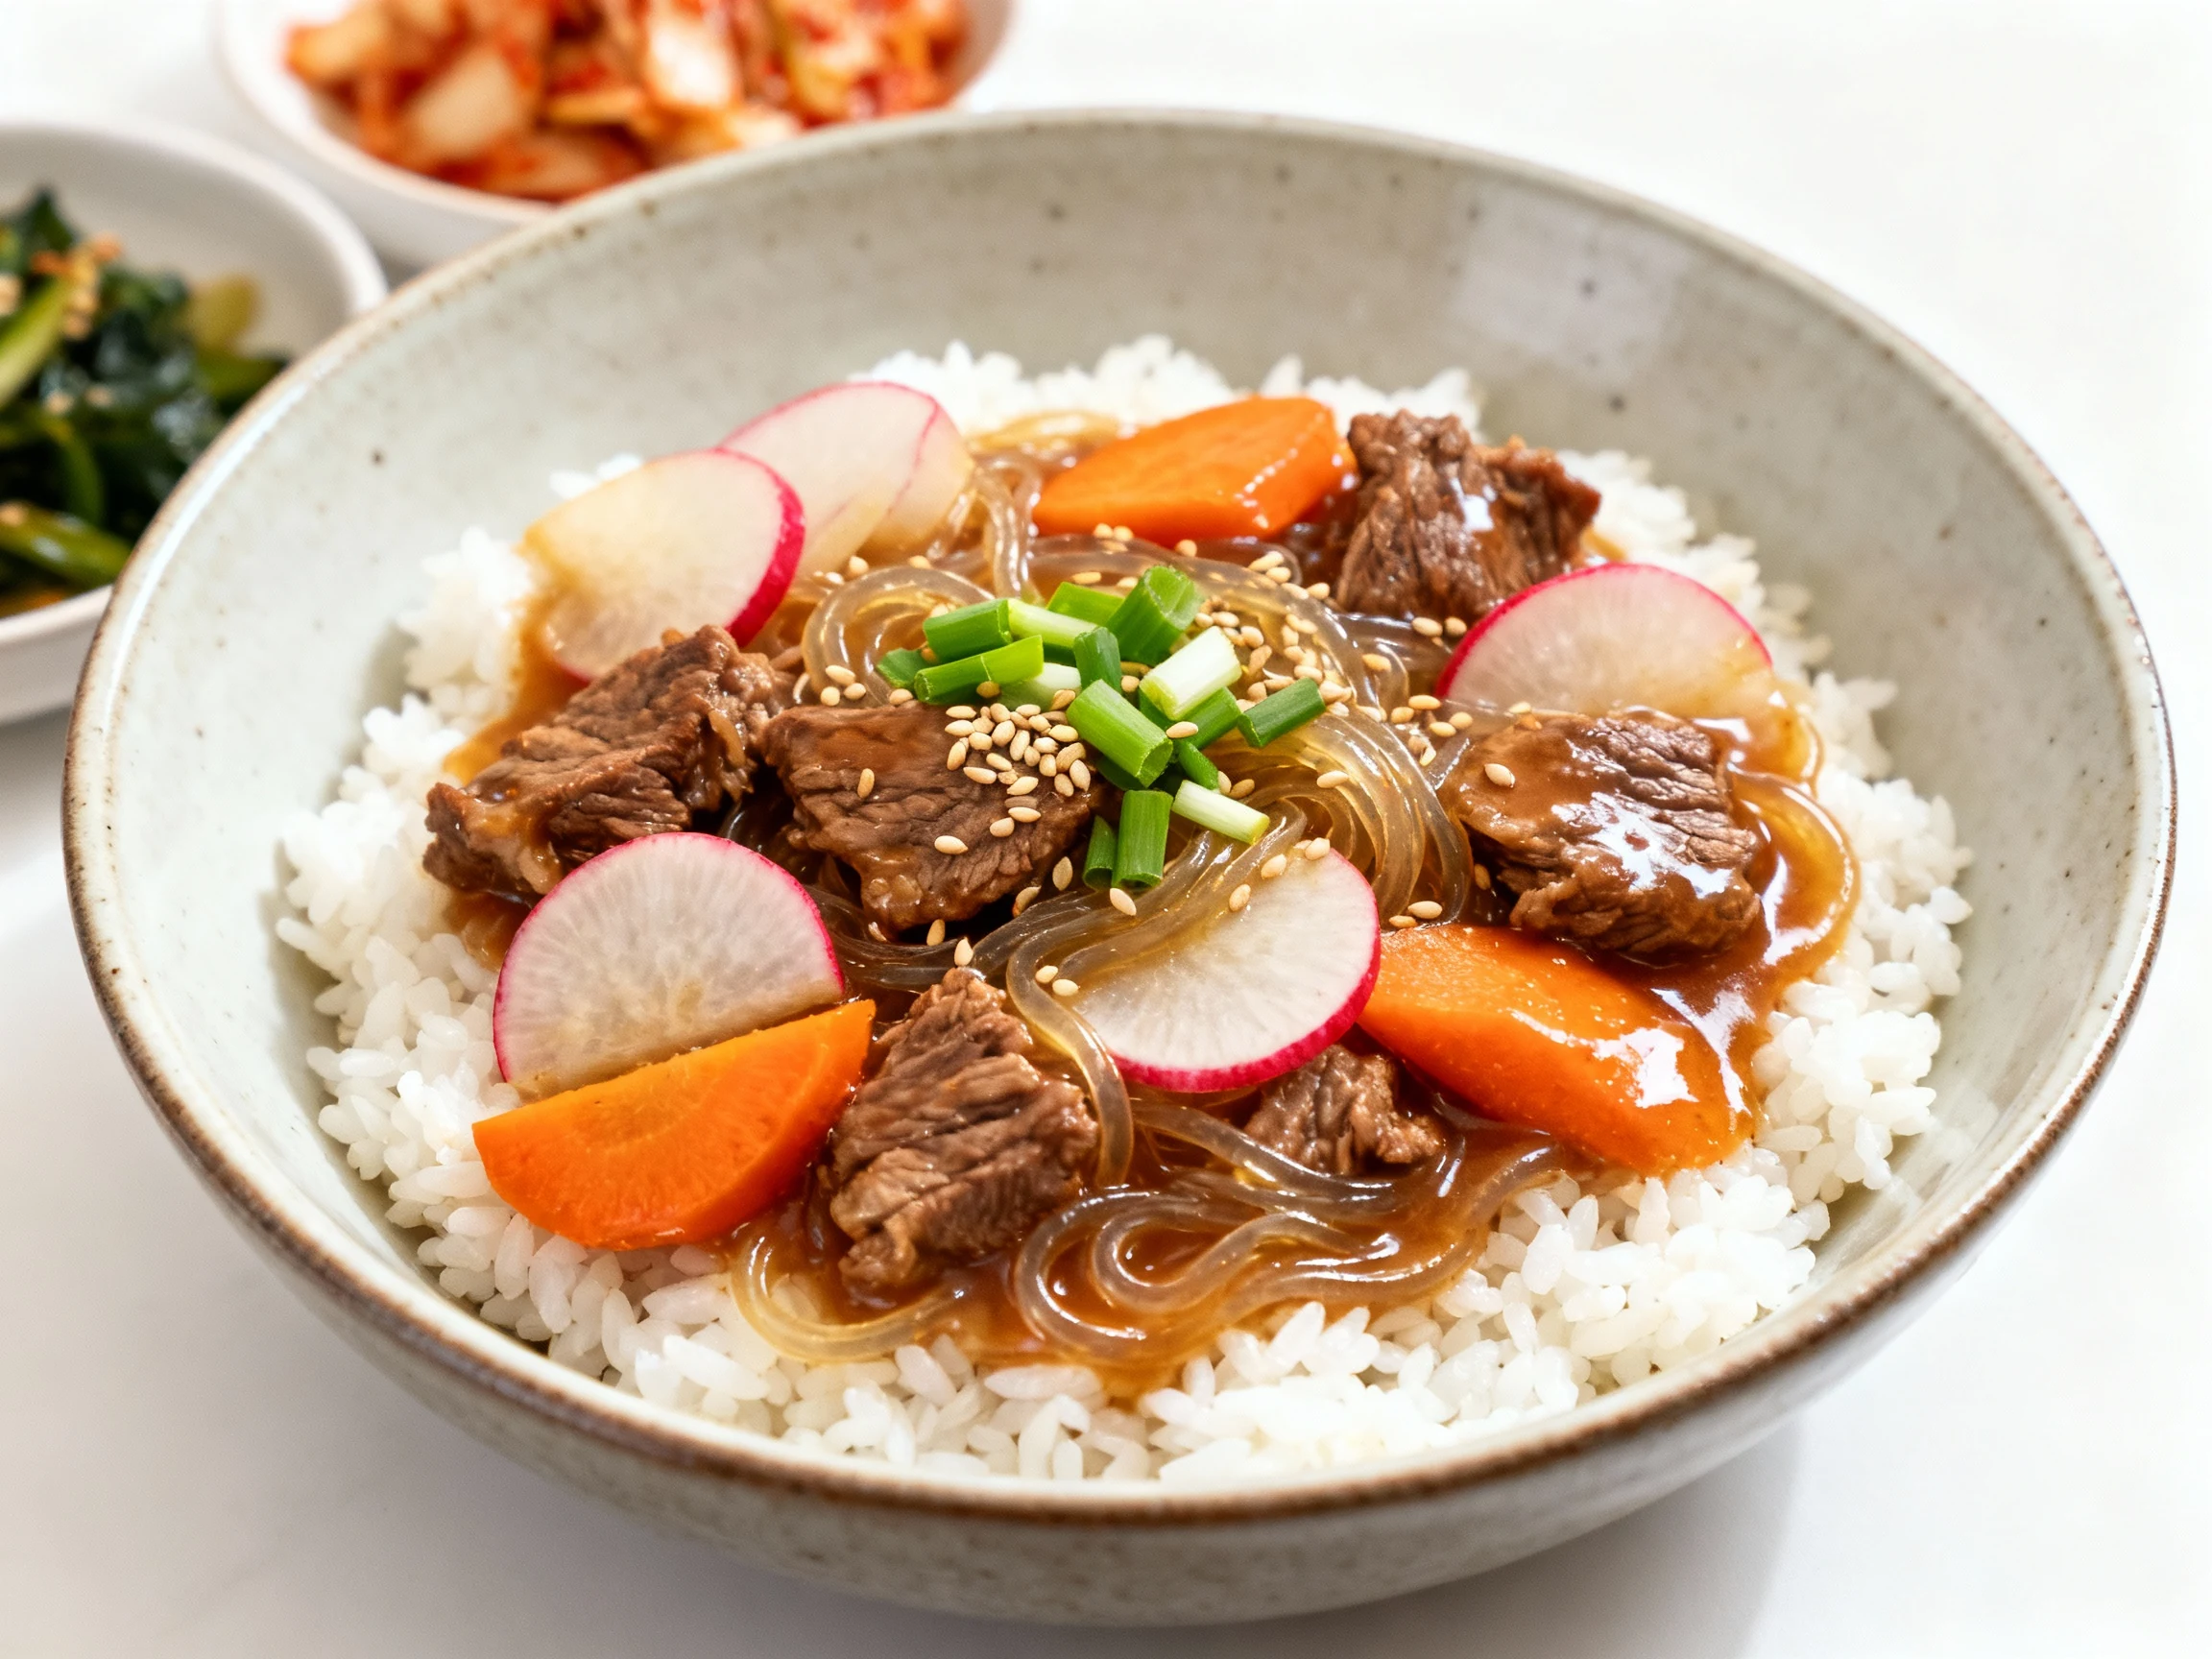
- Serve. Ladle over hot rice or alongside banchan. Watch everyone go quiet for a few minutes, then ask for seconds.
Keeping It Fresh
Fridge: Store cooled stew in airtight containers for up to 4 days. The flavors meld and get even better by day two—leftovers win.
Freezer: Freeze for up to 3 months. If you plan to freeze, use more radish and skip potatoes (they can turn mealy). Freeze in flat bags for quick thawing.
Reheat: Warm gently on the stovetop over medium-low with a splash of water to loosen. Rice cakes and noodles can over-soften, so add fresh ones to reheated portions if you want prime texture.
What’s Great About This
- Weeknight speed, weekend depth. Techniques do the heavy lifting, not time.
- One pot. Less mess, more eating.
- Flexible heat. Dial the gochujang up or down without losing balance.
- Budget-friendly cuts shine. Chuck turns tender and luxurious fast.
- Meal-prep gold. Tastes even better tomorrow; packs well for lunch.
- Pantry-powered. Uses staples you can keep around for monthly repeats.
- Family-friendly. Rich, savory, gently sweet—kids usually sign on quickly.
Don’t Make These Errors
- Cramming the pan with beef. Overcrowding steams instead of sears. Work in batches.
- Skipping the bloom. Adding gochujang cold dulls its flavor. Toast it with aromatics.
- Boiling hard. A violent boil toughens meat and clouds the broth. Keep a lively simmer.
- Forgetting to deglaze. That fond is liquid gold. Mirin plus scraping = flavor boost.
- Adding veggies too early. Radish and carrots don’t need the full time. Stagger so nothing turns mushy.
- Seasoning blind. Broths vary. Taste at the end and balance salt, sweet, acid.
- Over-sweetening. This isn’t dessert. Add sugar/honey gradually and let the pear work.
- Cutting beef too big. Large cubes won’t tenderize fast. Stick to 3/4–1 inch.
- Skipping the finish. A splash of rice vinegar and sesame oil wakes everything up.
Different Ways to Make This
- Instant Pot: Sear on Sauté, build the liquid, pressure-cook 20 minutes with a 10-minute natural release. Add veg, Sauté 5–7 minutes to finish. TBH, it’s nearly hands-off.
- Slow cooker: Sear beef and bloom pastes on the stovetop, then transfer. Cook 4–5 hours on High or 7–8 on Low; add veg for the last 60–90 minutes.
- Spicy-spicy: Add 1–2 teaspoons gochugaru and a sliced fresh chili. Balance with a touch more sugar.
- Galbijjim vibes: Swap in bone-in short ribs, add chestnuts and jujubes, and extend simmer to 90–120 minutes until fork-tender.
- Low-carb: Skip potatoes. Double radish and mushrooms. You won’t miss a thing.
- No pear on hand: Use half a sweet apple or 1–2 teaspoons sugar plus an extra 1/2 teaspoon rice vinegar at the end. FYI, avoid kiwi unless you’re very gentle—it tenderizes fast.
- Noodles or rice cakes: Make it heartier with dangmyeon or tteok in the last 5–7 minutes.
FAQ
What cut of beef works best?
Use well-marbled chuck. It has enough fat and connective tissue to turn juicy and tender in a relatively short simmer. Avoid super-lean cuts like round; they dry out and stay chewy.
Is gochujang required, and can I substitute it?
Gochujang gives the signature heat, sweetness, and body. If you must substitute, use a mix of chili paste and a bit of miso plus sugar, but it won’t taste quite the same.
Can I make this in an Instant Pot?
Yes. Sear on Sauté, then pressure-cook 20 minutes with a 10-minute natural release. Add vegetables and simmer on Sauté until tender and glossy, about 5–7 minutes.
How do I make it milder for kids?
Reduce gochujang to 1 tablespoon and skip extra chili. Balance with a little more soy and a teaspoon of honey. The result stays savory, not fiery.
Why add pear or apple to the stew?
They add gentle sweetness and enzymes that help tenderize. The flavor isn’t “fruity”—it’s balanced and rounded. Think of it as your shortcut to that long-braised vibe.
Can I make this gluten-free?
Use certified gluten-free soy sauce (tamari) and a gluten-free gochujang. Everything else is naturally gluten-free. Check labels—brands vary.
How do I thicken the broth without cornstarch?
Reduce uncovered for a few extra minutes. Or mash a couple of soft radish or potato chunks into the broth to naturally thicken. Old-school, very effective.
Does it freeze well with potatoes?
Potatoes can turn grainy after freezing. If you plan to freeze, use radish instead or add fresh potatoes when reheating. The beef and broth freeze like a dream.
Wrapping Up
You want weeknight speed with weekend payoff—this stew delivers. Searing, blooming, and a few umami boosters stack flavor fast, while pear and smart timing give you tenderness on demand. Make it once, and it’ll join your cold-weather rotation on repeat. Next time, try it with rice cakes or noodles and pretend you planned it like that all along.
Printable Recipe Card
Want just the essential recipe details without scrolling through the article? Get our printable recipe card with just the ingredients and instructions.