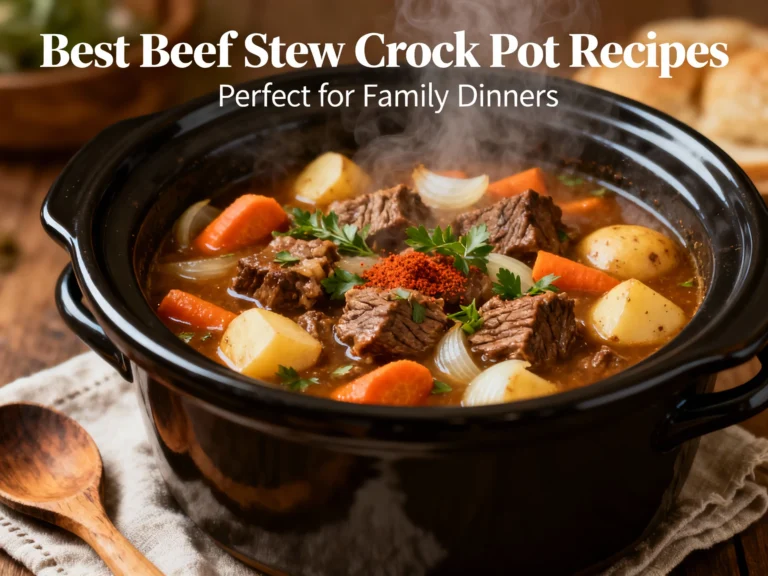
Dutch Oven Recipes for Big Flavor and No Fuss Dinners
One pot, bold taste, minimal dishes: master a versatile base formula for weeknights, meal prep, and cozy weekends—no chef skills required.
You want maximum flavor with minimum effort? This is your new playbook. We’re building a one-pot system that nails crispy, juicy chicken and fork-tender veggies with a sauce so good you’ll “accidentally” need more bread. The trick isn’t fancy ingredients—it’s sequencing: high-heat sear, fast deglaze, then a hands-off braise that makes your oven do the heavy lifting. You’ll spend 20 minutes upfront, then kick back while dinner makes itself and your sink takes the night off. Ready to cook smarter, not harder?
What Makes This Recipe So Good
Sear-to-braise technique delivers both crispy skin and fall-apart vegetables. You lay down flavor in stages: sear, sauté, deglaze, braise, then crisp. That’s the restaurant playbook—just simplified.
Deep, layered flavor without extra work. The fond (those golden bits at the bottom) plus tomato paste, Dijon, and stock create a rich pan sauce that tastes like it simmered all day.
Hands-off finish. After the quick sear and build, the oven carries you across the finish line. You get consistent results every time, even if you’re juggling kids, email, or both.
Flexible and forgiving. Swap the protein, switch the veg, skip the wine—this formula adapts. It’s tough to mess up, and that’s on purpose.
Budget-friendly. Thighs, potatoes, and carrots deliver comfort food on a budget. No specialty shopping. No mystery spice blends. Just staples used well.
What Goes Into This Recipe – Ingredients
- 6 bone-in, skin-on chicken thighs (about 2.5 lb / 1.1 kg)
- 2 teaspoons kosher salt, plus more to taste
- 1 teaspoon black pepper
- 2 teaspoons smoked paprika (or sweet paprika)
- 1 teaspoon dried thyme (or 6 sprigs fresh thyme)
- 1 teaspoon garlic powder
- 2 tablespoons olive oil
- 1 large yellow onion, thinly sliced
- 4 garlic cloves, minced
- 3 carrots, peeled and cut into 1-inch chunks
- 1 lb baby potatoes, halved (or 3 medium Yukon Gold, cubed)
- 2 tablespoons tomato paste
- 1 tablespoon Dijon mustard
- 1 cup low-sodium chicken stock
- 1/2 cup dry white wine (optional; sub with more stock)
- 2 bay leaves
- Zest of 1 lemon + 1 tablespoon lemon juice
- 2 tablespoons chopped fresh parsley (or dill/chives)
Equipment: 5.5- to 6.5-quart Dutch oven with lid, tongs, wooden spoon, small bowl.
Step-by-Step Instructions
- Preheat the oven to 375°F (190°C). Position a rack in the lower-middle. Keep the lid handy.
- Season the chicken. Pat thighs dry. In a small bowl, mix salt, pepper, smoked paprika, thyme, and garlic powder. Rub all over the chicken, including under the skin where possible. FYI, drier skin = better sear.
- Heat the Dutch oven. Set over medium-high. Add olive oil and heat until shimmering but not smoking.
- Sear the chicken, skin-side down. Work in 2 batches if needed. Don’t crowd. Sear 5–7 minutes until deep golden; flip and sear 2 minutes on the second side. Transfer to a plate. You want browned, not burnt.
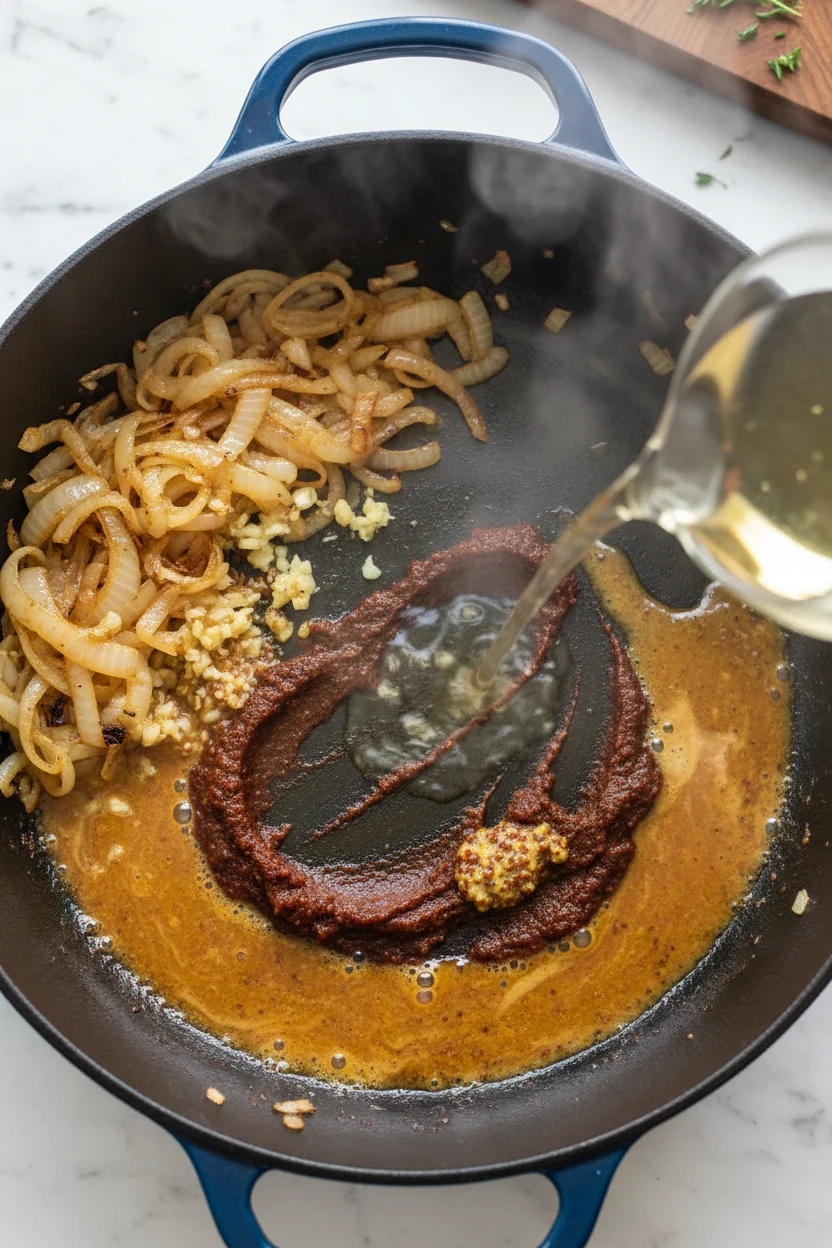
- Sauté the aromatics. Reduce heat to medium. Add onions and a pinch of salt. Sauté 3–4 minutes, scraping up fond. Stir in garlic; cook 30 seconds until fragrant.
- Build the base. Add tomato paste and Dijon. Cook 1 minute, stirring, until the paste darkens slightly. This tiny step = massive flavor.
- Deglaze. Pour in wine (or stock). Scrape to dissolve the fond into the liquid. Simmer 1–2 minutes to reduce slightly.
- Add the vegetables. Stir in carrots and potatoes. Pour in chicken stock and tuck in bay leaves. Bring to a gentle simmer.
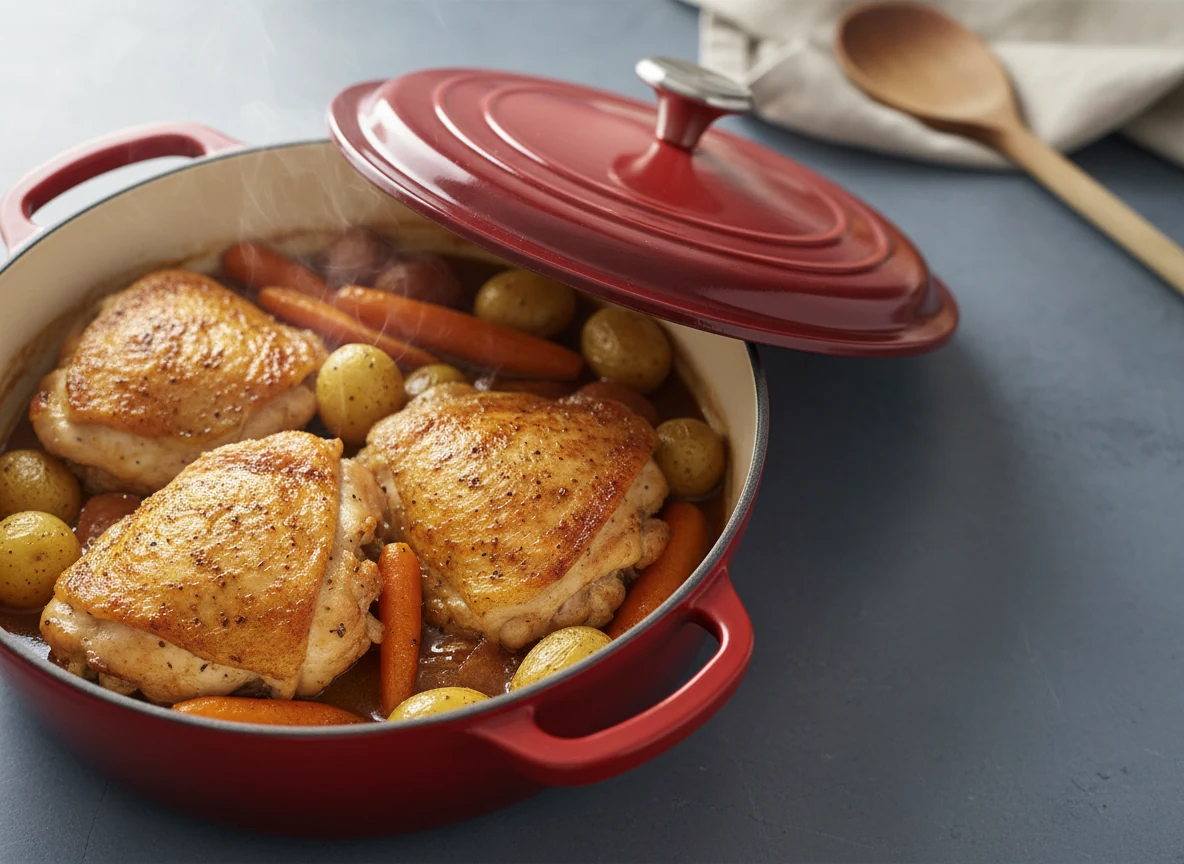
- Nestle the chicken back in. Place thighs on top, skin side up. Liquids should come halfway up the meat (add a splash more stock if needed). Cover with the lid.
- Braise in the oven for 25 minutes. Everything softens, flavors meld, and your kitchen smells like you hired a private chef.
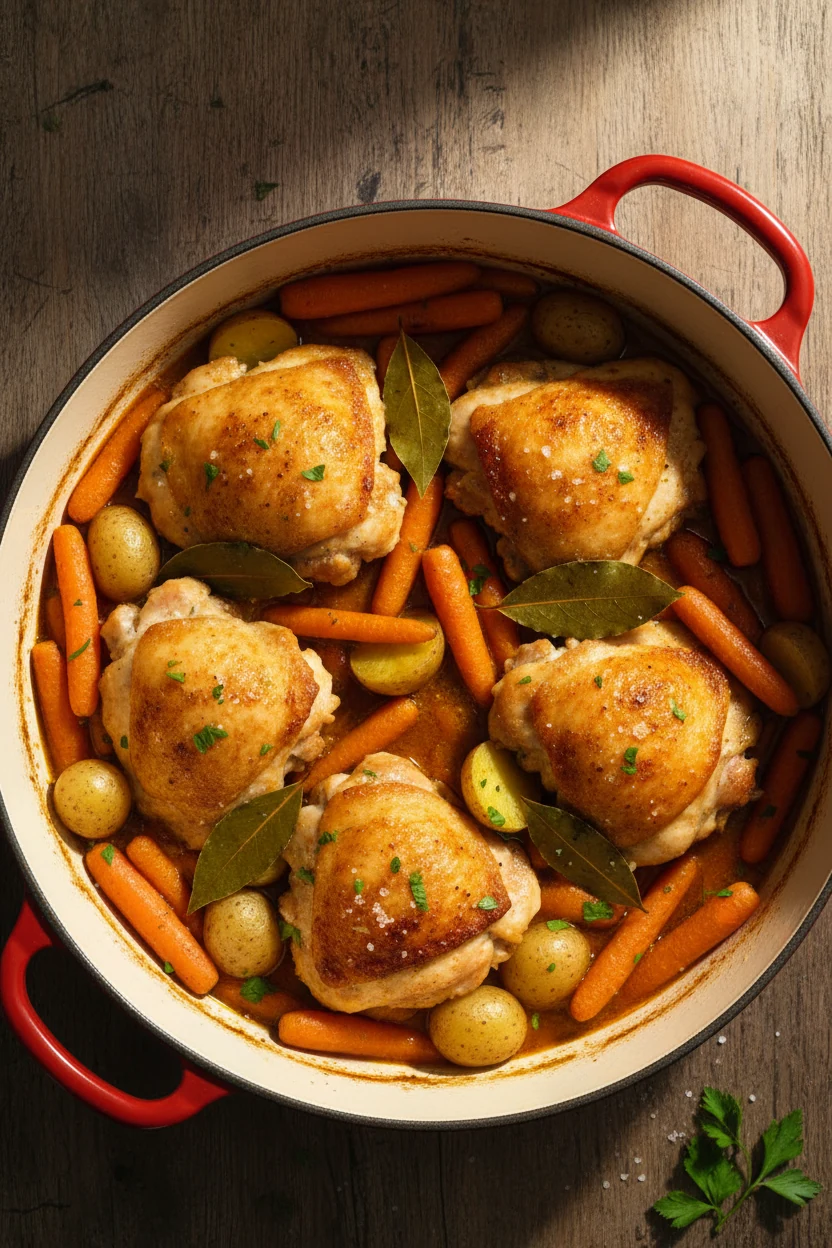
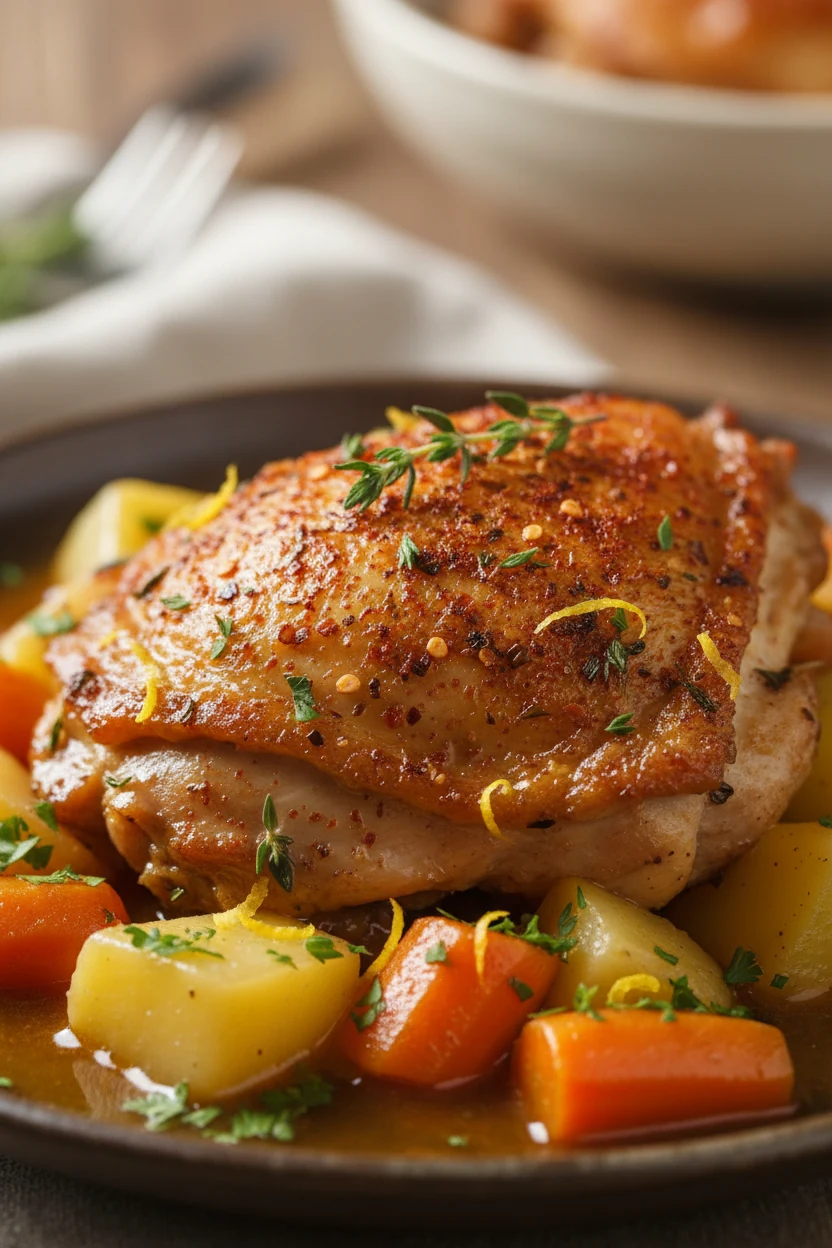
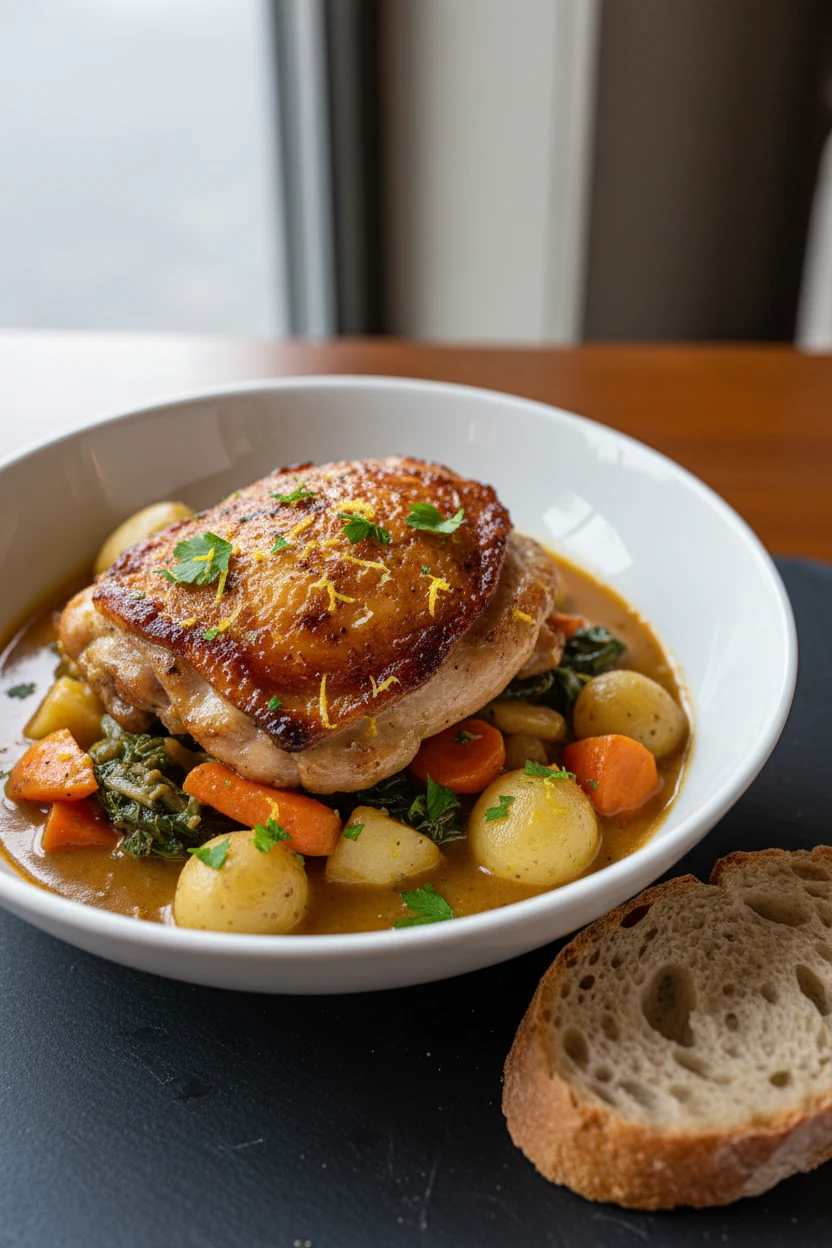
- Uncover and crisp. Remove lid and cook 15–20 minutes more until the chicken skin crisps and internal temp hits 175°F (79°C). Veg should pierce easily.
- Finish and season. Off heat, stir in lemon zest and juice. Sprinkle parsley. Taste and adjust salt and pepper. The lemon brightens the sauce so it pops.
- Serve. Spoon vegetables and sauce into bowls. Top with chicken. If you’ve got crusty bread, now is its moment.
Yield: Serves 4–6. Total time: About 1 hour (20 minutes active, 40 minutes oven).
How to Store
- Fridge: Cool completely, then store in airtight containers for up to 4 days. Keep the chicken on top to preserve the skin.
- Freezer: Up to 3 months. Remove bones and freeze meat with vegetables and sauce in meal-size portions. Thaw overnight in the fridge.
- Reheat: Stovetop over medium-low until hot, adding a splash of stock to loosen. For crisper skin, reheat chicken separately in a 425°F (220°C) oven for 8–10 minutes.
- Meal prep tip: Cook, cool, and portion into bowls with extra greens (spinach wilts beautifully when hot sauce hits it).
Benefits of This Recipe
- One pot, one wash. Your sink and your sanity thank you.
- Beginner-proof technique. The Dutch oven regulates heat and moisture so you get juicy chicken without babysitting.
- Balanced plate. Protein, starch, veg, and a built-in sauce. It’s the dinner trifecta you can repeat weekly, TBH.
- Pantry-friendly. Everything here comes from a normal grocery aisle. Substitutions welcome.
- Scalable. Double it in a 7.5-qt Dutch oven or make half in a 3.5-qt for date night.
- Great leftovers. The sauce deepens overnight and becomes even better. Next-day bragging rights included.
- Budget-conscious. Thighs and root veg stretch flavor per dollar, IMO.
What Not to Do
- Don’t skip the sear. That browned crust builds the entire flavor profile. Pale chicken = bland sauce.
- Don’t overcrowd. If you pile in the chicken, it steams instead of sears. Work in batches for real color.
- Don’t forget to deglaze. Those browned bits are liquid gold. Scrape them into the sauce or you leave flavor behind.
- Don’t boil the braise. Gentle simmer only. A rolling boil tightens meat and turns veg mushy on the outside, hard on the inside.
- Don’t go skinless if you want crisp. Skin-on is key for that roasted finish. If you must use skinless, keep it covered and expect less texture.
- Don’t rely on boneless breasts. They dry out under braise conditions. Use thighs, drumsticks, or bone-in breasts and adjust time.
Different Ways to Make This
Beef Chuck + Red Wine Stew
Swap chicken for 2.5 lb (1.1 kg) beef chuck, cut into 1.5-inch cubes. Brown in batches. Use 1 cup red wine, 2 cups beef stock, add 1 tablespoon Worcestershire, and toss in mushrooms. Braise covered at 325°F (165°C) for 2.5–3 hours until fork-tender.
Pork Shoulder + Apple Cider
Use 3 lb (1.4 kg) pork shoulder, cut into large chunks. Season with cumin and coriander. Deglaze with 1/2 cup apple cider and 1 tablespoon apple cider vinegar; add 1.5 cups stock. Add fennel and sweet potatoes. Braise 2–2.5 hours at 325°F (165°C).
Vegetarian Chickpea + Greens
Skip meat. Sauté onions, garlic, and 1 diced red pepper. Add 2 tablespoons tomato paste, 1 teaspoon smoked paprika, 1 teaspoon cumin. Stir in 2 cans chickpeas (drained), 1 can crushed tomatoes, and 2 cups vegetable stock. Simmer covered 25 minutes; add kale and lemon to finish.
Cioppino-Style Seafood
Build the base with onions, fennel, garlic, tomato paste, 1/2 cup white wine, 2 cups fish stock, and red pepper flakes. Simmer 10 minutes. Add clams/mussels (cook 5 minutes, covered), then cod chunks and shrimp (cook 4–5 minutes more). Finish with parsley and lemon.
Smoky Chili
Brown 2 lb (900 g) ground beef or turkey. Add onions, garlic, 2 tablespoons chili powder, 1 teaspoon cumin, 1 chipotle in adobo (minced), tomato paste, 1 can crushed tomatoes, and 2 cups stock. Simmer 45–60 minutes. Beans optional; controversy inevitable.
No-Knead Dutch Oven Bread
Different vibe, same pot. Mix 3 cups bread flour, 1/2 teaspoon instant yeast, 1.25 teaspoons salt, and 1.5 cups water. Rest 12–18 hours. Preheat pot at 450°F (230°C). Bake 30 minutes covered, 15 minutes uncovered. Serve with everything above.
FAQ
What size Dutch oven should I use?
A 5.5- to 6.5-quart Dutch oven fits this recipe perfectly. It gives the chicken room to sear without steaming and holds enough veg for 4–6 servings.
Enamel-coated or bare cast iron—does it matter?
Both work. Enamel is easier for acidic sauces (wine, tomato) and simpler to clean. Bare cast iron builds killer sear but needs proper seasoning and care with acids.
Can I use boneless, skinless chicken?
Yes, but adjust. Use thighs, not breasts. Reduce covered braise to 15–18 minutes, then uncover 5–10 minutes. You’ll miss the crispy skin, but the sauce still slaps.
Do I have to use wine?
Nope. Use more stock and add 1 teaspoon apple cider vinegar or a squeeze of lemon to balance richness. You want a touch of acidity for brightness.
Can I make this entirely on the stovetop?
Yes. Keep it at the gentlest simmer, covered, for 25–30 minutes, then uncover to reduce and crisp as best you can. Oven heat crisps better, but the stovetop works in a pinch.
How do I prevent metallic or off flavors?
Don’t burn the fond. Scrape it up right after deglazing, and keep your heat in the medium zone once you add liquids. Also, avoid reactive utensils if you’re cooking with wine or tomato in bare cast iron.
Can I make it ahead?
Absolutely. Cook fully, cool, and refrigerate. Reheat gently; for best texture, re-crisp the chicken in a hot oven while you warm the veg and sauce on the stovetop.
What if my sauce is too thin or too salty?
For thin sauce, simmer uncovered on the stovetop 5–10 minutes to reduce. For salty sauce, add unsalted stock, a knob of butter, or a small splash of cream to round it out. Lemon also brightens without boosting salt.
The Bottom Line
This isn’t just another comfort-food idea—it’s a reliable system for big flavor with minimal effort. Sear for depth, deglaze for complexity, braise for tenderness, and finish bright so every bite pops. Once you nail this method, you can plug in any protein, veg, or spice profile and watch dinner practically make itself. One pot, massive payoff, and no drama—your weeknight rotation just leveled up.
Printable Recipe Card
Want just the essential recipe details without scrolling through the article? Get our printable recipe card with just the ingredients and instructions.