Bread Recipes Homemade for Busy Bakers—fast Bakery Good
Fast, foolproof loaves and rolls with pantry staples, minimal kneading, and bakery-level crust—perfect for weeknights or lazy Sundays.
You don’t need a $400 mixer or a culinary degree to bake bread that makes people stop mid-sentence. You need warm water, a solid plan, and a recipe that respects your time. This master dough is engineered for speed without tasting rushed, because flavor shouldn’t be a negotiation. One bowl, simple steps, and a crust that crackles—yes, that “did you buy this?” kind of crackle.
Most “quick” breads compromise texture. Not here. We leverage yeast like a tiny workforce, dial in hydration for that glossy crumb, and use high heat to cheat a pro-level oven spring. You’ll pull a showpiece loaf from your oven tonight, and tomorrow? Rolls, focaccia, cinnamon swirl—the same dough, different flex.
What Makes This Recipe So Good
- Speed without sacrifice: A warm rise and high-heat bake deliver bakery-quality crust and open crumb in under 2.5 hours.
- Pantry-friendly: Flour, water, yeast, salt, and a touch of sugar or honey. No weird ingredients, no drama.
- Flexible base dough: Shape it into a round loaf, rolls, focaccia, or a swirled sandwich loaf—same formula, new vibe.
- Beginner-proof: Short rest (autolyse), light knead or stretch-and-fold, and clear checklists so you don’t guess.
- Consistent results: Temperature cues, grams + cups, and timing windows keep the process predictable, IMO the key to confidence.
Shopping List – Ingredients
- Bread flour: 4 cups (500 g). All-purpose works for a softer crumb.
- Warm water: 1 1/2 cups (360 g), at 105–110°F.
- Instant yeast: 2 teaspoons (7 g). For active dry, use 2 1/4 teaspoons and bloom it.
- Sugar or honey: 1 tablespoon (12 g) to fuel yeast and boost browning.
- Fine sea salt: 2 teaspoons (10 g) for flavor and gluten strength.
- Olive oil (optional): 1 tablespoon (15 g) for a slightly softer crumb.
- Cornmeal or parchment: For dusting/lining.
- Optional mix-ins: Chopped herbs, minced garlic, shredded cheese, seeds.
Instructions
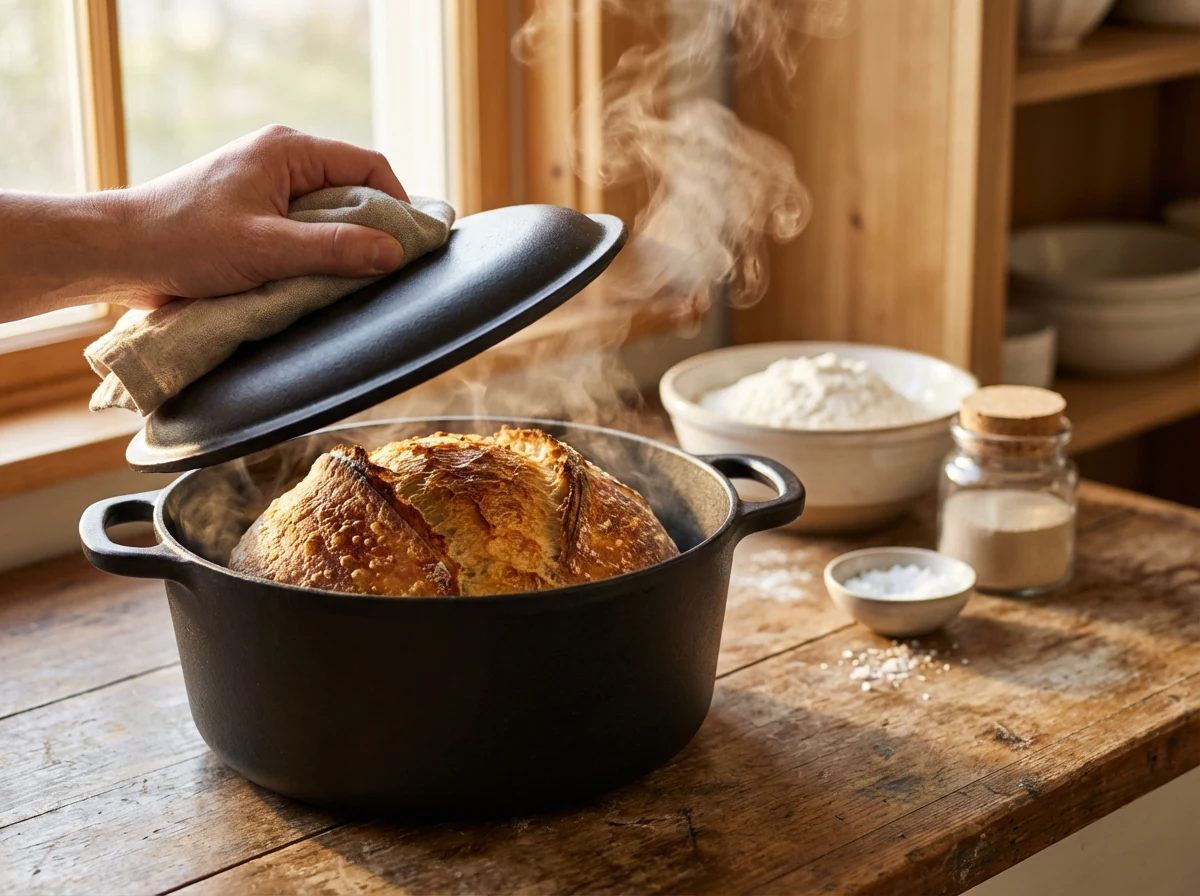
- Preheat the oven and pot: Place a Dutch oven with lid (or a heavy baking sheet/steel and an oven-safe pan for steam) inside and preheat to 450°F (232°C) for at least 30 minutes. Hot environment = elite crust.
- Bloom (if using active dry yeast): Stir yeast into 1/2 cup warm water with the sugar/honey. Let it foam for 5–10 minutes. If using instant yeast, skip to mixing.
- Mix the dough: In a large bowl, combine flour, instant yeast (or bloomed yeast), sugar/honey, and salt. Add warm water and olive oil (if using). Stir with a spatula until shaggy and no dry flour remains. The dough should be slightly sticky—this is good.
- Rest (autolyse): Cover and let the dough sit for 15 minutes. This simple pause boosts gluten formation with zero effort.
- Light knead or folds: Knead by hand for 3–5 minutes, OR perform three sets of stretch-and-folds: wet your hands, grab one side, stretch up, fold over; rotate bowl and repeat. Dough should smooth out and gain elasticity.
- First rise: Cover and let rise in a warm spot until puffy and ~doubled, 45–60 minutes. Tip: A closed oven with the light on is a great proof box.
- Shape: Lightly flour the counter. Turn out the dough, gently deflate, and shape into a tight round (boule). Use a bench scraper to tuck edges under and build surface tension. For rolls or loaf pan variations, see “Recipe Variations.”
- Second rise: Place the shaped dough seam-side down on parchment or in a floured banneton. Cover and proof until it looks airy and springs back slowly when poked, 30–45 minutes.
- Score: Using a sharp lame or serrated knife, slash 1–2 deep cuts on top. This directs the oven spring and prevents random blowouts.
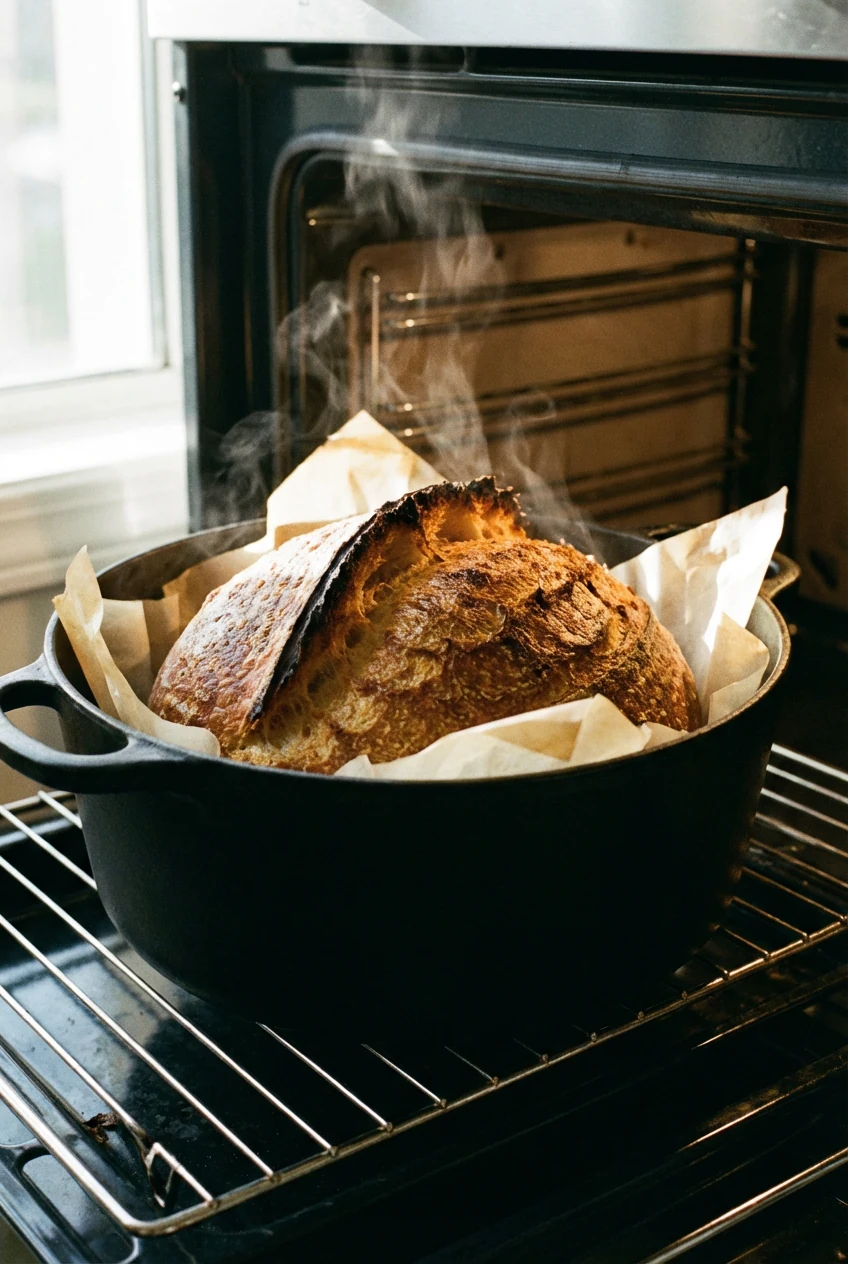
- Bake with steam: Carefully transfer the dough into the preheated Dutch oven (on parchment for easy handling). Cover and bake 25 minutes. Then uncover and bake 18–22 minutes until deep golden-brown, crackly, and internal temp hits 205–210°F.
- Cool: Move loaf to a rack and cool at least 1 hour before slicing. Yes, the wait is painful. Also yes, slicing early makes gummy bread—don’t sabotage.
Storage Instructions
For crusty loaves, store at room temperature in a paper bag or cut side down on a board for up to 2 days. Plastic softens the crust—great if you like softer slices, not great if you love crunch.
For sandwich-style bread or rolls, store in a zip-top bag at room temperature up to 3–4 days. If the kitchen is warm, check daily and avoid direct sun (we’re making bread, not croutons).
Freeze: Slice, wrap tightly, and freeze up to 2 months. Reheat slices straight from the freezer in a toaster or oven at 350°F for 6–8 minutes.
Refresh crust: Spritz the loaf lightly with water and bake at 375°F for 8–10 minutes. It’s like a mini spa day for stale bread—FYI, it works.
Benefits of This Recipe
- Time-efficient: From mix to mouth in a single evening.
- Beginner-friendly cues: Temperatures, timelines, and visual checks remove guesswork.
- Restaurant-worthy texture: Chewy interior, crackly exterior, photogenic crumb you’ll brag about.
- Customizable: One dough, many formats. Rolls for dinner, focaccia for parties, swirl loaf for brunch.
- Scalable: Double the recipe with the same method; just use a second pot or bake back-to-back.
What Not to Do
- Don’t over-flour the dough: Slight stickiness is normal. Too much flour = dry loaf and dense crumb.
- Don’t rush the second rise: Under-proofing kills oven spring. If it rebounds instantly when poked, give it more time.
- Don’t bake “cold”: A fully preheated oven and pot are non-negotiable for that pro-level crust.
- Don’t slice hot: Steam needs to redistribute. Cutting early makes the crumb gummy—patience is your secret ingredient.
- Don’t ignore salt: Salt isn’t optional; it controls gluten and flavor. Bland bread is a crime against carbs.
Recipe Variations
Classic Sandwich Loaf
Swap 1 cup (125 g) bread flour for all-purpose and keep olive oil. After first rise, shape into a 9×5-inch loaf, place in greased pan, proof 35–45 minutes. Bake at 375°F for 35–40 minutes. Optional: Brush top with milk for a soft crust.
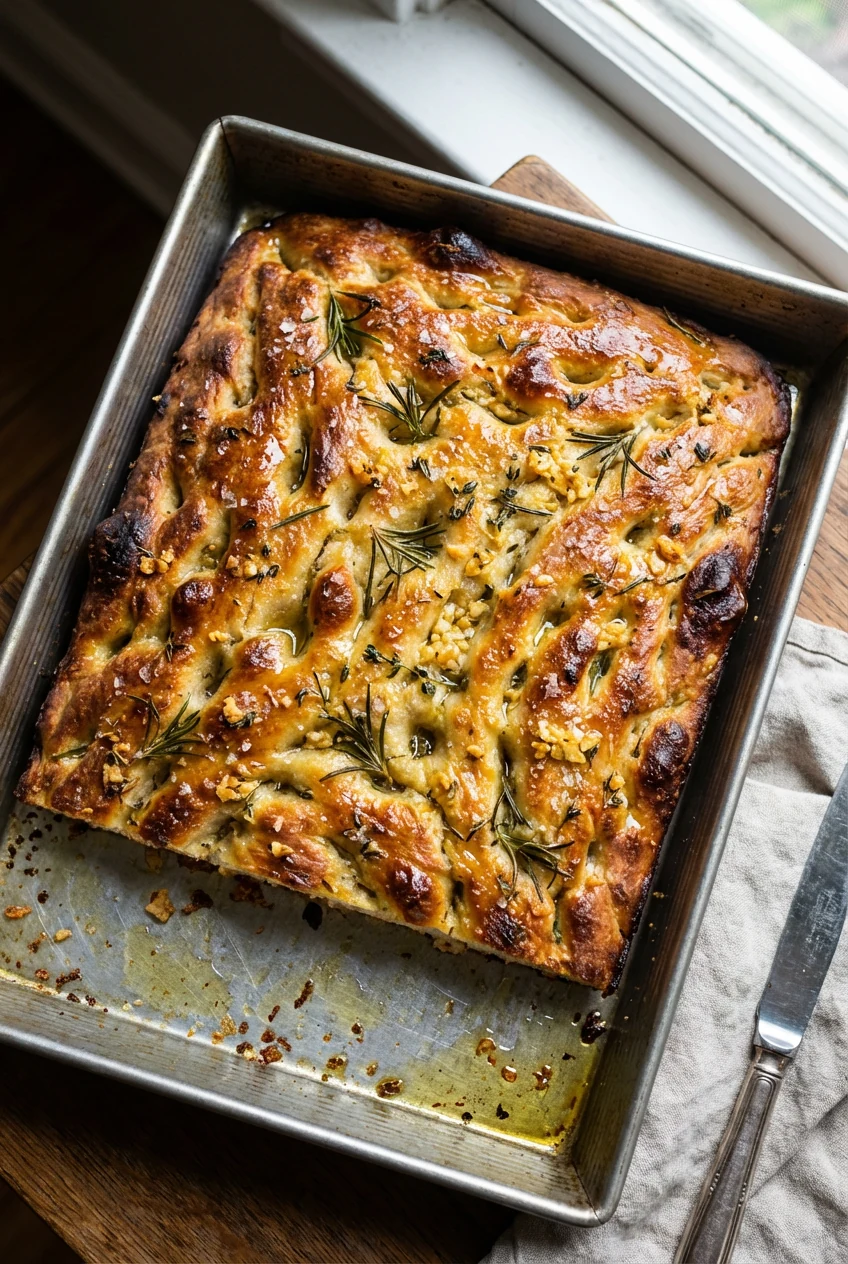
Garlic-Herb Focaccia
Increase olive oil to 3 tablespoons. After first rise, spread dough onto a well-oiled 9×13-inch pan. Dimple with fingertips, drizzle more oil, sprinkle chopped rosemary, thyme, and flaky salt. Proof 20–30 minutes. Bake at 450°F for 20–25 minutes. Finish with minced garlic sautéed in oil.
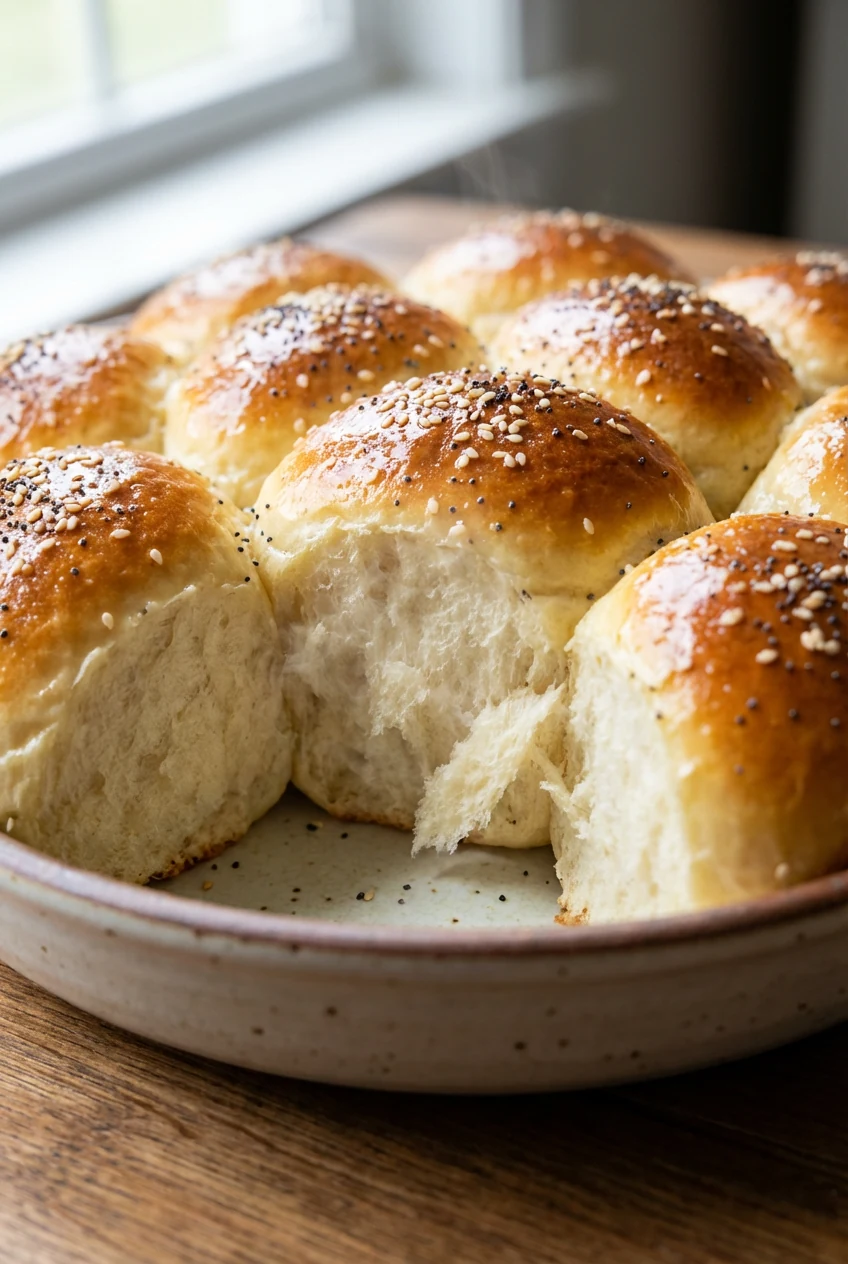
Pull-Apart Dinner Rolls
Divide dough into 12 equal pieces, roll into tight balls, and arrange in a greased 9×13-inch pan. Proof 30–40 minutes until puffy. Bake at 375°F for 18–22 minutes. Brush hot rolls with melted butter; sprinkle sesame or poppy seeds if you’re feeling fancy.
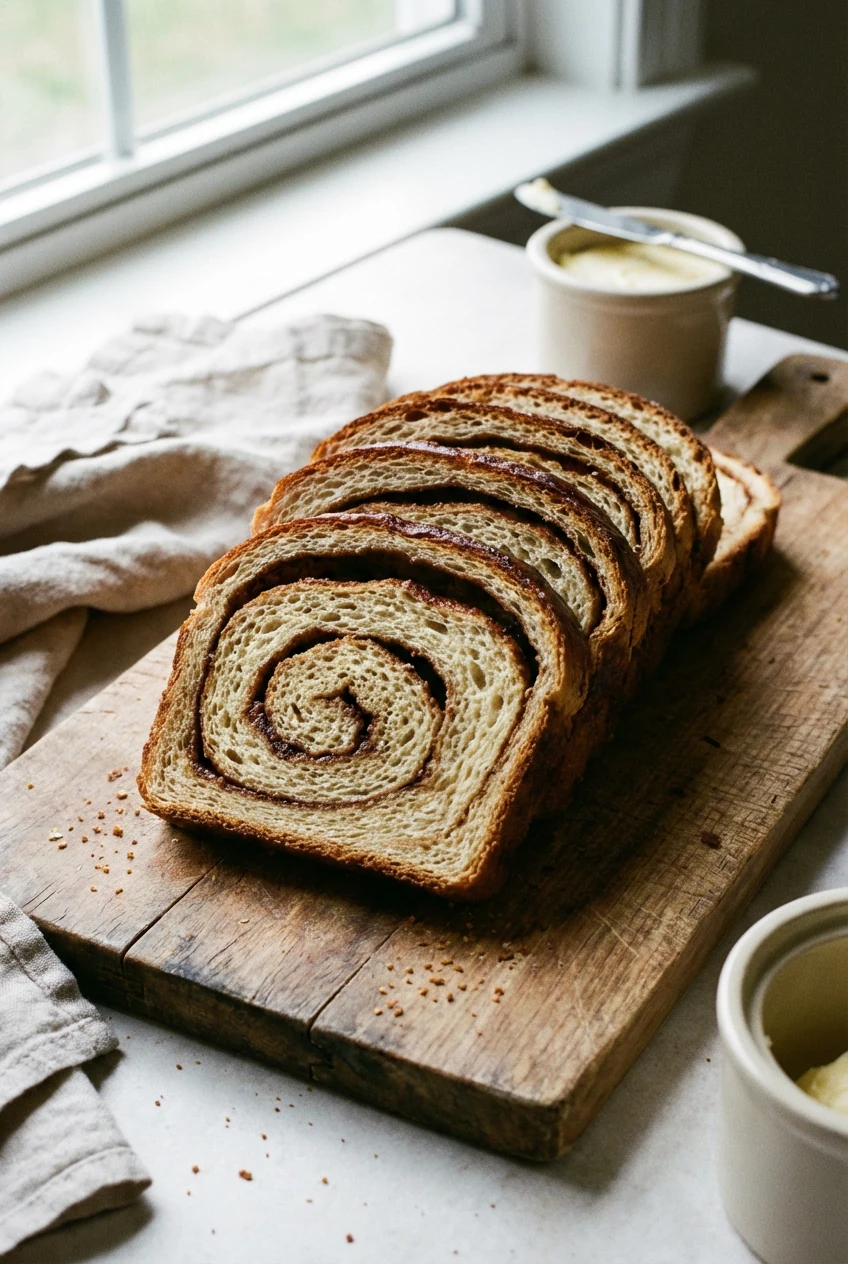
Cinnamon Swirl Breakfast Loaf
Stir 2 tablespoons extra sugar into the dough. After first rise, roll into a rectangle, spread with a mix of 3 tablespoons sugar + 2 teaspoons cinnamon + 1 tablespoon melted butter, and roll up tightly. Proof in a loaf pan 35–45 minutes. Bake at 375°F for 35–40 minutes. Cool fully before slicing to protect the swirl.
Cheesy Jalapeño Boule
Fold 1 cup shredded cheddar and 2–3 finely chopped jalapeños into the dough after the autolyse. Shape as a round and bake per the main method. Pro tip: Score deep to avoid leaks, and place parchment under the loaf to catch melty goodness.
FAQ
Can I use all-purpose flour instead of bread flour?
Yes. All-purpose flour yields a slightly softer crumb and less chew, but the recipe still works. For a stronger structure, keep hydration closer to the lower end and avoid over-proofing.
What if I don’t own a Dutch oven?
Use a preheated baking sheet or steel. Add steam by placing a metal pan on the lower rack and pouring in 1 cup boiling water right after you load the loaf. Bake times remain similar; watch color and internal temperature.
How do I know the dough is properly proofed?
Try the poke test: gently press the dough; if the indentation springs back slowly and not fully, it’s ready. If it snaps back instantly, proof longer. If it collapses, it’s over-proofed—bake ASAP and expect a flatter loaf.
Can I cold-proof the dough overnight?
Absolutely. After the first rise or after shaping, refrigerate covered 8–12 hours. Cold fermentation boosts flavor. Let it warm up 30–60 minutes before baking so the oven spring doesn’t suffer.
Is gluten-free possible with this recipe?
This specific dough relies on gluten for structure. For gluten-free, use a dedicated GF bread flour blend and add 1 teaspoon xanthan gum if your blend lacks it. Hydration and timing will differ; follow your blend’s guidance.
Why is my crust pale?
Common culprits: cooler oven, low sugar/honey, or insufficient steam. Verify oven temperature, don’t skip the sweetener, and bake covered first to trap steam. For deeper color, bake uncovered a few extra minutes.
Can I double the recipe?
Yes, but give the dough more room to rise and bake loaves separately if you’re not using two pots. Overcrowding drops oven heat and steals crust quality, which we do not accept, TBH.
Final Thoughts
Simple inputs, smart process, and a finish that looks suspiciously professional—that’s the win. Master this base, and your kitchen turns into a one-stop bread shop on demand. Build sandwiches, tear warm rolls, or plate a crackly boule with soup and smug satisfaction. Once you taste this, “store-bought” becomes a last resort, not the default.
Printable Recipe Card
Want just the essential recipe details without scrolling through the article? Get our printable recipe card with just the ingredients and instructions.