Beef Stew in Dutch Oven — Weeknight Soul Food
Big flavor, minimal fuss: a cozy Dutch oven classic you can nail on a weeknight, with tender beef, rich gravy, and stress-free steps.
You want a one-pot dinner that feels like a hug and tastes like you spent all day cooking—without actually spending all day. This stew delivers exactly that: deep, beefy flavor, silky gravy, and melt-in-your-mouth bites. The trick isn’t complicated; it’s process and patience, not fancy ingredients. Sear hard, simmer low, and you’ll turn simple staples into high-impact comfort food. Cook once, eat twice—because leftovers get even better, and your future self will thank you.
What Makes This Recipe Awesome
- Restaurant-level flavor at home: A fierce sear plus low-and-slow braising builds a rich, glossy gravy that tastes like you cheated.
- Minimal babysitting: Once it’s in the oven, you’re mostly hands-off. Set it and let your Dutch oven do the heavy lifting.
- Flexible and forgiving: Swap wine for broth, add mushrooms, skip peas—this stew welcomes your preferences and your pantry.
- Budget-friendly cut, premium result: Chuck roast transforms into fork-tender bites with proper technique. Translation: value without compromise.
- Make-ahead gold: It’s even better the next day. FYI, the flavors deepen and the sauce thickens as it rests.
What Goes Into This Recipe – Ingredients
Serves 6 generously.
- 2.5–3 lb beef chuck roast, trimmed and cut into 1.5-inch cubes
- 2 teaspoons kosher salt, divided (plus more to taste)
- 1 teaspoon freshly ground black pepper
- 2 tablespoons neutral oil (avocado, canola, or light olive oil)
- 1 large yellow onion, diced
- 2 ribs celery, sliced (optional but recommended)
- 3 cloves garlic, minced
- 2 tablespoons tomato paste
- 2 tablespoons all-purpose flour (or cornstarch for gluten-free)
- 1 cup dry red wine (optional; substitute 1 cup broth if not using alcohol)
- 3 cups low-sodium beef broth
- 2 bay leaves
- 1 teaspoon dried thyme (or 1 tablespoon fresh)
- 1 tablespoon Worcestershire sauce
- 4 large carrots, peeled and cut into 1-inch chunks
- 1.5 lb baby Yukon Gold potatoes, halved (or 1.5 lb russets, peeled and cubed)
- 1 cup mushrooms, sliced (optional)
- 1 cup frozen peas (add at the end)
- 1 tablespoon balsamic vinegar (finish, for brightness)
- Fresh parsley, chopped, for garnish
Instructions
- Preheat and prep: Set your oven to 325°F (165°C). Pat the beef dry thoroughly and season with 1.5 teaspoons salt and all the pepper. Dry meat sears better; damp meat steams. No thanks.
- Sear in batches: Heat oil in a 5–6 qt Dutch oven over medium-high until shimmering. Sear beef in 2–3 batches, 2–3 minutes per side, until deep brown. Don’t crowd the pot—space is flavor. Transfer browned beef to a bowl; keep the fond (brown bits!) in the pot.
- Sweat aromatics: Reduce heat to medium. Add onion and celery; cook 5–6 minutes until softened and lightly golden. Stir in garlic and cook 30 seconds until fragrant (we’re making friends, not burnt garlic).
- Tomato paste and flour: Add tomato paste; cook 1–2 minutes, stirring, until it darkens slightly. Sprinkle flour over the veggies and stir for 1 minute to coat—this builds body for a velvety gravy.
- Deglaze: Pour in red wine (or extra broth). Scrape up the fond with a wooden spoon until the bottom is clean. Simmer 2–3 minutes to reduce slightly.
- Build the braise: Add beef broth, bay leaves, thyme, Worcestershire, and the remaining 0.5 teaspoon salt. Return the beef (and accumulated juices) to the pot. Bring just to a simmer.
- Oven time: Cover and move the pot to the oven. Braise for 60 minutes.
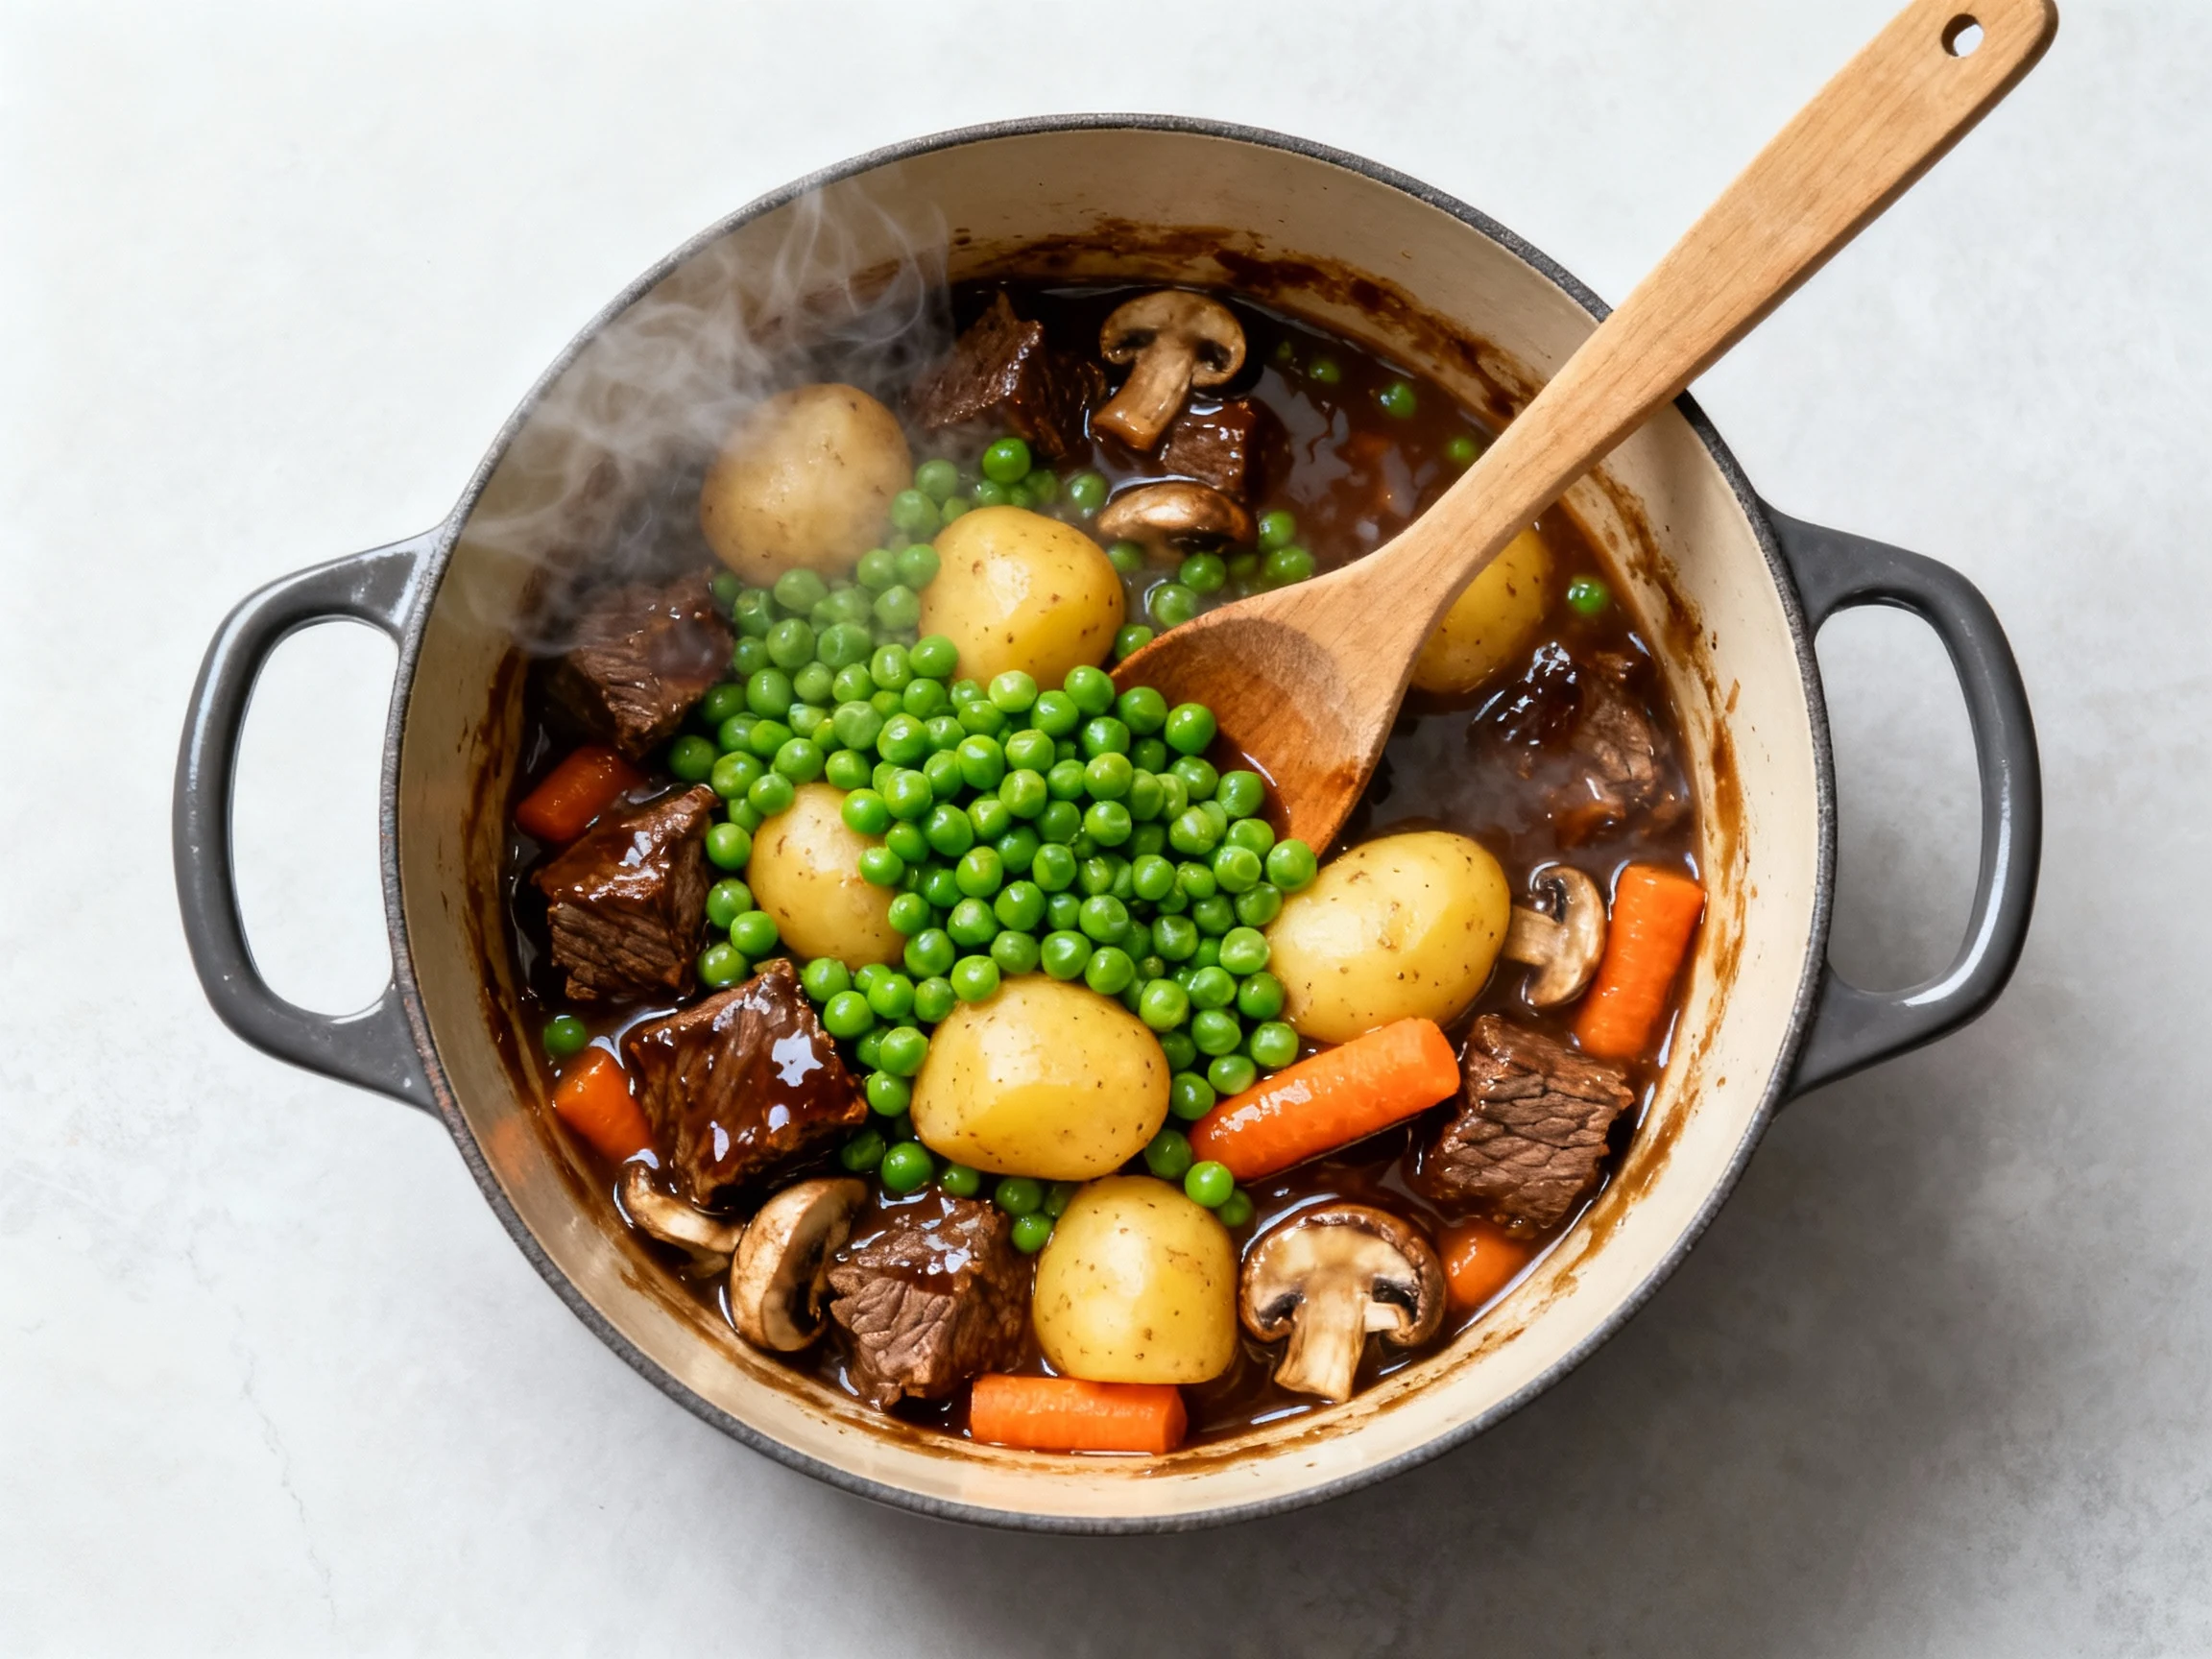
- Add hearty veg: After 60 minutes, stir in carrots, potatoes, and mushrooms (if using). Cover and braise another 45–60 minutes until the beef is fork-tender and the potatoes are cooked through.
- Finish smart: Remove bay leaves. Stir in peas and balsamic; simmer on the stovetop 3–5 minutes until peas are bright and the sauce glosses up. Taste and adjust salt and pepper. If the sauce seems thin, simmer uncovered for 5–10 minutes; if too thick, splash in broth.
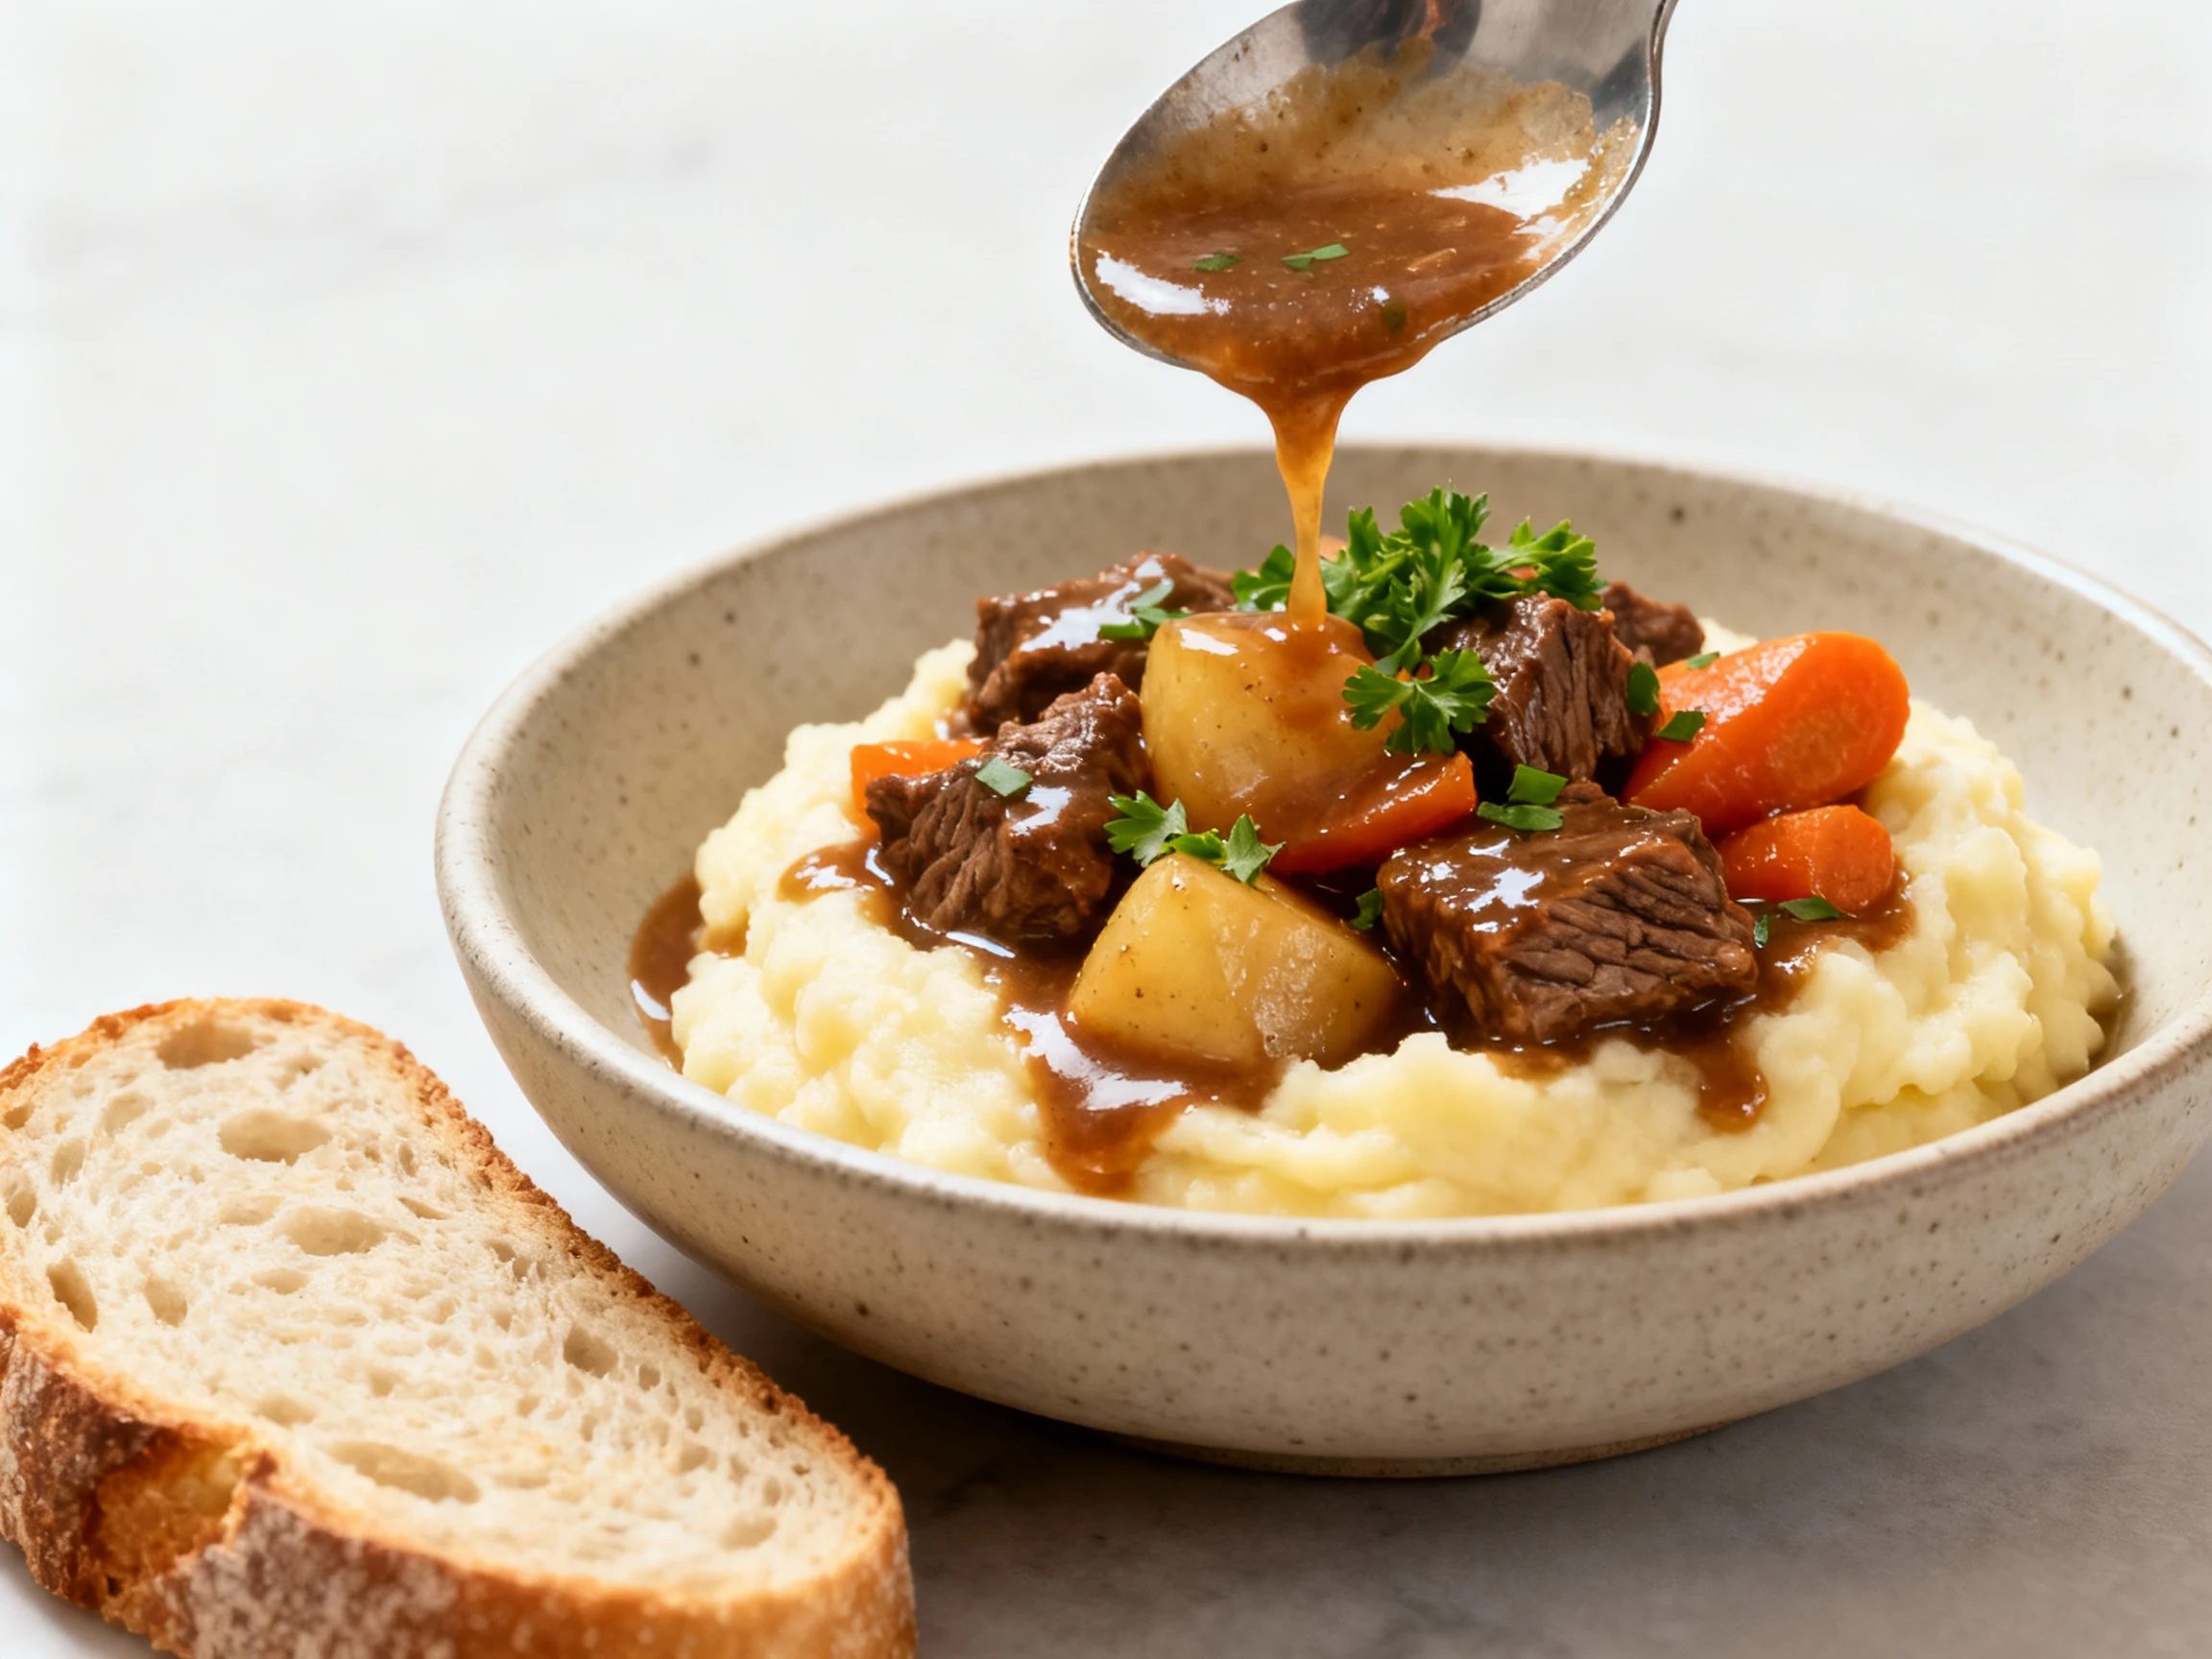
- Rest, then serve: Let the stew rest 10 minutes—it thickens and calms down. Garnish with parsley. Serve over mashed potatoes, buttered noodles, or crusty bread for maximum happiness.
How to Store
- Fridge: Cool completely, then store in airtight containers for up to 4 days. It tastes even better tomorrow.
- Freezer: Portion into freezer-safe containers; freeze for up to 3 months. Skip freezing the potatoes if you’re picky about texture; add fresh ones when reheating, IMO.
- Reheat: Stovetop over medium-low with a splash of broth or water, 10–15 minutes, stirring occasionally. Microwave works too—short bursts, stir between rounds.
- Make-ahead tip: Cook the base (beef + sauce) on day one; add carrots and potatoes when reheating on day two for perfect texture.
Nutritional Perks
- High-quality protein: Chuck roast offers complete protein to keep you satisfied and support muscle recovery.
- Micronutrient-rich: Carrots bring vitamin A; peas add fiber and vitamin K; potatoes deliver potassium for electrolyte balance.
- Smart fats: Minimal added oil and natural collagen from the braise create body without excess fat.
- Controlled sodium: Use low-sodium broth and salt to taste at the end. Flavor should come from technique, not salt bombs.
- Balanced comfort: Protein + fiber + complex carbs = steady energy and real satiety. Yes, your cozy bowl can be a legit meal.
Avoid These Mistakes
- Skipping the sear: Browning isn’t optional—it’s where flavor happens. Pale beef equals pale results.
- Overcrowding the pot: Too much meat at once lowers heat and steams instead of sears. Work in batches.
- Boiling the braise: Keep it at a gentle simmer. A hard boil toughens meat and clouds the sauce. Patience wins.
- Adding potatoes too early: They’ll overcook and get mealy. Add them halfway through as instructed.
- Neglecting the fond: Those brown bits are liquid gold. Deglaze properly to extract every drop of flavor.
- Under-seasoning: Season in layers—beef, broth, finish. Taste at the end and adjust. Salt is a tool, not a villain.
- Using the wrong cut: Lean stew meat dries out. Choose chuck or similar well-marbled cuts for tenderness.
- Rushing rest time: Five to ten minutes off heat lets the sauce thicken and flavors settle. You can wait, right?
Alternatives
- Different cuts: Short ribs or brisket make a luxe version; round roast works but is leaner—trim less and extend braise.
- No wine: Swap with broth plus 1 teaspoon soy sauce for umami. A splash of balsamic still adds brightness.
- Gluten-free: Use cornstarch or rice flour instead of AP flour. Or thicken by reducing the sauce longer.
- Low-carb: Skip potatoes; add more mushrooms and celery root or turnips. The gravy is the star anyway.
- Guinness twist: Replace wine with stout; add 1 tablespoon brown sugar and 1 teaspoon mustard for pub vibes.
- Mediterranean vibe: Add olives, rosemary, and a strip of lemon zest; finish with a drizzle of good olive oil.
- Slow cooker: Sear beef and aromatics first, then cook on low 7–8 hours. Sauce may need a quick stovetop reduction.
- Stovetop-only: Keep it at a gentle simmer, covered, for 2–2.5 hours. Stir occasionally to prevent sticking.
FAQ
What’s the best cut of beef for this stew?
Chuck roast is your MVP. It’s marbled enough to stay juicy and breaks down into tender, spoonable bites with time. Short ribs or brisket work for a richer version; pre-cut “stew meat” varies wildly and can be lean—choose carefully.
Can I make it without wine?
Absolutely. Use an extra cup of broth and add 1 teaspoon soy sauce for umami depth. A little balsamic at the end restores brightness so you don’t miss the wine’s acidity.
How do I get the beef tender, not chewy?
Two keys: hard sear early and gentle heat later. Keep the braise at a low simmer and give it time—around 2 hours total. If it’s still firm, it needs more time, not more heat. Let collagen do its magic.
Do I have to use the oven, or can I simmer on the stove?
You can do either. The oven provides even, ambient heat that’s hard to beat. Stovetop works fine—just keep it on low and check occasionally so it doesn’t scorch. TBH, oven is the most hands-off.
How do I thicken the sauce if it’s too thin?
Simmer uncovered for 5–10 minutes to reduce. Alternatively, stir in a cornstarch slurry (1 tablespoon cornstarch mixed with 1 tablespoon cold water), then simmer a few minutes until glossy.
Should I peel the potatoes?
Yukon Golds don’t need peeling; their skin is thin and holds up well. If using russets, peel them—russet skins can disintegrate and get mealy in a long braise.
Can I add mushrooms or other vegetables?
Yes! Mushrooms add savory depth, and parsnips or turnips bring earthy sweetness. Add tender veg (peas, green beans) at the end so they don’t turn army green.
How far ahead can I make this?
Up to 3 days in advance in the fridge, or freeze for 3 months. Reheat gently with a splash of broth. The sauce thickens beautifully after chilling—bonus points for meal prep.
The Bottom Line
This is the kind of stew that turns a random Tuesday into a small celebration. With a solid sear, a patient braise, and a few smart finishing touches, you’ll get big flavor from simple ingredients. It’s flexible, reliable, and friendly to your schedule—and your wallet. Make it once, tweak it to your taste, and it’ll become your go-to cold-weather power move. Comfort food, optimized—because you deserve a bowl that works as hard as you do.
Printable Recipe Card
Want just the essential recipe details without scrolling through the article? Get our printable recipe card with just the ingredients and instructions.