Foccacia Bread Recipes — Easy Crunchy Bakery-level at Home
From weeknight dinners to show-off brunches, get crisp edges, tender crumb, and big flavor with minimal kneading and smart timing.
If you think great bread takes all day, a degree in French baking, and a second mortgage for gadgets, think again. This focaccia hits that sweet spot: low effort, high reward, big flex. We’re talking shatter-crisp edges, an airy, springy interior, and olive oil that makes every bite taste like you’ve finally figured life out. The twist? A salty brine and a smart proof that do most of the heavy lifting while you, you know, live your life. Ready to pull bakery-level bread out of your oven without the all-nighter?
The Secret Behind This Recipe
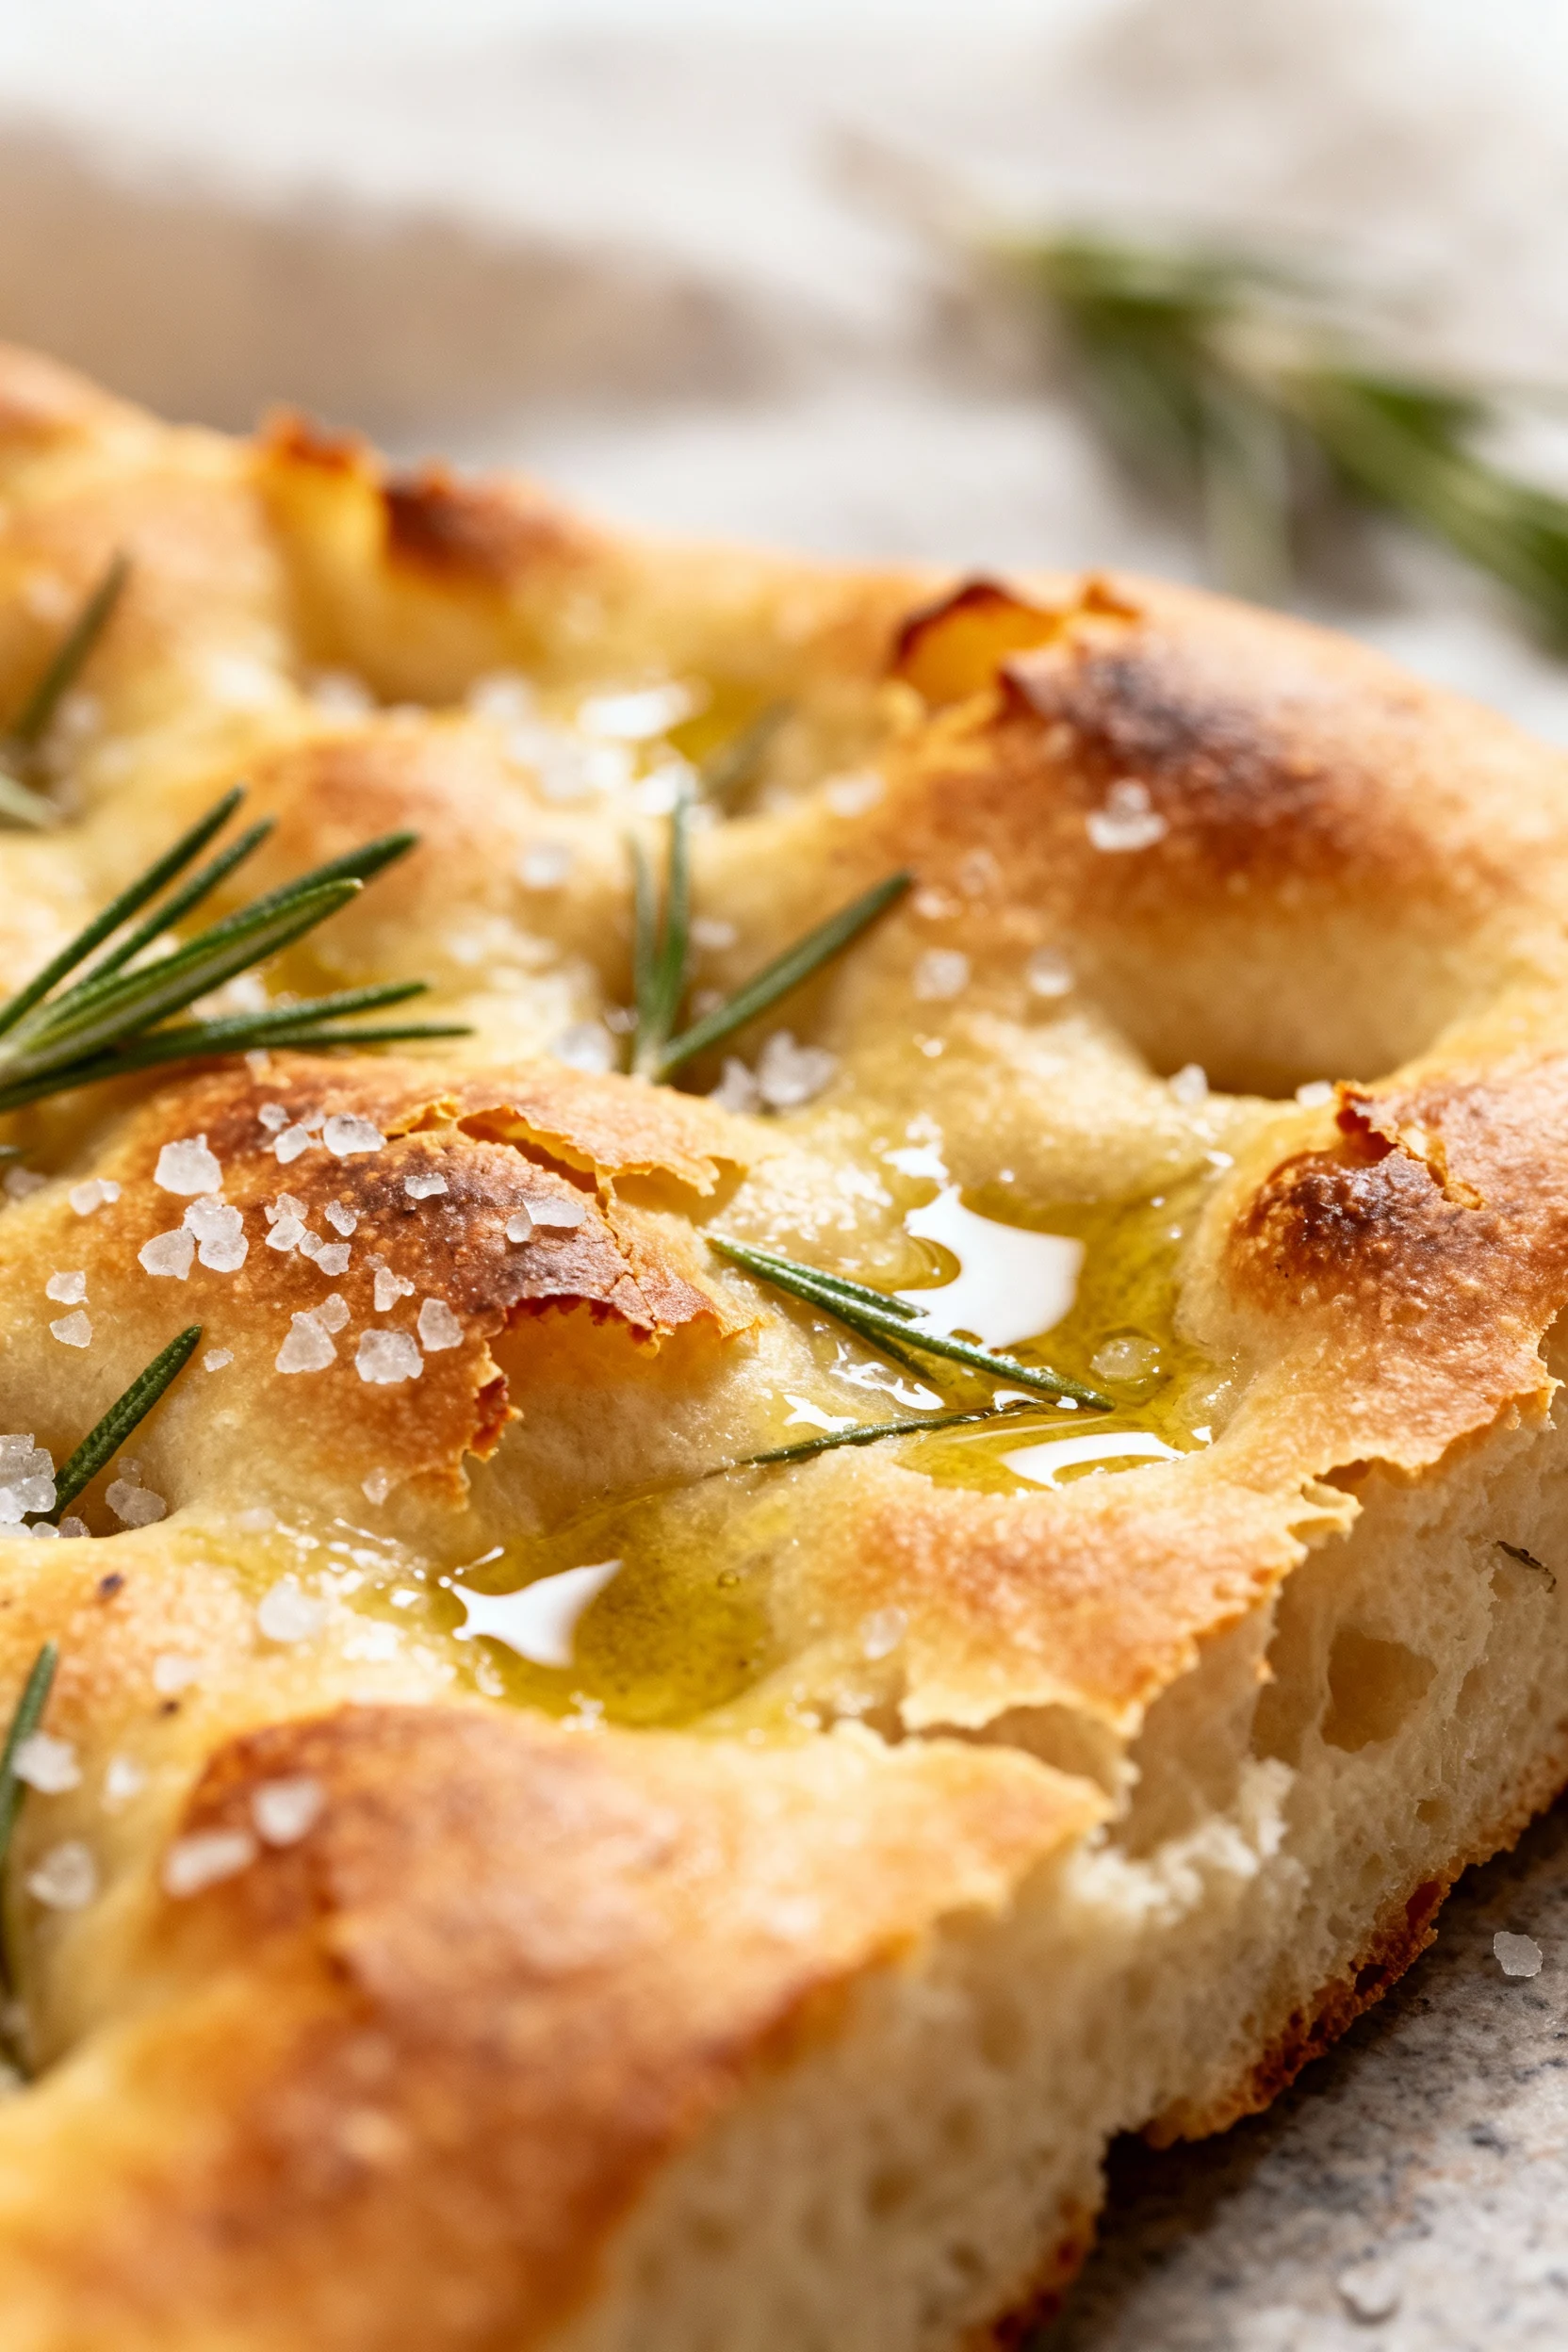
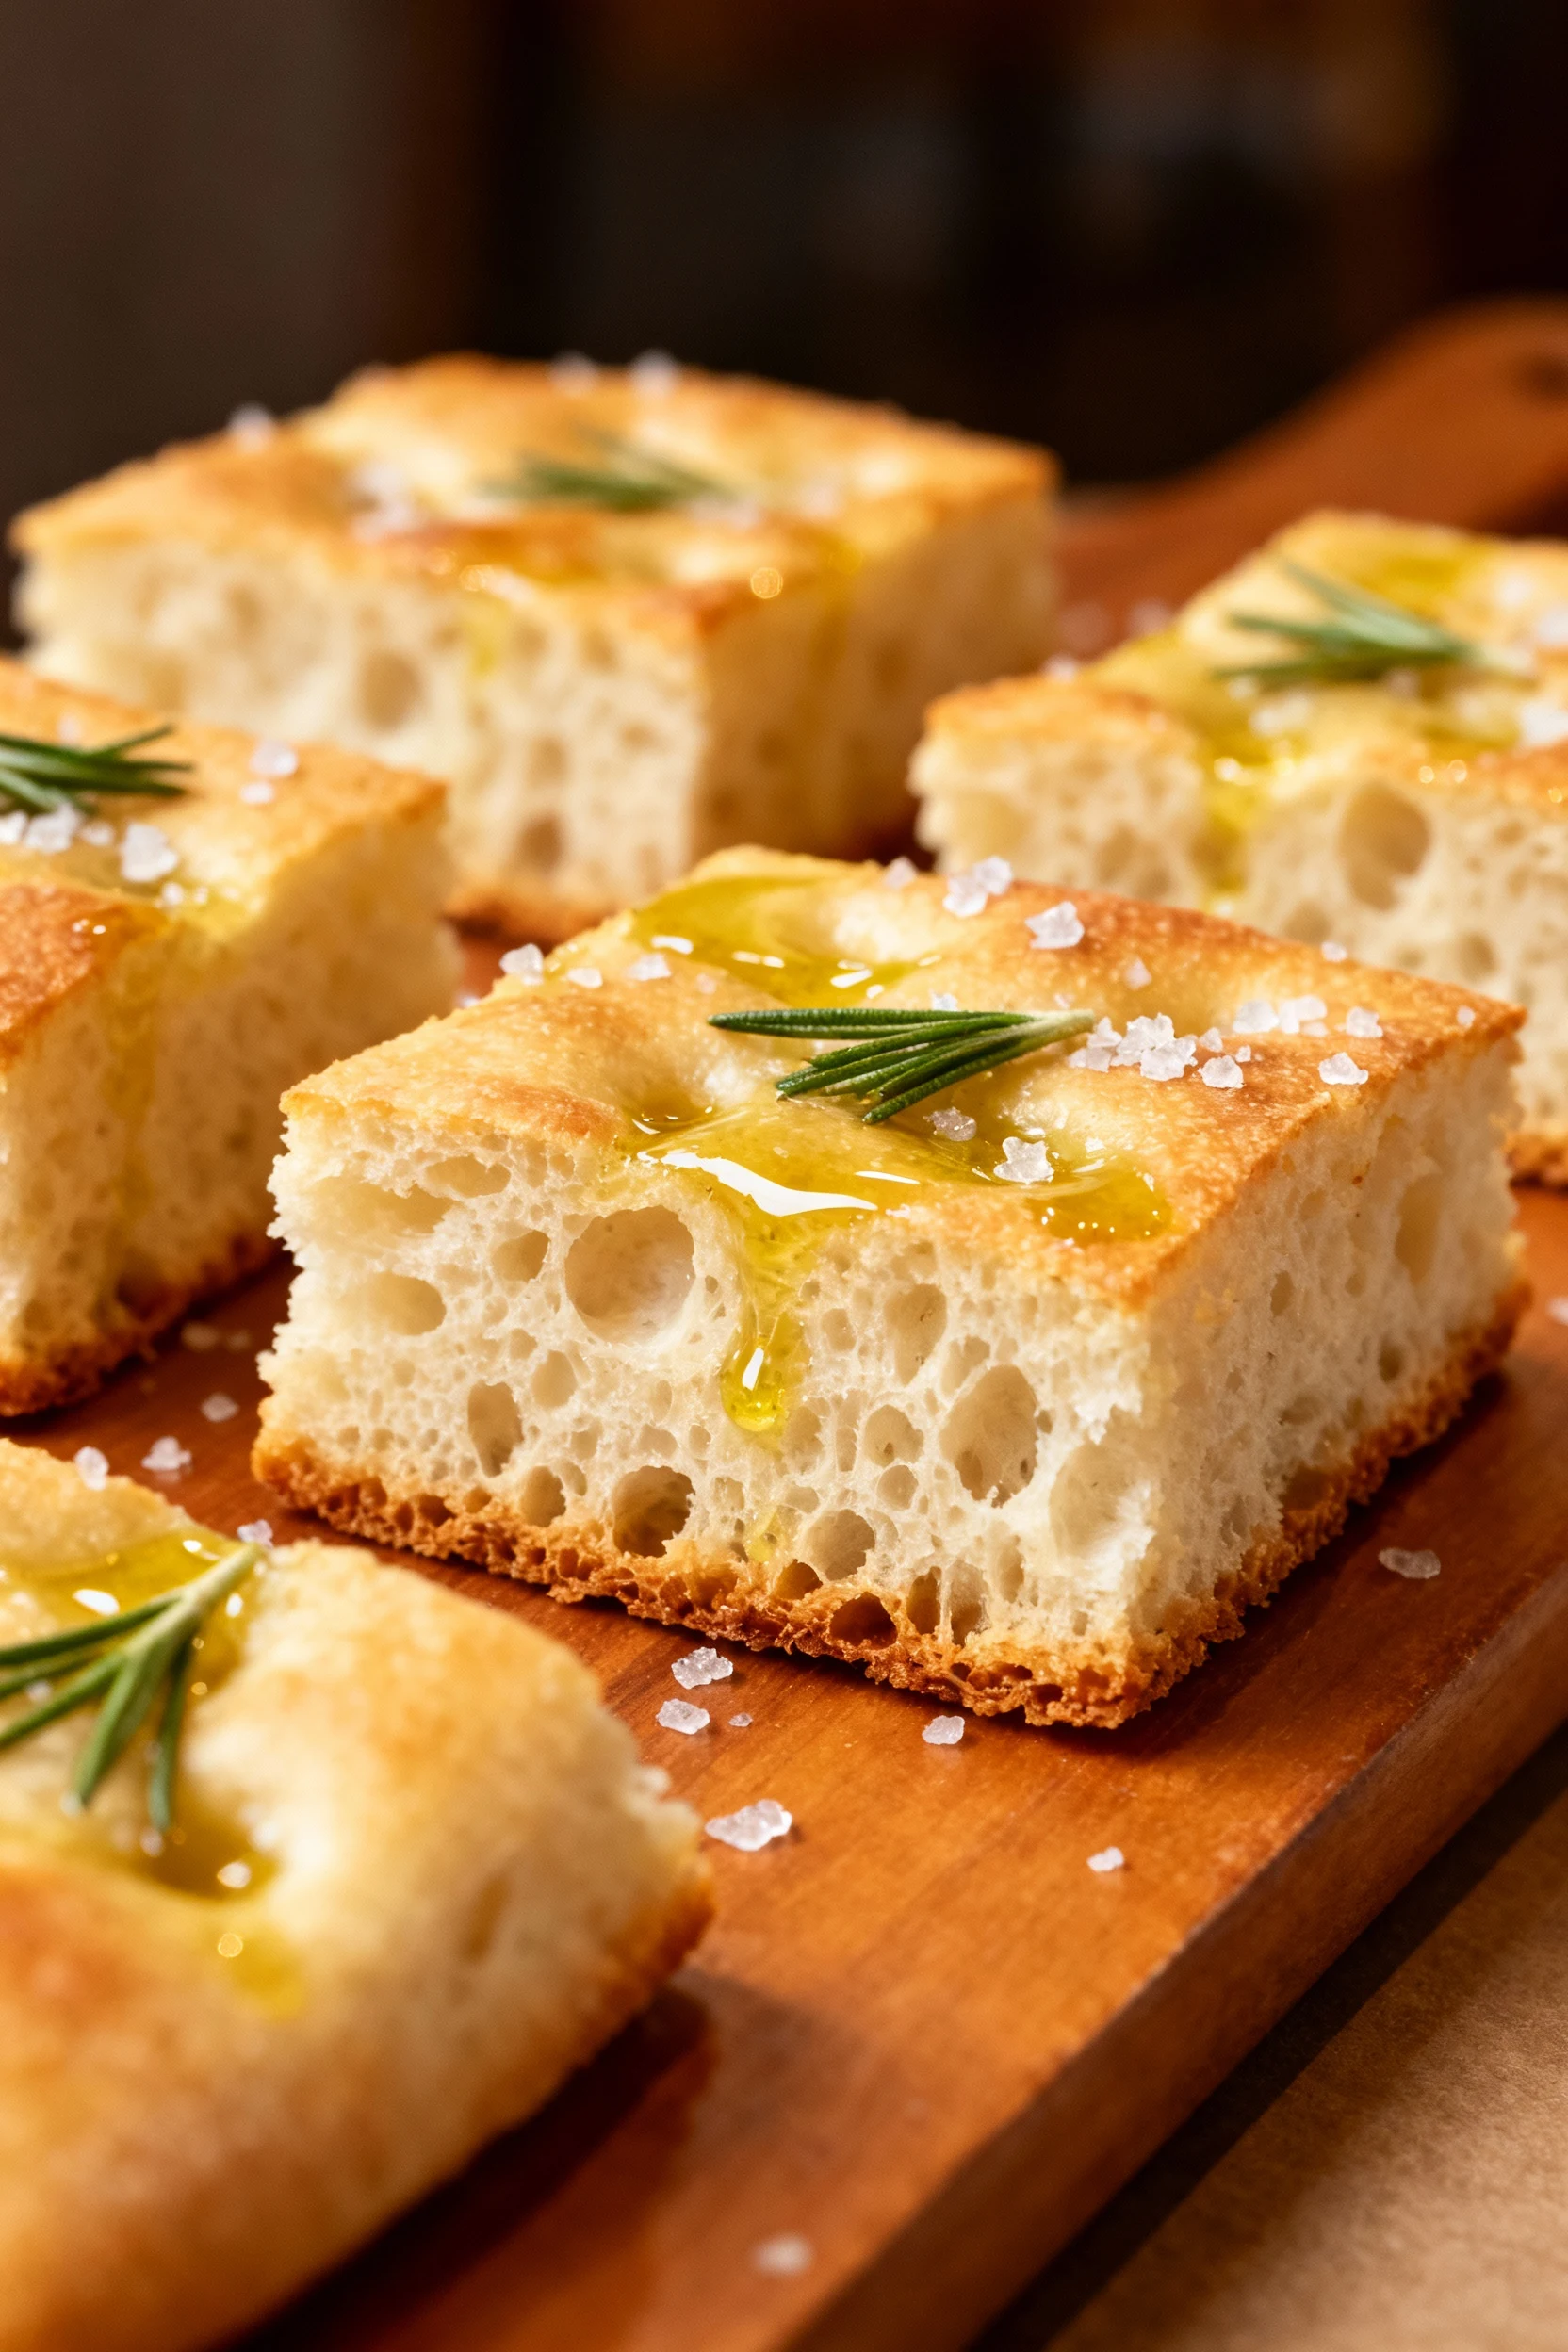
Here’s the cheat code: high hydration, gentle folds, and a brine-and-dimple finish. High hydration (about 70–75%) gives you that open crumb and a delicate chew, while light folds strengthen the dough without a sweaty kneading session. A well-oiled pan essentially fries the bottom crust for a golden, crispy base—like the best slice you’ve ever had, just thicker and better.
Then the brine: a quick mix of water and salt poured over before baking. The brine moves flavor into the dough and enhances crust blistering. Add the signature dimples to push gas pockets evenly and create little flavor “pools” for olive oil and herbs. Want to go next level? Cold ferment overnight for deeper flavor and better texture—because patience tastes amazing.
Shopping List – Ingredients
- Bread flour: 500 g (about 4 cups). All-purpose works in a pinch; bread flour gives a chewier bite.
- Warm water (95°F): 375 g (1 2/3 cups). Slightly warm helps yeast wake up without shocking it.
- Instant yeast: 7 g (2 1/4 tsp). For overnight cold ferment, use 3–4 g (about 1 tsp).
- Fine sea salt: 12 g (2 tsp). Flavor matters—don’t skimp.
- Extra-virgin olive oil: 30 g (2 tbsp) for the dough + 60 ml (1/4 cup) for the pan and drizzle.
- Honey or sugar: 10 g (2 tsp). Optional, but it helps with browning and balances the salt.
- Brine: 60 g water (1/4 cup) + 5 g salt (1 tsp), stirred until dissolved.
- Flaky salt: For finishing.
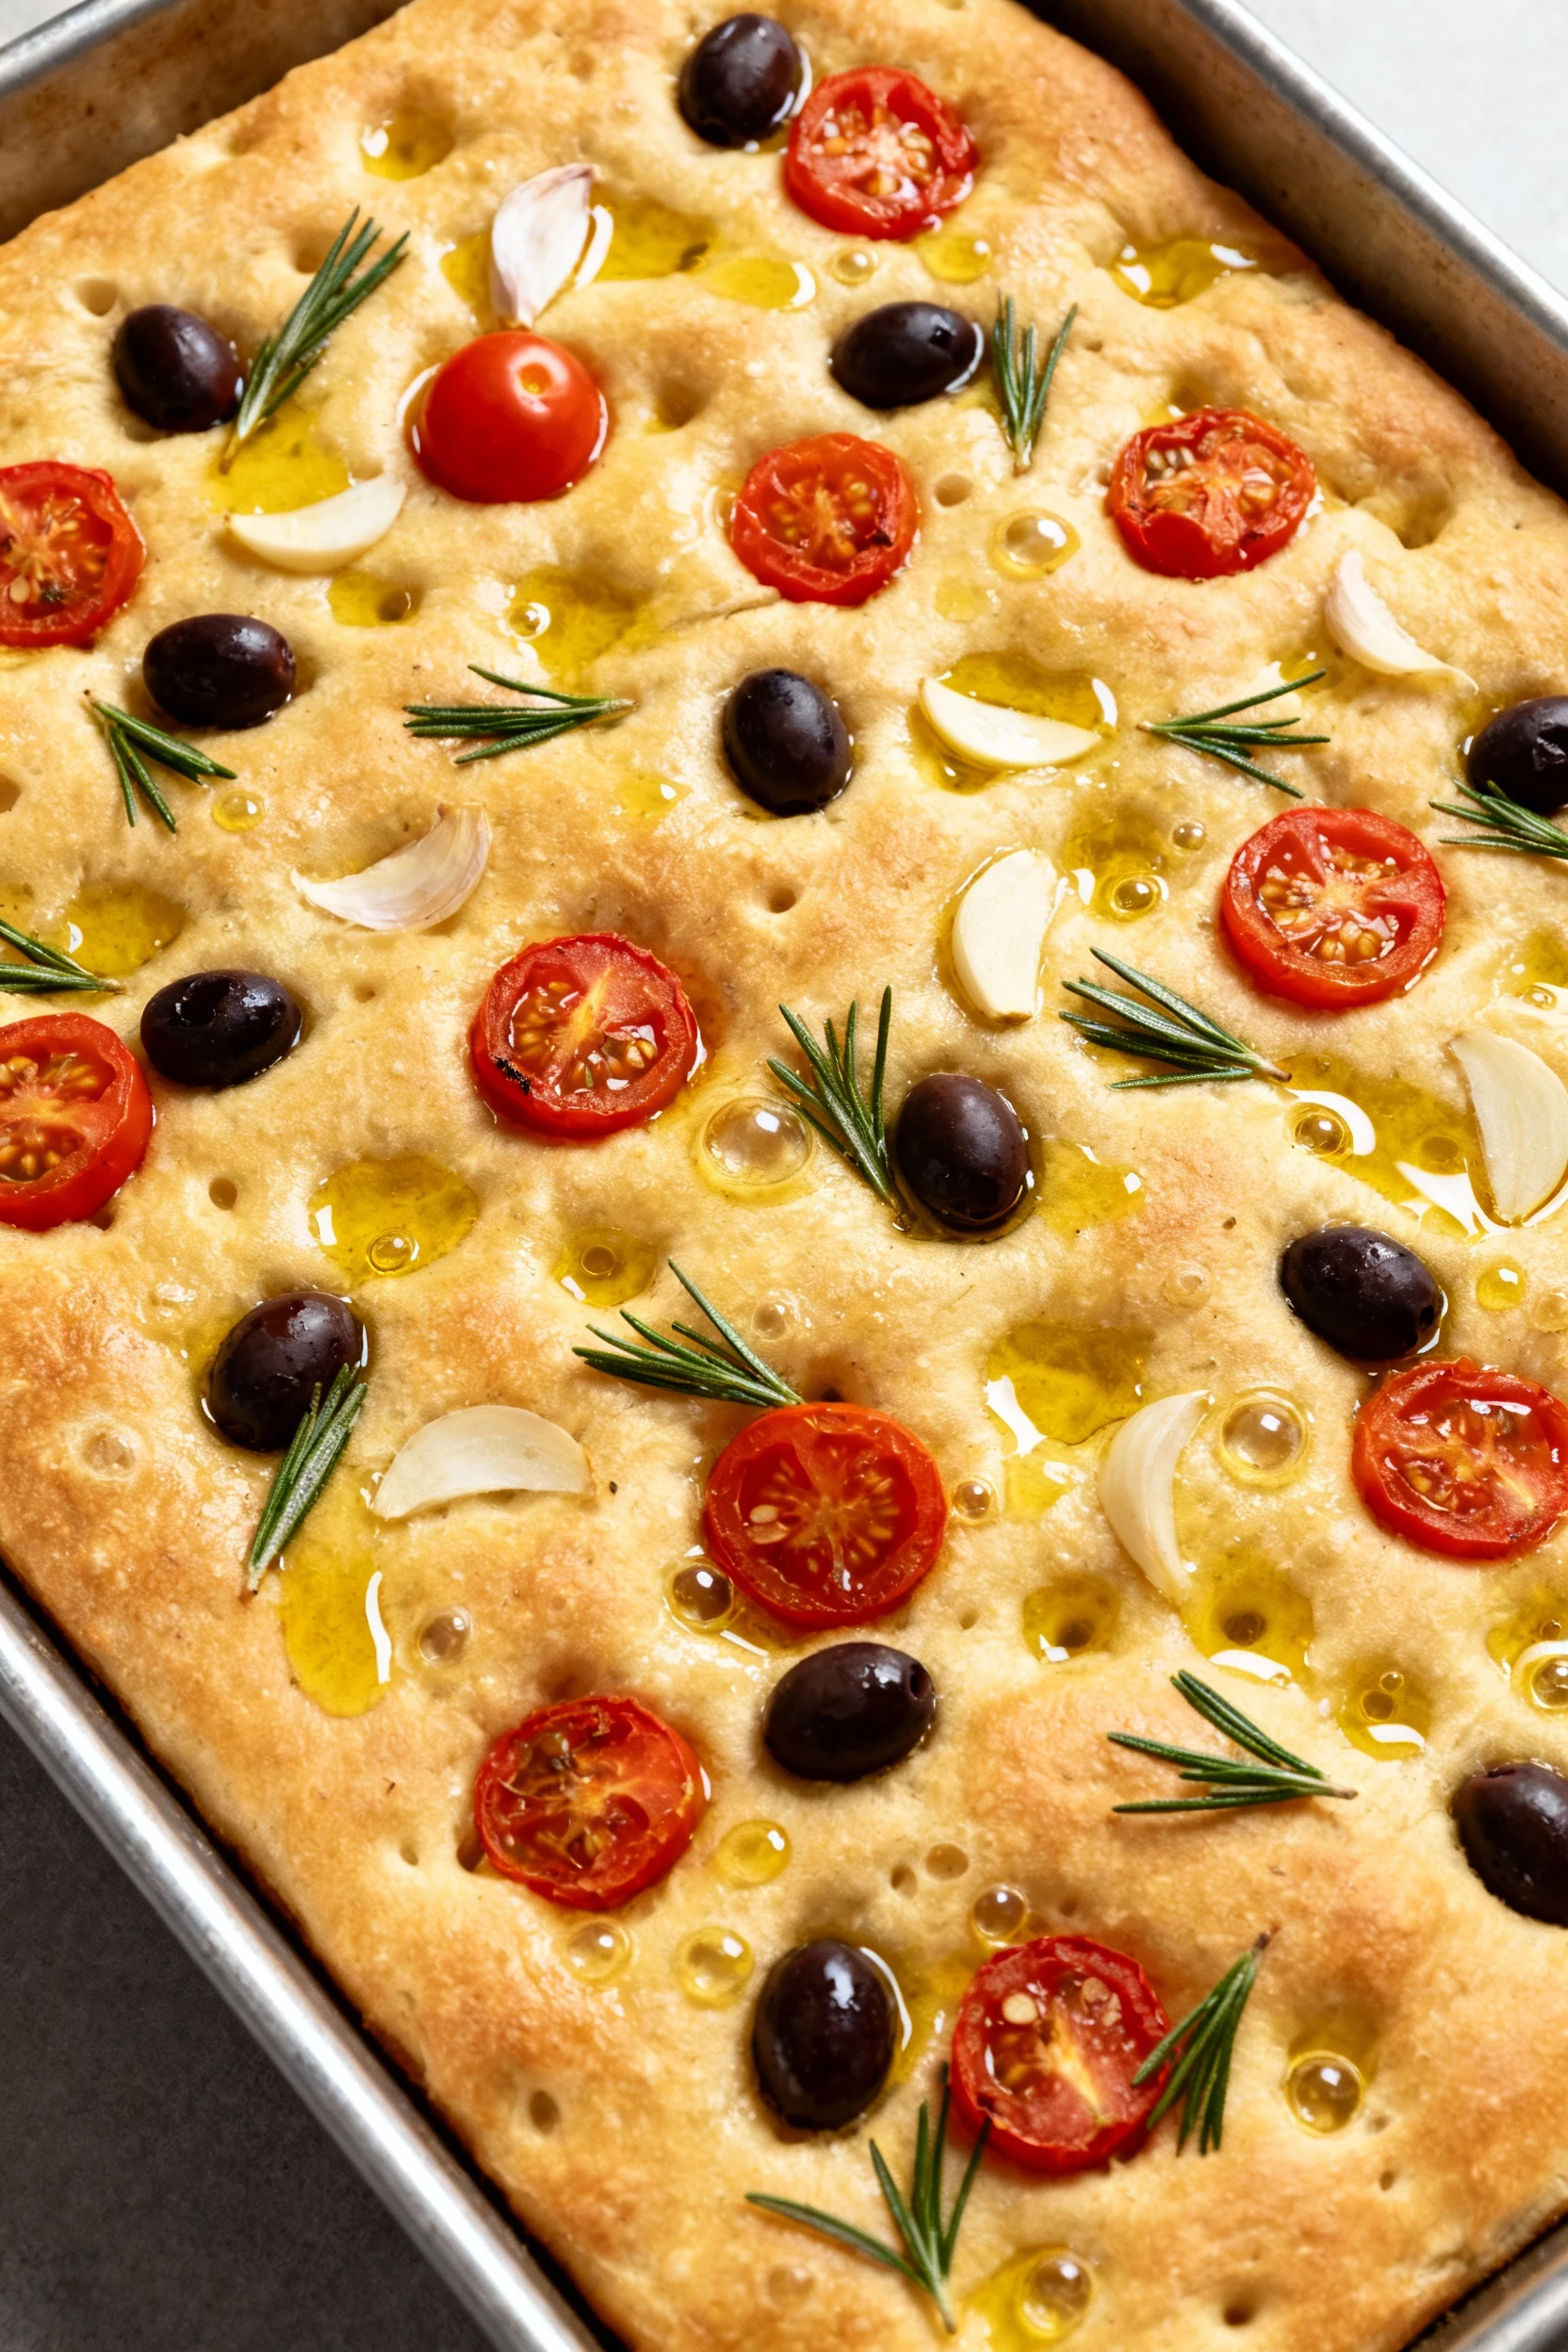
- Herbs & toppings: 2–3 sprigs fresh rosemary, 2–3 cloves thinly sliced garlic, halved cherry tomatoes, olives, caramelized onions—your call.
- Pan: 9×13-inch metal pan or a 10–12-inch cast-iron skillet for extra crisp.
- Parchment paper: Optional; helpful for easy release.
Let’s Get Cooking – Instructions
- Mix the dough: In a large bowl, whisk warm water, yeast, olive oil, and honey. Add flour and salt. Stir with a spatula until no dry bits remain. The dough will be sticky—perfect.
- Rest (autolyse-lite): Cover and let sit 10–15 minutes. This short rest hydrates flour and reduces effort later. FYI, it’s your mini timesaver.
- Fold to build strength: With damp hands, perform 3–4 sets of stretch-and-folds over 20 minutes (every 5–7 minutes). Grab an edge, stretch up, fold over; rotate the bowl and repeat. Dough should become smoother and bouncy.
- Proof option A — same-day: Cover and bulk rise at room temp until doubled, 60–90 minutes depending on your kitchen warmth.
- Proof option B — overnight: Use less yeast (3–4 g), cover, and refrigerate 8–24 hours. The slow rise makes flavor pop. Remove from fridge 45–60 minutes before shaping.
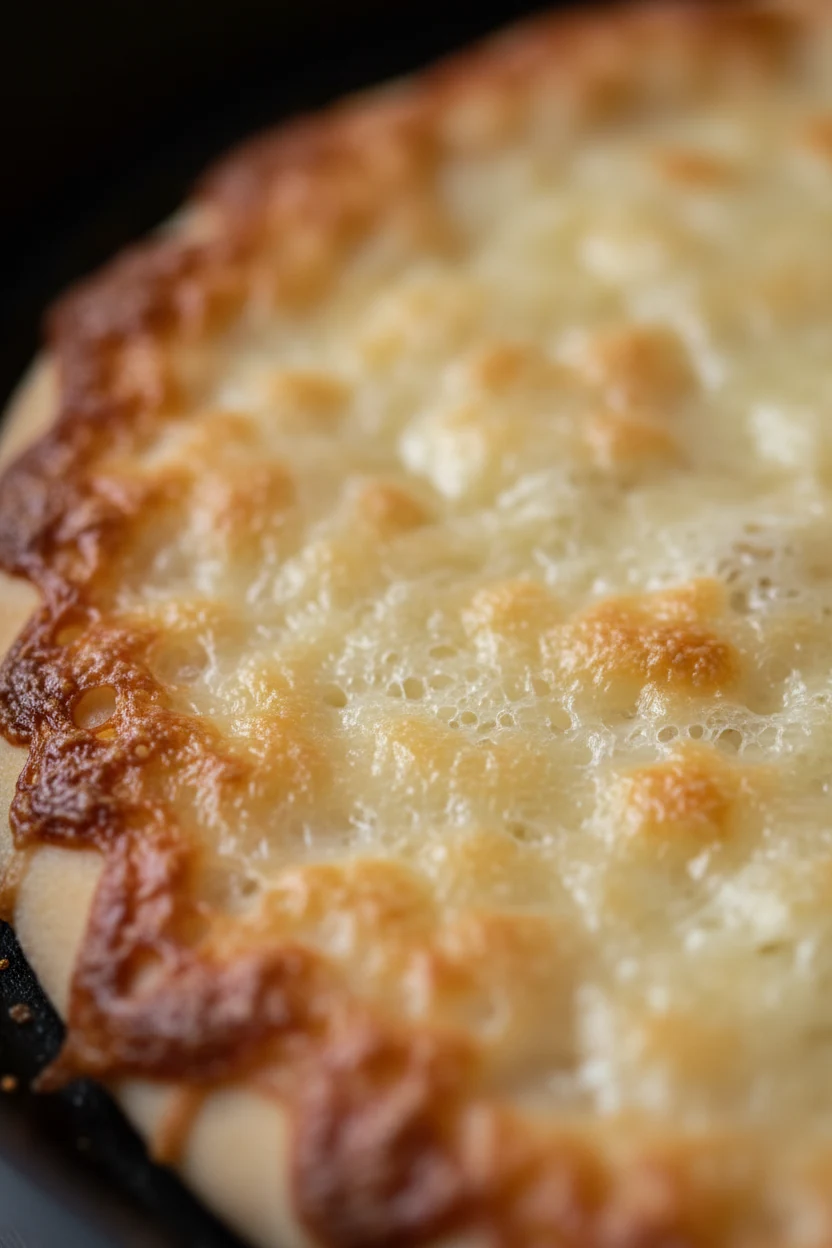
- Prep the pan: Swirl 2–3 tbsp olive oil in a 9×13 metal pan (or generously oil a cast iron). Coat the bottom and corners—it’s how you get that crisp fry.
- Pan the dough: Scrape dough into the pan. Oil your hands, then gently stretch it toward the edges. If it resists, let it rest 10 minutes and finish stretching—no wrestling match needed.
- Second rise: Cover and proof until puffy and almost doubled, 45–60 minutes. You want a marshmallow vibe with visible bubbles.
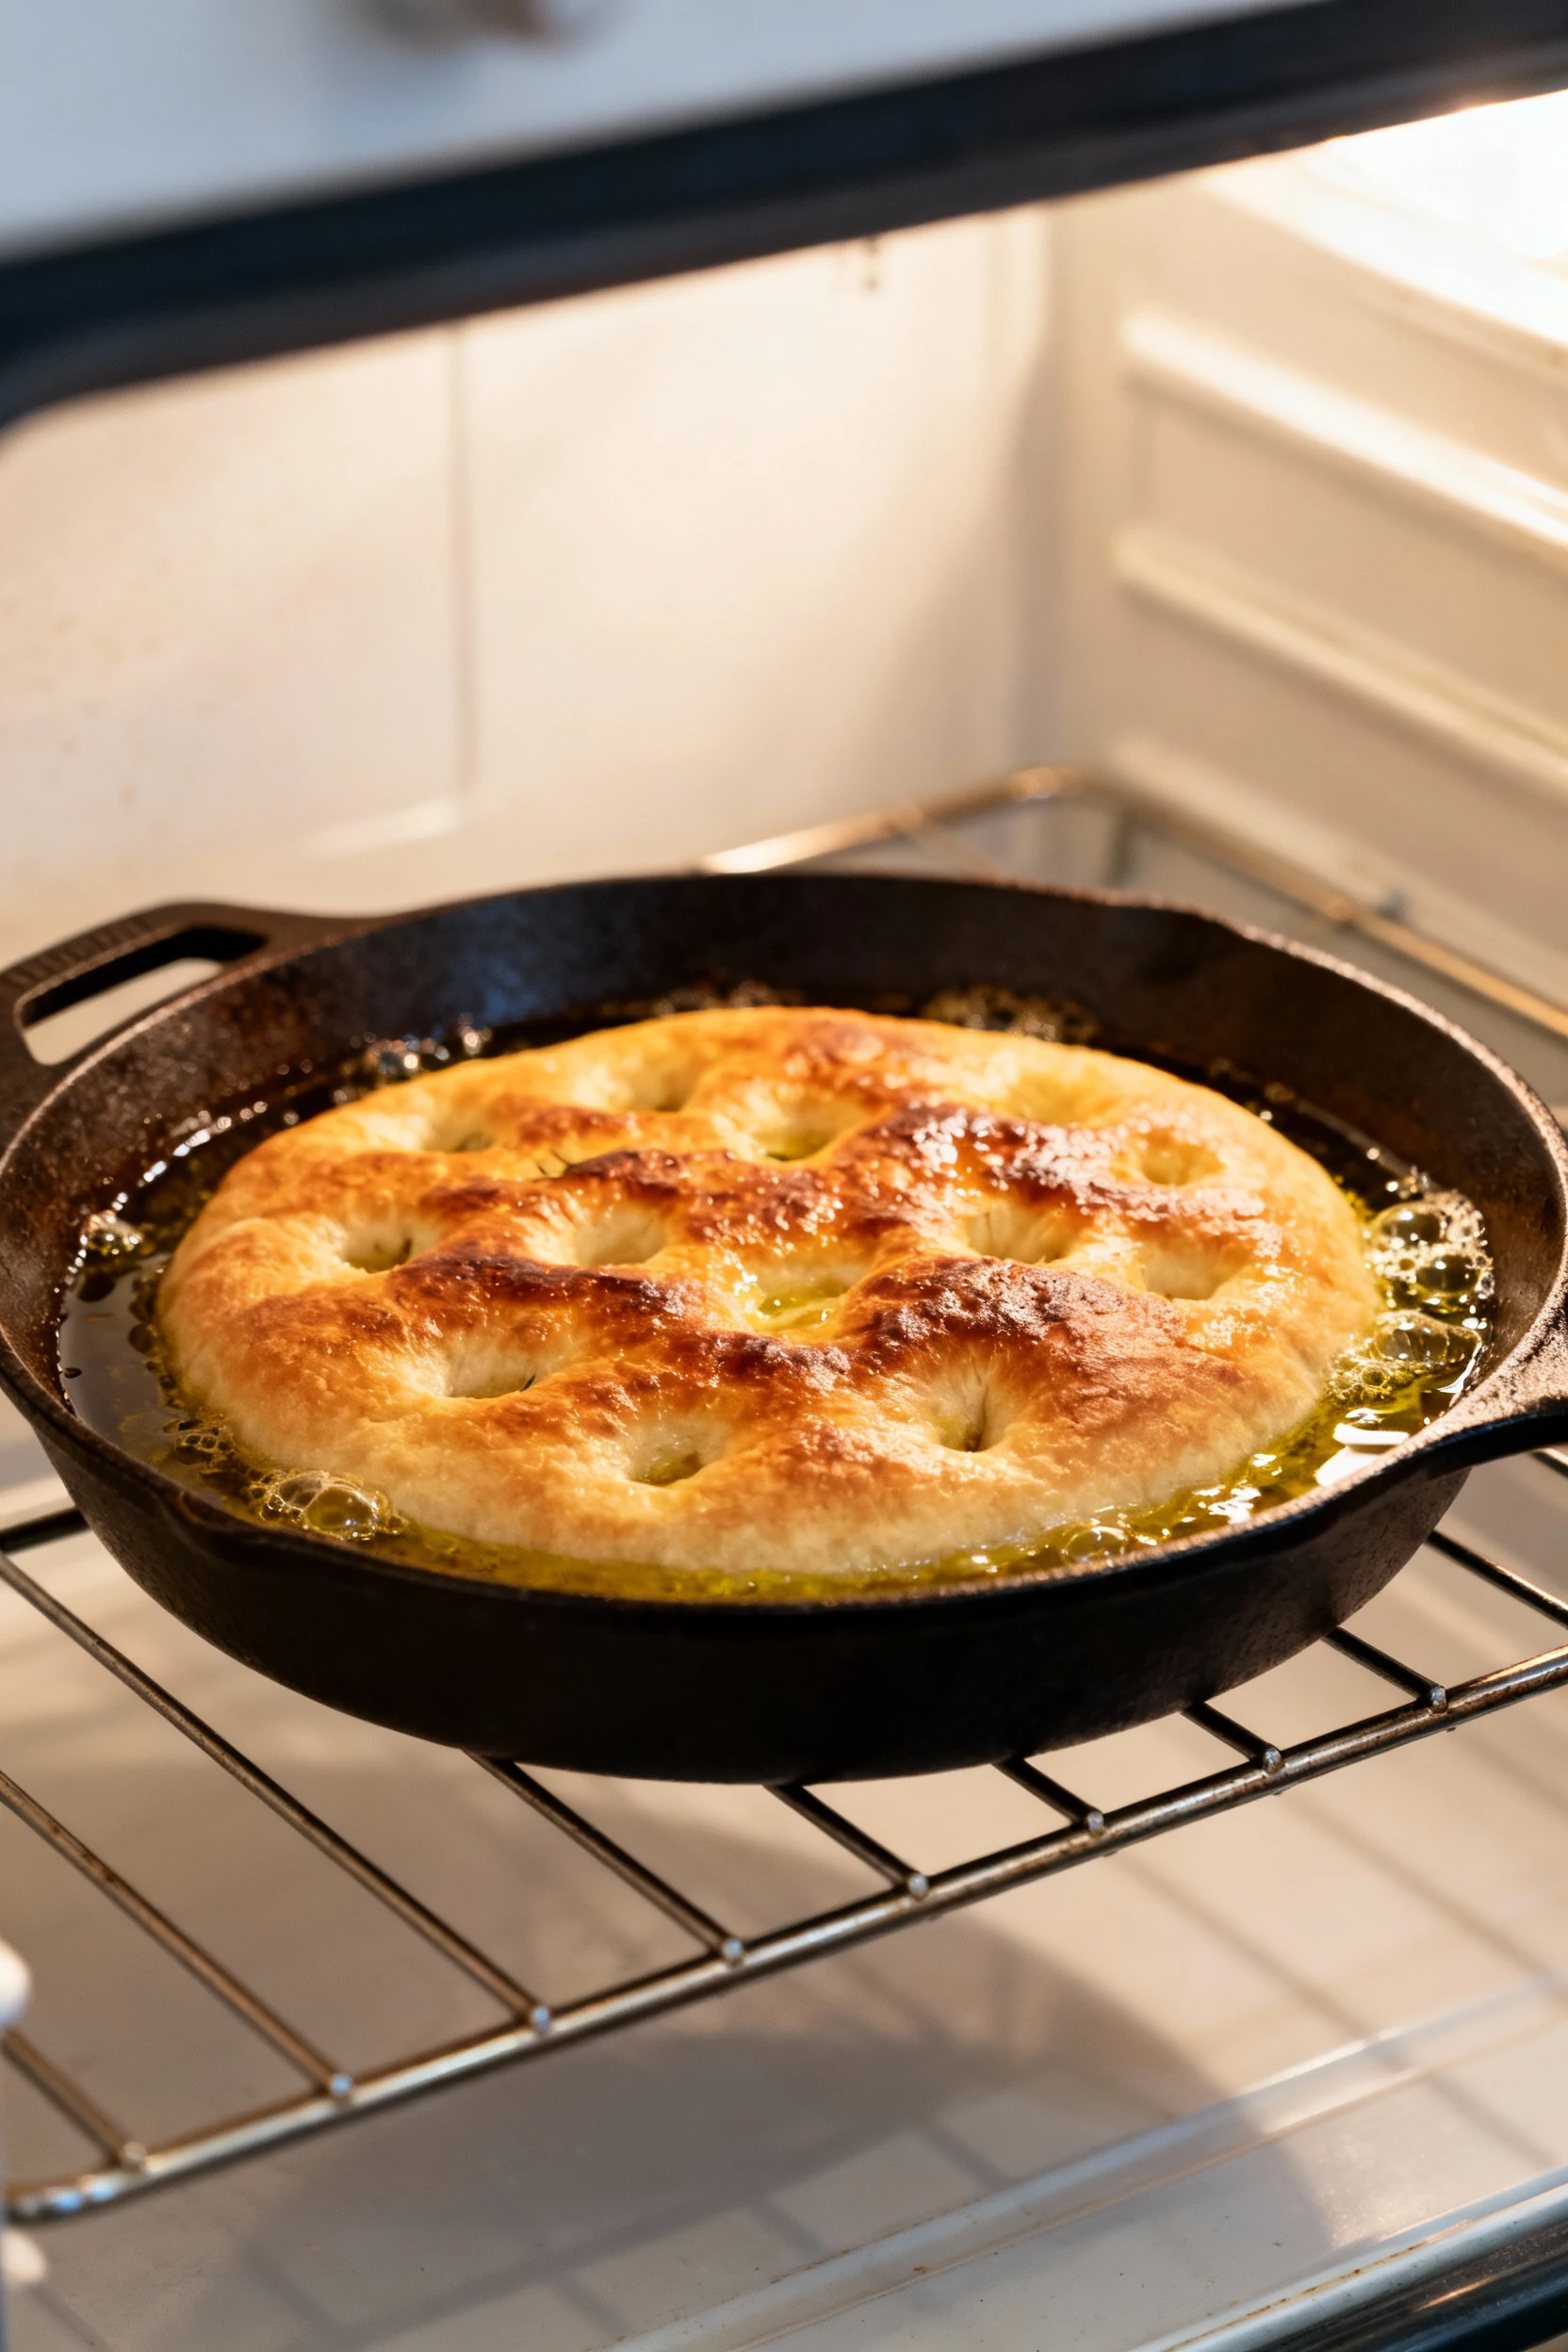
- Preheat the oven: 450°F (230°C). Place a rack in the lower-middle to brown the bottom nicely.
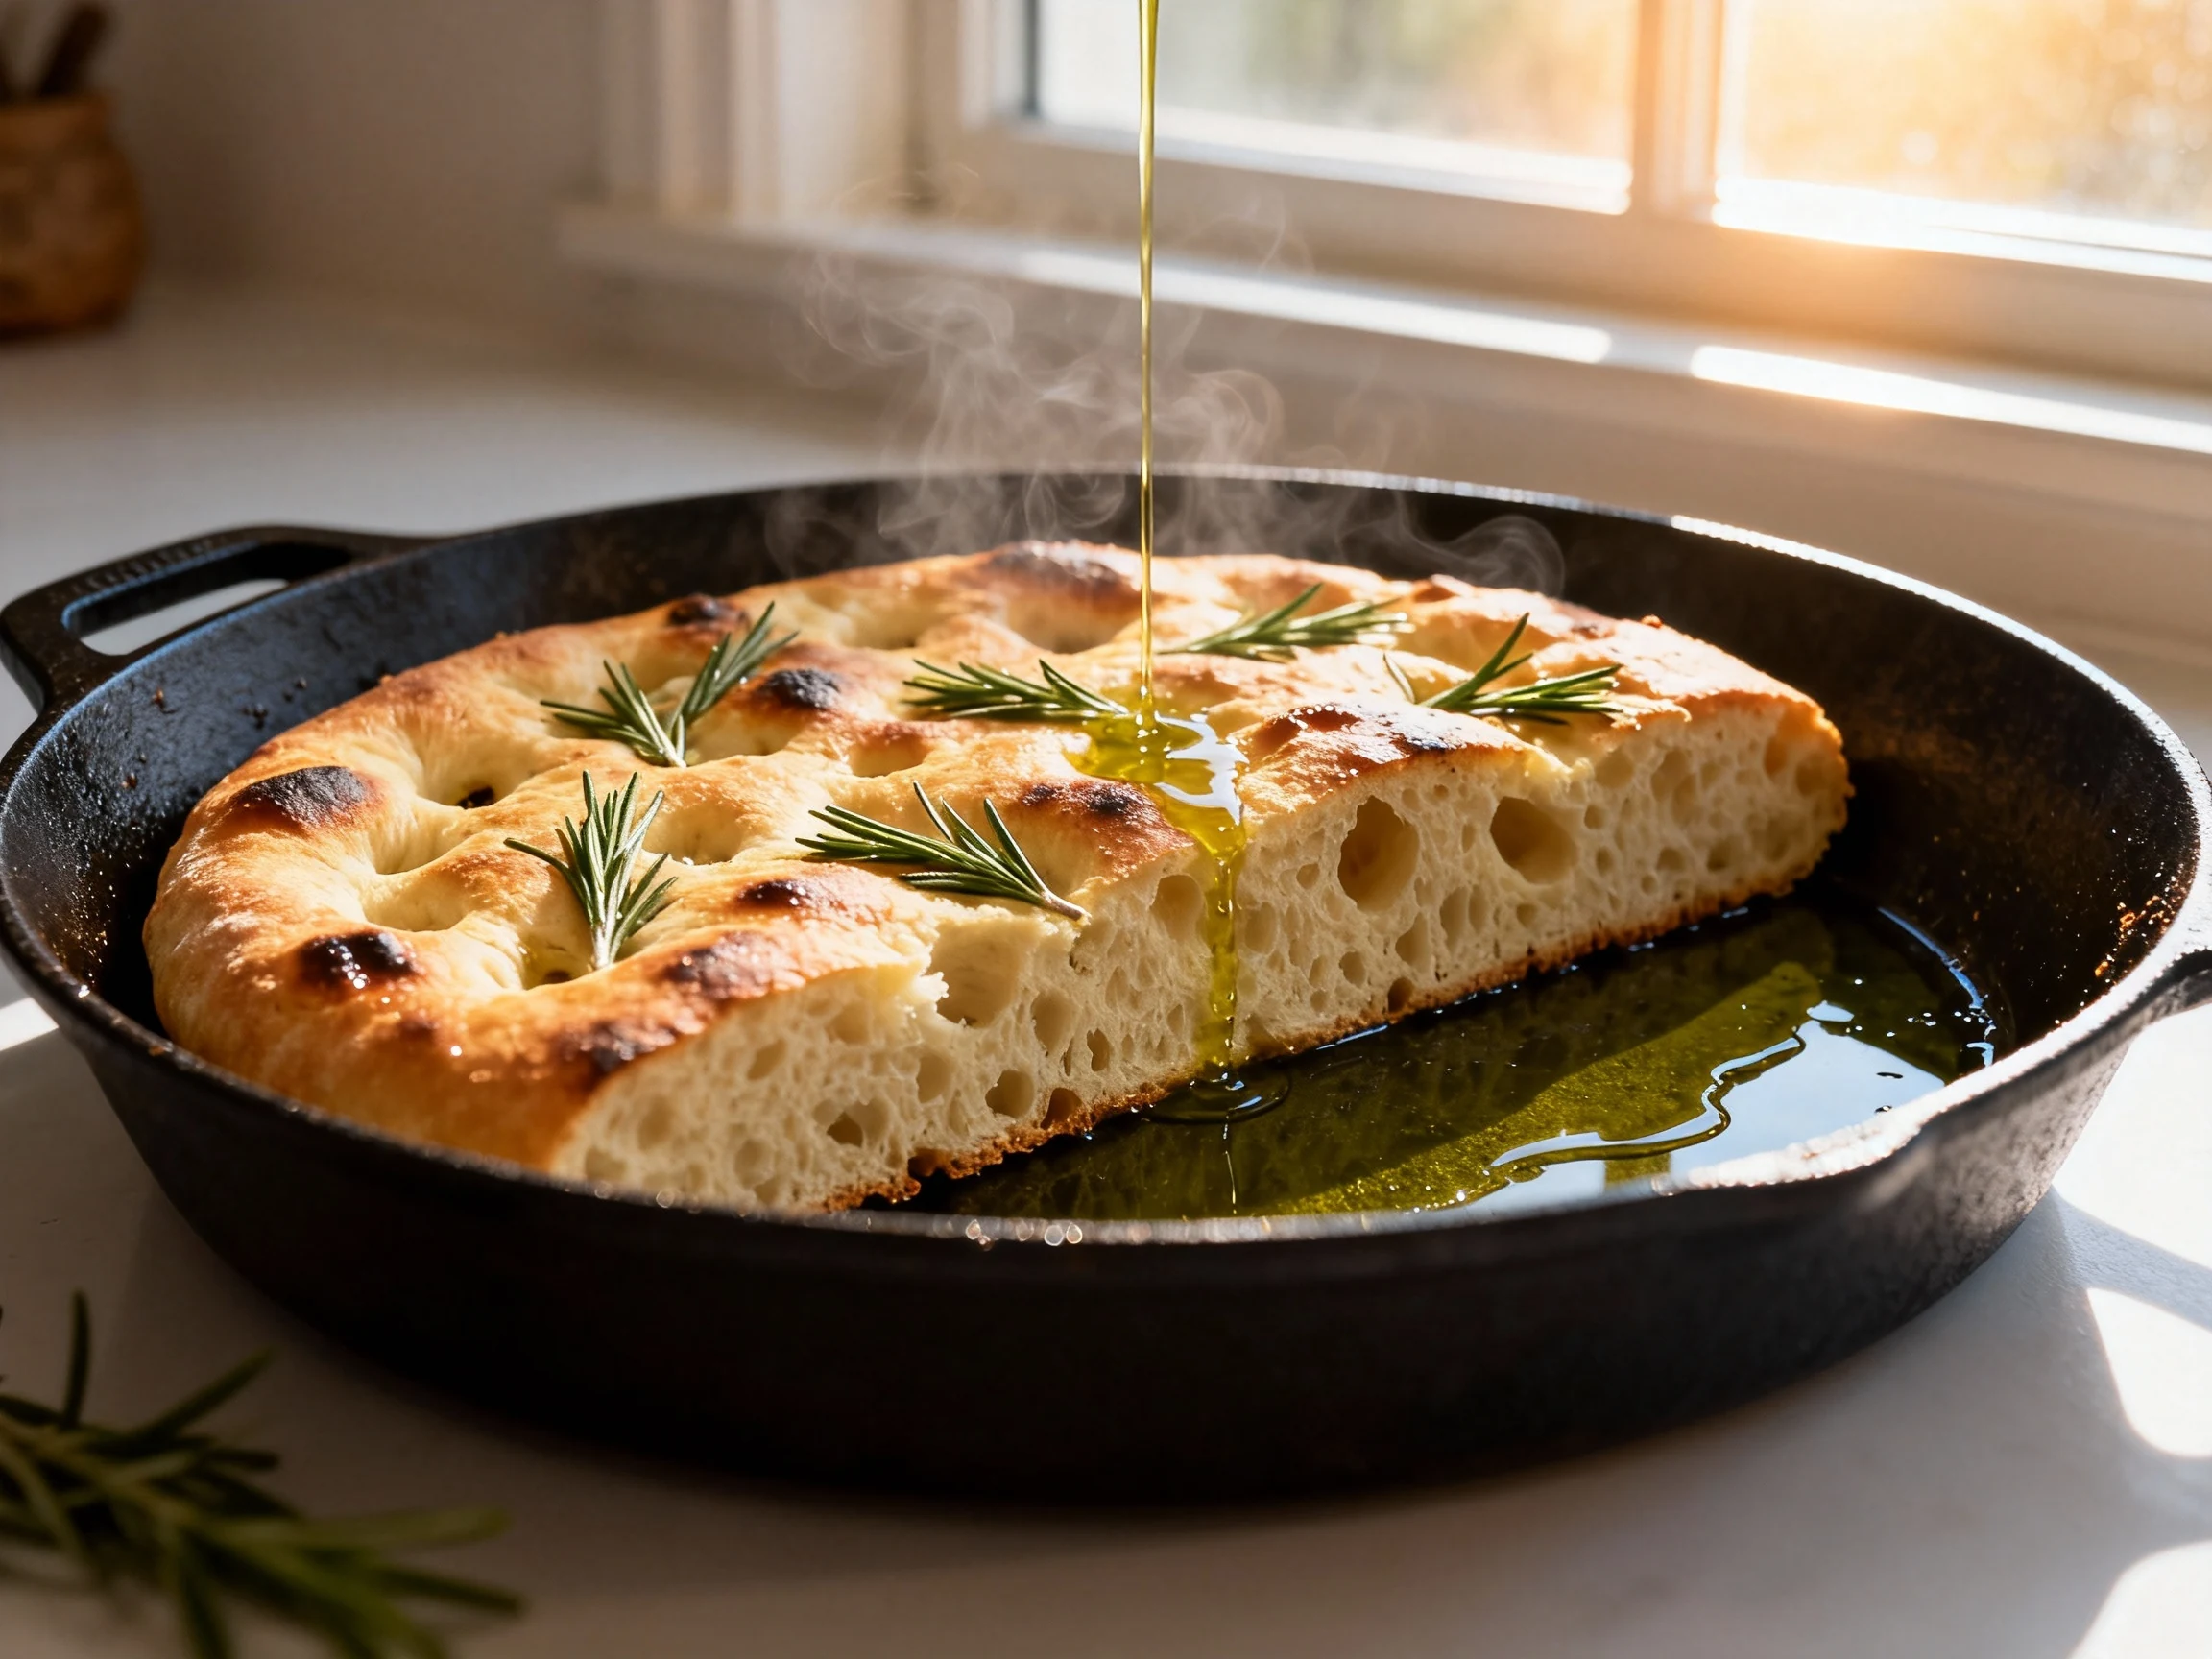
- Brine and dimple: Pour the brine evenly over the dough. With oiled fingers, press straight down to create deep dimples. Scatter rosemary, garlic, tomatoes, olives, and finish with flaky salt.
- Bake: 18–23 minutes until the top is golden and the edges are sizzling. Rotate the pan at 15 minutes if your oven plays favorites.
- Finish: Brush or drizzle a tablespoon of olive oil while hot. Cool 10–15 minutes in the pan before lifting out. Slice into squares and pretend you didn’t just win dinner.
Keeping It Fresh
Room temp: Store in an airtight container or wrapped in foil for up to 2 days. Avoid the fridge—cold air dries it out faster than you can say “why is this tough?”
Reheat to revive crisp: 375°F (190°C) for 8–10 minutes on a sheet pan. A light drizzle of olive oil helps bring back the glossy, crunchy edge.
Freeze: Slice, wrap tightly, and freeze up to 2 months. Reheat from frozen at 400°F (200°C) for 10–12 minutes. It’s your emergency carb plan—use wisely.
Nutritional Perks
Focaccia isn’t a salad, but it’s not a villain either. Olive oil’s monounsaturated fats support heart health. Herbs like rosemary add antioxidants and aroma without extra calories. Pair with protein (grilled chicken, beans, or tuna) and veggies to turn a slice into a balanced plate, IMO.
Estimated per serving (1/12 of a 9×13 pan, without heavy toppings): 220–260 calories, 7–10 g fat, 33–36 g carbs, 6–8 g protein, sodium varies with your hand on the salt. Not medical advice, just common sense and good taste.
What Not to Do
- Don’t skimp on oil in the pan. That golden, crispy bottom crust needs fat to fry. Dry pan = sad bread.
- Don’t rush the proof. If the dough isn’t puffy, your crumb will be tight. Give it time. It’s bread, not a speed date.
- Don’t over-flour your hands. Use olive oil to handle sticky dough. Extra flour can toughen the surface and dull flavor.
- Don’t overload toppings. Wet toppings can weigh down the dough. Keep it balanced so the bread still rises and crisps.
- Don’t slice piping hot. Rest at least 10 minutes to let steam settle. Otherwise, you’ll compress the crumb and lose texture.
- Don’t bake at too low a temp. Heat is your friend here. Underbaked focaccia tastes pale, inside and out.
Variations You Can Try
- Garlic confit + rosemary: Luxurious and aromatic. Dot the dough with tender garlic cloves and a shower of herbs.
- Tomato-olive: Halved cherry tomatoes and pitted Kalamatas for a briny, juicy bite. Add lemon zest for brightness.
- Caramelized onion + thyme: Sweet-savory meets herbaceous. Finish with a drizzle of balsamic reduction.
- Potato + rosemary: Paper-thin potato slices layered on top, brushed with oil and sprinkled with salt. Rustic and hearty.
- Cheesy edges: Sprinkle grated Parmesan around the perimeter for a frico-like crispy ring. Yes, it’s as good as it sounds.
- Whole-wheat boost: Swap 25–30% of the flour with whole wheat. Expect a slightly denser crumb, but great flavor.
- Sourdough upgrade: Replace yeast with 100 g active starter and adjust water to 350 g. Bulk rise until doubled; timing varies.
- Gluten-free attempt: Use a 1:1 gluten-free blend and add 1 tsp psyllium husk or xanthan gum for structure. Bake time may increase.

FAQ
Do I need bread flour, or can I use all-purpose?
Bread flour gives a chewier texture and a bit more lift thanks to its higher protein. All-purpose works and still makes excellent focaccia—just expect a slightly softer crumb. If you’ve got both, use bread flour; if not, don’t sweat it.
Why is my focaccia dense instead of airy?
Common culprits: under-proofing, too little hydration, or overloading toppings. Make sure the dough doubles during bulk, looks puffy before baking, and keep hydration near 70–75%. Also, handle gently—you’re encouraging bubbles, not deflating them.
What does the brine actually do?
The brine adds surface moisture and salt, helping with blistered crust and deeper flavor. It also improves dimensionality in the top layer, creating those shiny, flavorful “pools.” Skipping it won’t ruin the bread, but you’ll miss the wow factor.
Can I bake it in cast iron instead of a sheet pan?
Absolutely. A 10–12-inch cast-iron skillet delivers an extra-crispy bottom and beautiful browning. Preheat the skillet for a few minutes if you want even more sizzle, then oil generously before adding the dough.
How do I time this around a busy day?
Cold-ferment overnight (or up to 24 hours) so the dough is ready when you are. Shape after work, proof 45–60 minutes, dimple and bake. TBH, the hands-on time is minimal—most of the magic happens while you do other things.
Can I make it vegan?
Yes. Just swap the honey for sugar or maple syrup, or skip it. The rest is already plant-based, and olive oil brings all the richness you want.
How can I get maximum crisp?
Use a well-oiled metal pan, bake at 450°F, and don’t crowd the oven. Finish with a quick rest, then reheat slices on a hot sheet pan if needed. A little extra oil brushed on top while hot also helps.
How do I avoid soggy focaccia with juicy toppings?
Pat toppings dry, cut tomatoes in half, and avoid heavy layers. Add a light drizzle of oil and a sprinkle of salt to concentrate flavors without drowning the dough. Reserve excess moisture-heavy ingredients for serving.
In Conclusion
Focaccia is proof that great bread doesn’t have to be complicated. With high hydration, a gentle touch, and a brine-and-dimple finish, you can turn pantry staples into something that feels special every single time. Whether it’s a quick weeknight win or your showpiece for guests, this method delivers consistent, craveable results. Keep olive oil handy, trust the process, and let the oven do the heavy lifting—your kitchen just got a whole lot more delicious.
Printable Recipe Card
Want just the essential recipe details without scrolling through the article? Get our printable recipe card with just the ingredients and instructions.