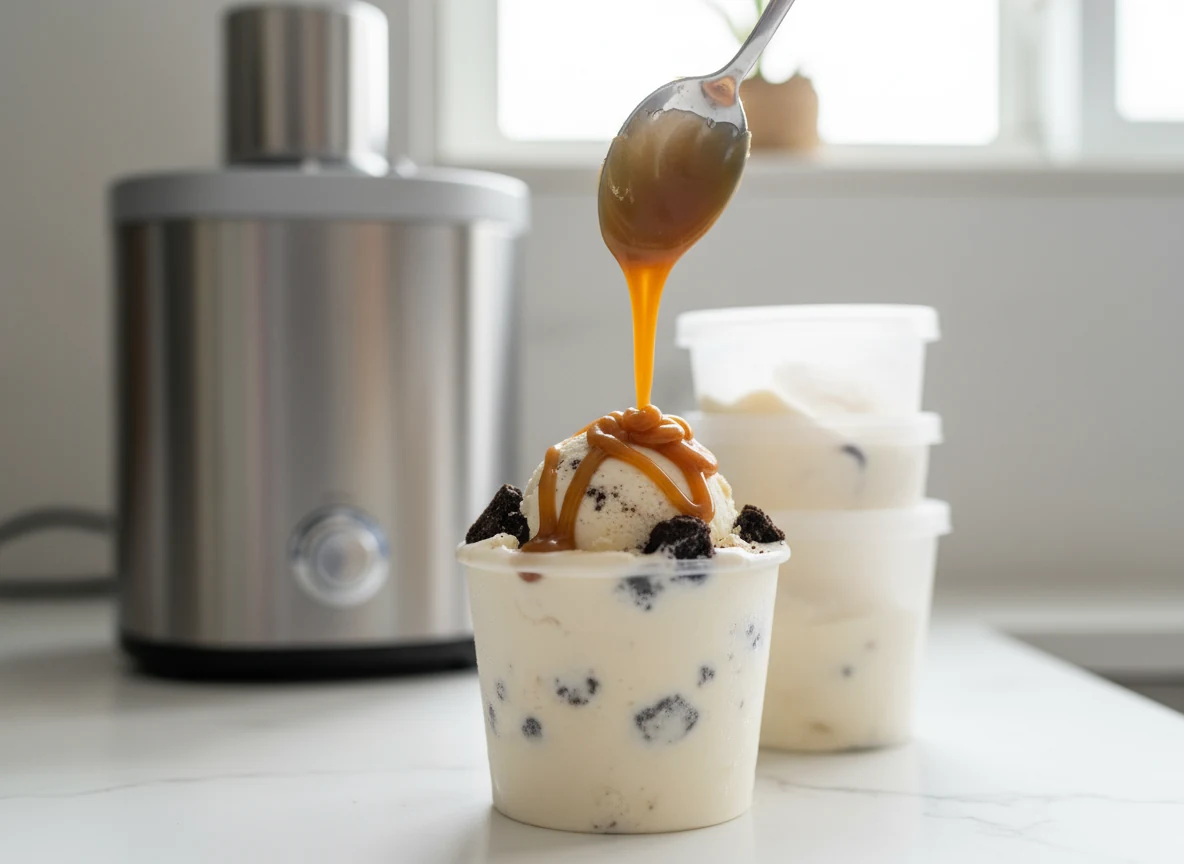
Ninja Creami Ice Cream Recipes — Big Flavor Low Effort
Make scoop-shop quality at home with fast bases, budget-friendly staples, and crowd-pleasing mix-ins fit for weeknights and parties.
If you think premium ice cream demands a chef, a churner, and a second mortgage, think again. The Ninja Creami turns your freezer into a flavor factory, minus the drama. With the right base and a few clutch mix-ins, you can spin out pints that embarrass store-bought—faster than your group chat can say “bring dessert.” I’ll show you how to nail texture, boost nutrition, and still keep it stupid-simple. Ready to upgrade your freezer game without breaking your brain?
Why This Recipe Works
Great ice cream isn’t magic; it’s math with delicious consequences. We balance fat for creaminess, sugar for softness, and solids (like milk powder) for body so your pint doesn’t freeze into a brick. The Ninja Creami’s blade doesn’t churn air—it microscrapes the frozen base, then “respins” to smooth it out. That means your mix needs the right ratio to avoid crumbly snow.
We use a flexible master base you can tweak: classic dairy, chocolate, fruit-forward, protein-packed, or dairy-free. The secret sauce? A pinch of stabilizer (optional), proper freezing time, and mix-ins added after a smooth spin so they don’t shred into oblivion.
What You’ll Need (Ingredients)
Master Vanilla Base (1 pint)
- 1 cup (240 ml) whole milk
- 1/2 cup (120 ml) heavy cream
- 1/4 cup (50 g) granulated sugar
- 1 tablespoon (8 g) milk powder (for body; optional but clutch)
- 1 teaspoon vanilla extract
- Pinch of salt
- 1/8 teaspoon xanthan gum (optional; improves scoopability)
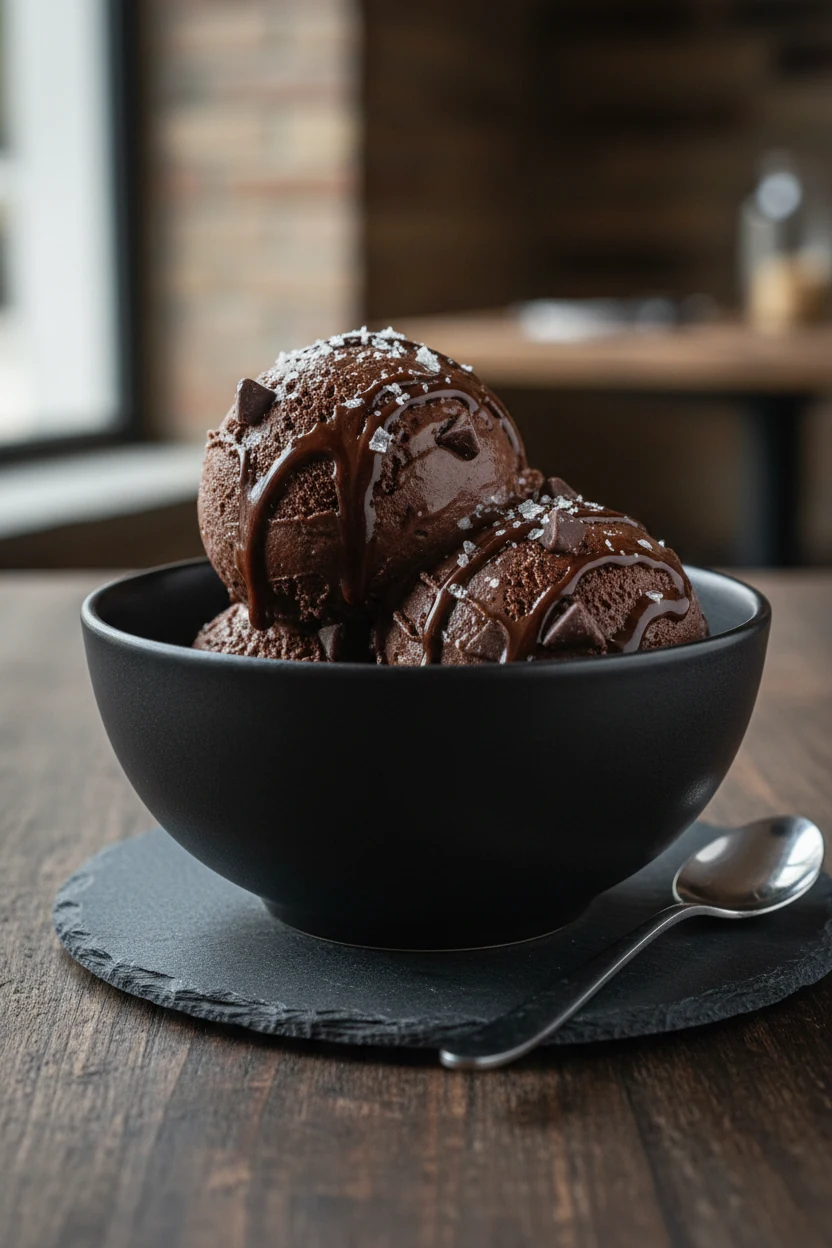
Chocolate Variation
- Master Vanilla Base, minus vanilla
- 2 tablespoons (12 g) Dutch-process cocoa
- 2 tablespoons (30 g) chocolate syrup or 1 oz melted dark chocolate
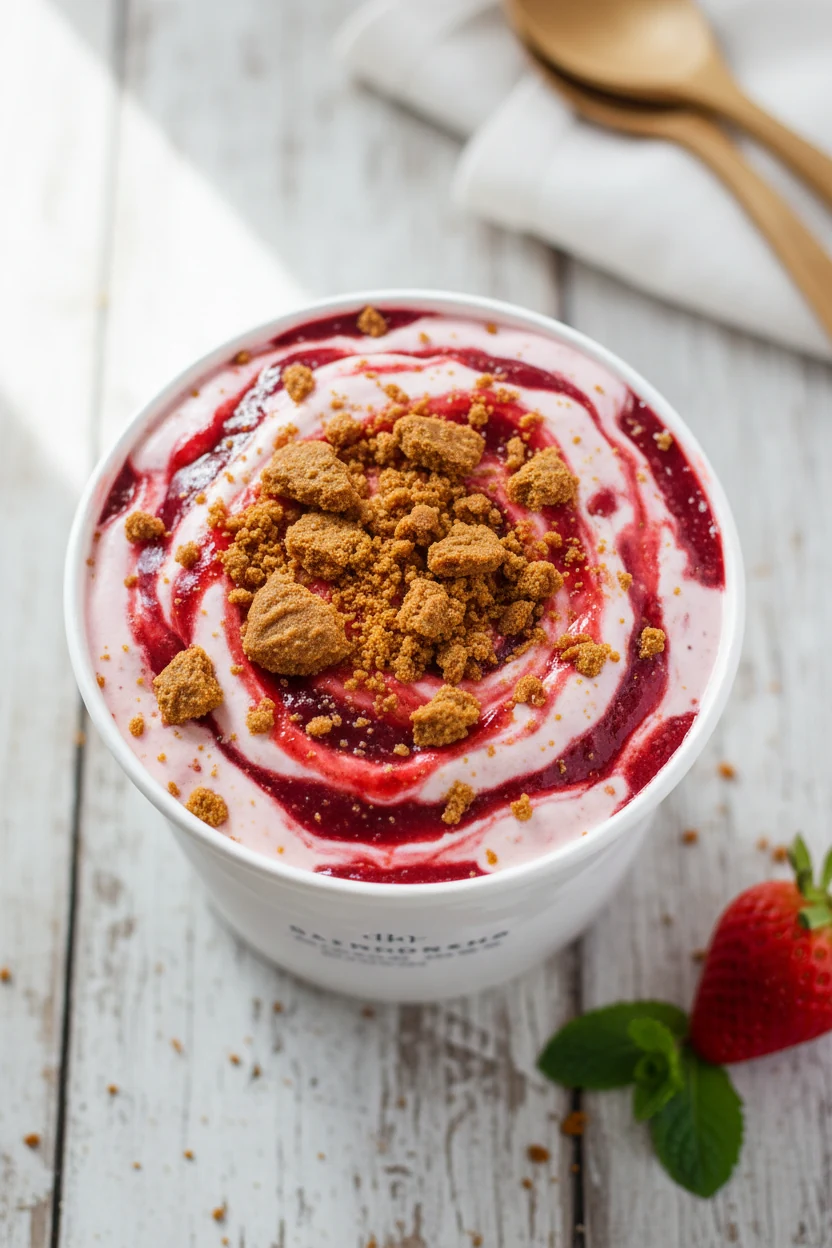
Strawberry Cheesecake Variation
- 3/4 cup (180 ml) whole milk
- 1/2 cup (120 ml) heavy cream
- 2 oz (56 g) cream cheese, softened
- 1/4 cup (50 g) sugar
- 1 cup (140 g) frozen strawberries, thawed and mashed
- 1 tablespoon (8 g) milk powder
- Pinch of salt
Protein Ice Cream (High-Protein)
- 1 cup (240 ml) fairlife or ultrafiltered milk
- 1/2 cup (120 ml) cottage cheese or Greek yogurt
- 1 scoop (25–30 g) vanilla whey or casein
- 2–3 tablespoons (24–36 g) allulose or erythritol blend
- 1 teaspoon vanilla extract
- Pinch of salt
- 1/8 teaspoon xanthan gum (optional)
Dairy-Free Coconut Base
- 1 cup (240 ml) full-fat coconut milk (can)
- 1/2 cup (120 ml) oat milk or almond milk
- 1/4 cup (50 g) sugar or maple syrup
- 1 tablespoon (8 g) coconut milk powder (optional; adds body)
- 1 teaspoon vanilla extract
- Pinch of salt
Favorite Mix-Ins (Choose Your Adventure)
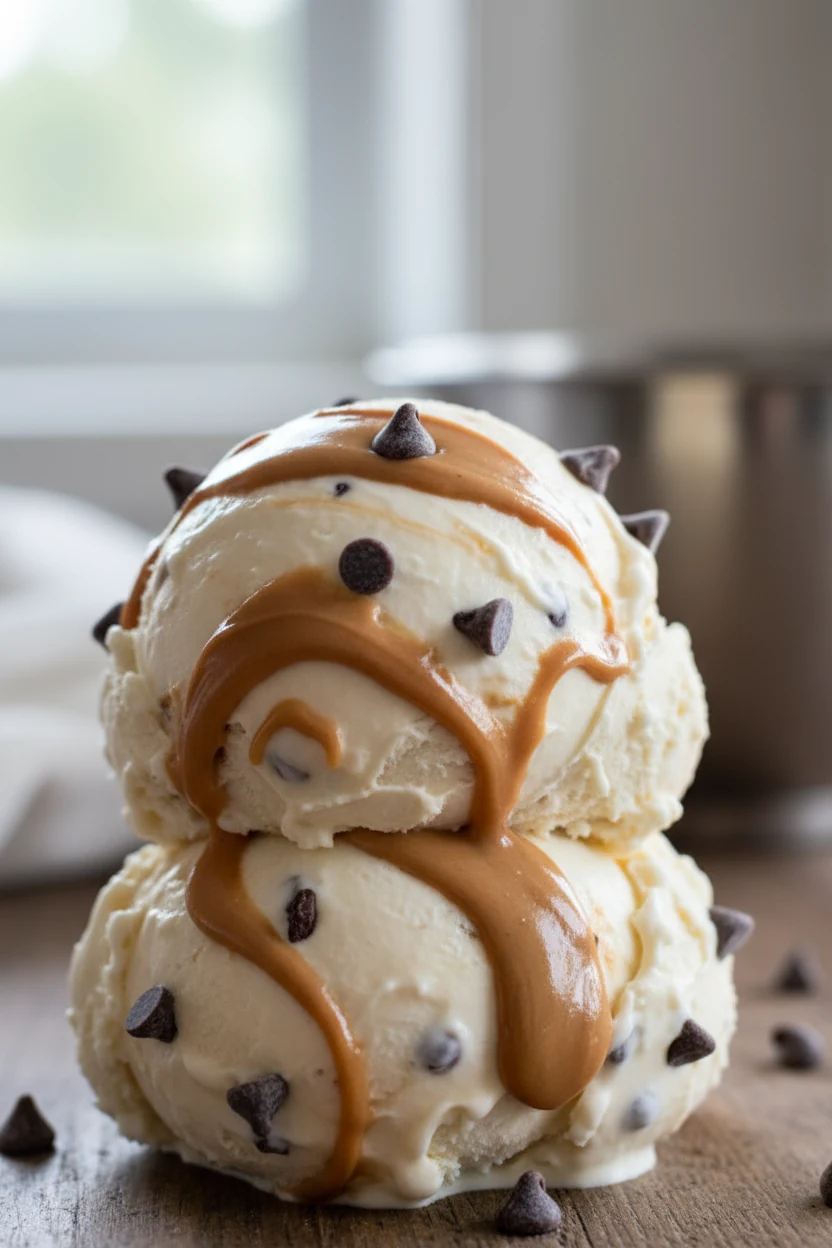
- Crushed cookies (Oreos, Biscoff)
- Chocolate chips or chunks
- Caramel or fudge swirl
- Peanut butter ribbons
- Toasted nuts (pecans, almonds)
- Fruit jams or compotes
- Sprinkles (because joy.)
Cooking Instructions
- Blend the base. In a blender, combine your chosen base ingredients. Blend on medium until sugar dissolves and the mix is silky. No gritty sugar allowed; if you hear crystals, you’re not done.
- Pour and level. Pour the mixture into a Ninja Creami pint. Keep below the max fill line. Smooth the top for even freezing.
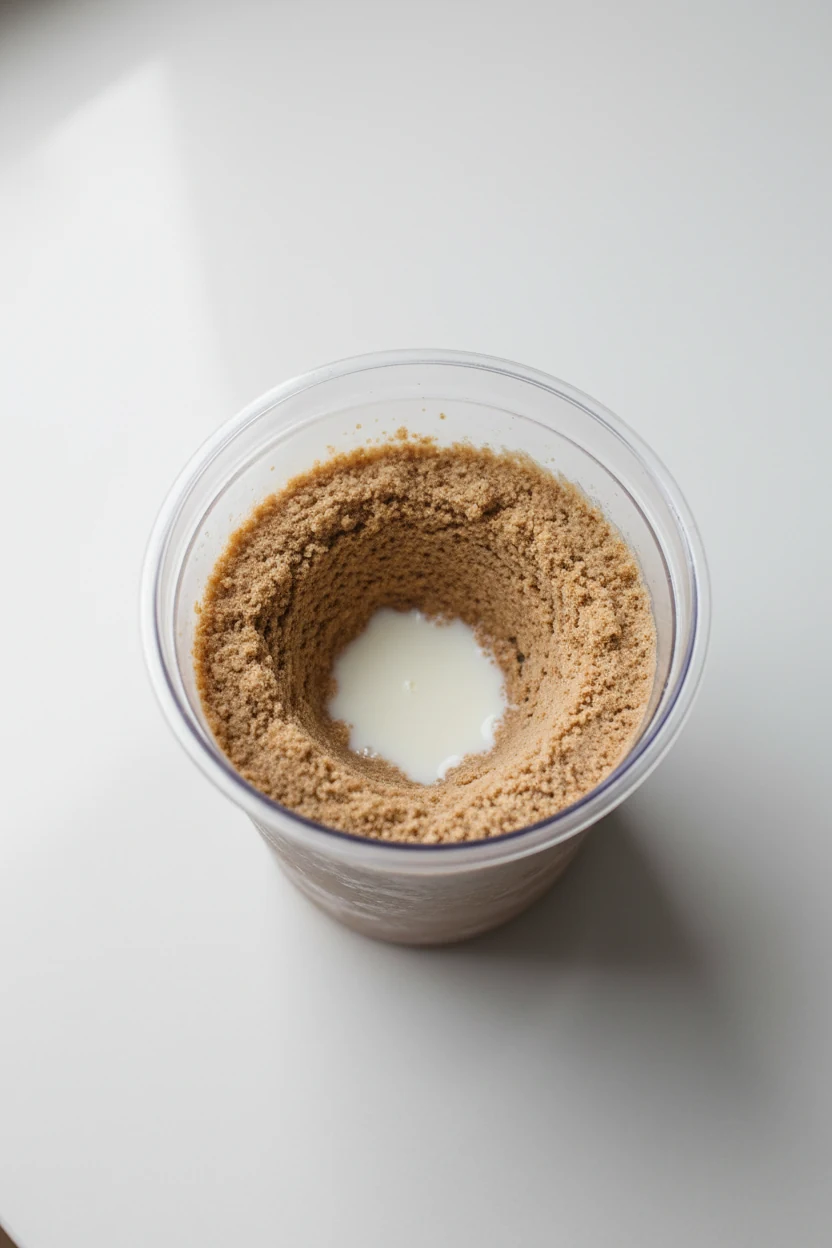
- Freeze solid. Place the lid on and freeze level for 20–24 hours. FYI, partial freezing equals crumb city. Patience pays.
- First spin. Remove the lid, place the pint in the outer bowl, lock the machine, and run the appropriate program: Ice Cream for dairy, Sorbet for fruit-heavy, or Lite Ice Cream for high-protein.
- Assess texture. After the first spin, you might see sandy crumbles. That’s normal. Create a shallow well in the center, add 1–2 tablespoons milk (or liquid matching your base), and run Re-Spin.
- Mix-ins time. When smooth and creamy, add your mix-ins. Use the Mix-In function to distribute chunks without annihilating them. Want swirls? Spoon ribbons of caramel or fudge and pulse Mix-In briefly.
- Serve or firm up. Enjoy right away for soft-serve vibes. For scoopable firmness, refreeze 30–60 minutes. Don’t pretend you’ll wait longer.
- Variation notes:
- Chocolate: Bloom cocoa in warm milk before blending for deeper flavor.
- Strawberry Cheesecake: Blend cream cheese until smooth to avoid tiny tangy pebbles. Use Sorbet or Ice Cream based on fruit ratio.
- Protein: Casein yields creamier texture than whey. If crumbly, add 1–2 tablespoons almond milk and Re-Spin twice.
- Dairy-Free: Coconut base may need 2 Re-Spins; add a splash of oat milk to finish.
Preservation Guide
Leftovers? Wild concept, but okay. Smooth the surface, press parchment onto the top, and snap the lid on. The parchment minimizes ice crystals and freezer funk.
Store pints for up to 2 weeks. Sugar-heavy bases last longer than low-sugar ones. Before serving again, let the pint sit at room temp for 5–10 minutes, then run Re-Spin to restore that creamy magic.
If you plan to add more mix-ins later, keep them separate in a small bag or container. Add after a Re-Spin for best texture. Don’t refreeze melted swirls into the pint—they get icy and sad.
Why This is Good for You
Homemade means control. You choose the sugars, fats, and flavors, not a factory’s “mystery stabilizer” cocktail. Want less sugar? Use allulose or reduce 10–20% and add a spoon of milk powder to keep body.
Craving protein? The high-protein base sneaks in 25–35 g per pint without tasting like gym chalk. Dairy-free? Coconut and oat deliver a creamy plant-based win.
Plus, portion control becomes normal when you prep individual pints. You’re not wrestling a gallon at midnight—unless that’s your cardio, no judgment.
Pitfalls to Watch Out For
- Under-freezing: If the center is slushy, the blade can’t microscrape cleanly. Freeze 20–24 hours. Overnight sometimes isn’t enough—trust the clock.
- Overfilling: The max fill line exists for a reason. Overfill = uneven freeze = weird texture. Keep headspace.
- Skimping on sugar: Going ultra low-sugar without compensating leads to brittle ice shards. Use allulose or add milk powder for body.
- Wrong program: Protein and fruit bases behave differently. Use Lite for protein, Sorbet for fruit-heavy mixes, or you’ll chase respins forever.
- Mix-ins too soon: Don’t add chunks before you reach smooth. They’ll pulverize into dust. Save them for the Mix-In cycle.
- Ignoring salt: A pinch of salt makes flavors pop. No, it won’t make your ice cream salty. It makes it vivid.
Alternatives
- No milk powder? Use 1 tablespoon sweetened condensed milk or 1–2 teaspoons cornstarch slurry (heated with a bit of milk) to add body.
- No xanthan? Skip it, or use 1/4 teaspoon gelatin bloomed in warm milk. Stabilizers help scoopability but aren’t mandatory.
- Lower fat: Swap half the cream for half-and-half, then expect to add 1–2 Re-Spins. Texture will be lighter—still great.
- Vegan chocolate: Coconut milk base + Dutch cocoa + maple syrup = decadent. Add chopped dairy-free dark chocolate on Mix-In.
- Quick fruit sorbet: Blend 2 cups frozen fruit with 1/4 cup sugar and a splash of lemon. Freeze and run Sorbet. IMO, mango is elite.
FAQ
How long should I freeze the base before spinning?
Freeze the pint level for 20–24 hours. If the center isn’t fully solid, the blade creates uneven crumbs. Plan ahead—prep a couple pints so you’re never caught waiting.
Why is my ice cream crumbly after the first spin?
That’s normal. Add 1–2 tablespoons of liquid (milk, coconut milk, etc.) to the center and hit Re-Spin. If it’s still dry, repeat. Protein and low-sugar bases often need two respins.
Which milk works best for creamy texture?
Whole milk + heavy cream is the gold standard. For lighter versions, use half-and-half or ultrafiltered milk. Dairy-free? Full-fat coconut milk wins on creaminess; oat gives a neutral vibe.
Can I use alternative sweeteners like allulose or erythritol?
Yes. Allulose is excellent; it depresses freezing and keeps pints scoopable. Erythritol can taste cool and crystallize; blend with a bit of allulose or add milk powder to compensate.
When should I add mix-ins?
Add them after the base is smooth—use the Mix-In function. If you add chunks early, they’ll get shredded. For swirls, spoon ribbons and pulse Mix-In briefly.
Do I need xanthan gum or stabilizers?
No, but a tiny amount improves texture, especially with low sugar or dairy-free bases. If you prefer clean-label, bump milk powder or use condensed milk for body. Your pint, your rules.
How do I clean the Ninja Creami correctly?
Disassemble the lid and blade, rinse immediately, and wash with warm soapy water. Dry thoroughly to prevent residue. Pro tip: Check the blade housing for hidden gunk—your future self will thank you.
Can I refreeze after serving?
Yes. Smooth the top, press parchment, and seal. Next time, let it sit 5–10 minutes and run Re-Spin. Texture won’t be exactly first-day perfect but still big-time delicious.
What’s the best way to make a lighter, lower-calorie pint?
Use ultrafiltered milk, swap part of the cream for half-and-half, and sweeten with allulose. Add a small amount of xanthan or milk powder for body. Keep expectations realistic—lower fat equals lighter mouthfeel.
Can I make coffee ice cream?
Absolutely. Add 2 teaspoons instant espresso to the master base or steep cold brew into the milk. Mix in chocolate chunks or caramel swirl if you’re feeling fancy. Caffeine plus dessert? Dangerous, but worth it.
Wrapping Up
The Ninja Creami thrives on smart ratios, proper freezing, and strategic mix-ins. With a master base and a couple riffs, you can crank out pints that wreck your favorite brand—on a Tuesday. Keep sugar and solids balanced, respect the freeze, and use Re-Spin like a pro. Then flex a custom flavor, because FYI, your kitchen just became the best ice cream shop in town.
Grab a pint container, pick a base, and make a batch tonight. Tomorrow, you’ll scoop silky, legit ice cream that tastes like you stole the recipe from a pastry chef. You didn’t. You just followed a system—and the system works.
Printable Recipe Card
Want just the essential recipe details without scrolling through the article? Get our printable recipe card with just the ingredients and instructions.