Sugar Free Cake Mix Recipes: Chocolate Peanut Butter Bars That Taste Illegal
Chewy, fudgy bars with a peanut butter swirl, made fast from cake mix and pantry staples, no sugar spikes.
You know that moment when you want dessert, but you also don’t want a dessert that makes you feel like you need a nap and a life coach? These bars solve that problem. They hit like a bakery treat, but they’re built from a sugar free cake mix and a few power-player ingredients. You get deep chocolate, salty peanut butter, and that dense, chewy bite that makes people “accidentally” take a second square. And yes, someone will ask where you bought them, which is hilarious because you basically assembled them.
Why You’ll Love This Recipe
This recipe is ridiculously fast, which means you can make it on a weeknight and still pretend you planned ahead. The texture lands in that sweet spot between brownie and cookie bar, so nobody feels cheated. It’s also flexible: you can make it more fudgy, more cakey, or more peanut-butter-forward depending on your mood. And because you start with a sugar free mix, it’s easier to keep the sweetness under control without doing advanced kitchen math.
- Big flavor, low effort with a chocolate base that tastes rich, not “diet.”
- One pan situation, so cleanup stays civilized.
- Party-proof because they travel well and slice clean.
- Customizable with crunchy add-ins or extra swirl, your call.
Ingredients Breakdown
Think of this as a smart shortcut recipe. Each ingredient has a job, and none of them are just “vibes.” Choose a sugar free chocolate cake mix you actually like, because it sets the tone for everything else.
- Sugar free chocolate cake mix (about 15 to 16 ounces): the base, flavor, and structure.
- Eggs (2 large): bind everything and add lift.
- Unsweetened cocoa powder (2 tablespoons): deepens the chocolate, makes it taste more grown-up.
- Melted butter (6 tablespoons) or coconut oil: creates chew and richness.
- Plain Greek yogurt (1/3 cup): keeps bars moist and tender.
- Vanilla extract (1 teaspoon): rounds out the sweetness and chocolate.
- Salt (1/4 teaspoon): makes the chocolate pop, not optional IMO.
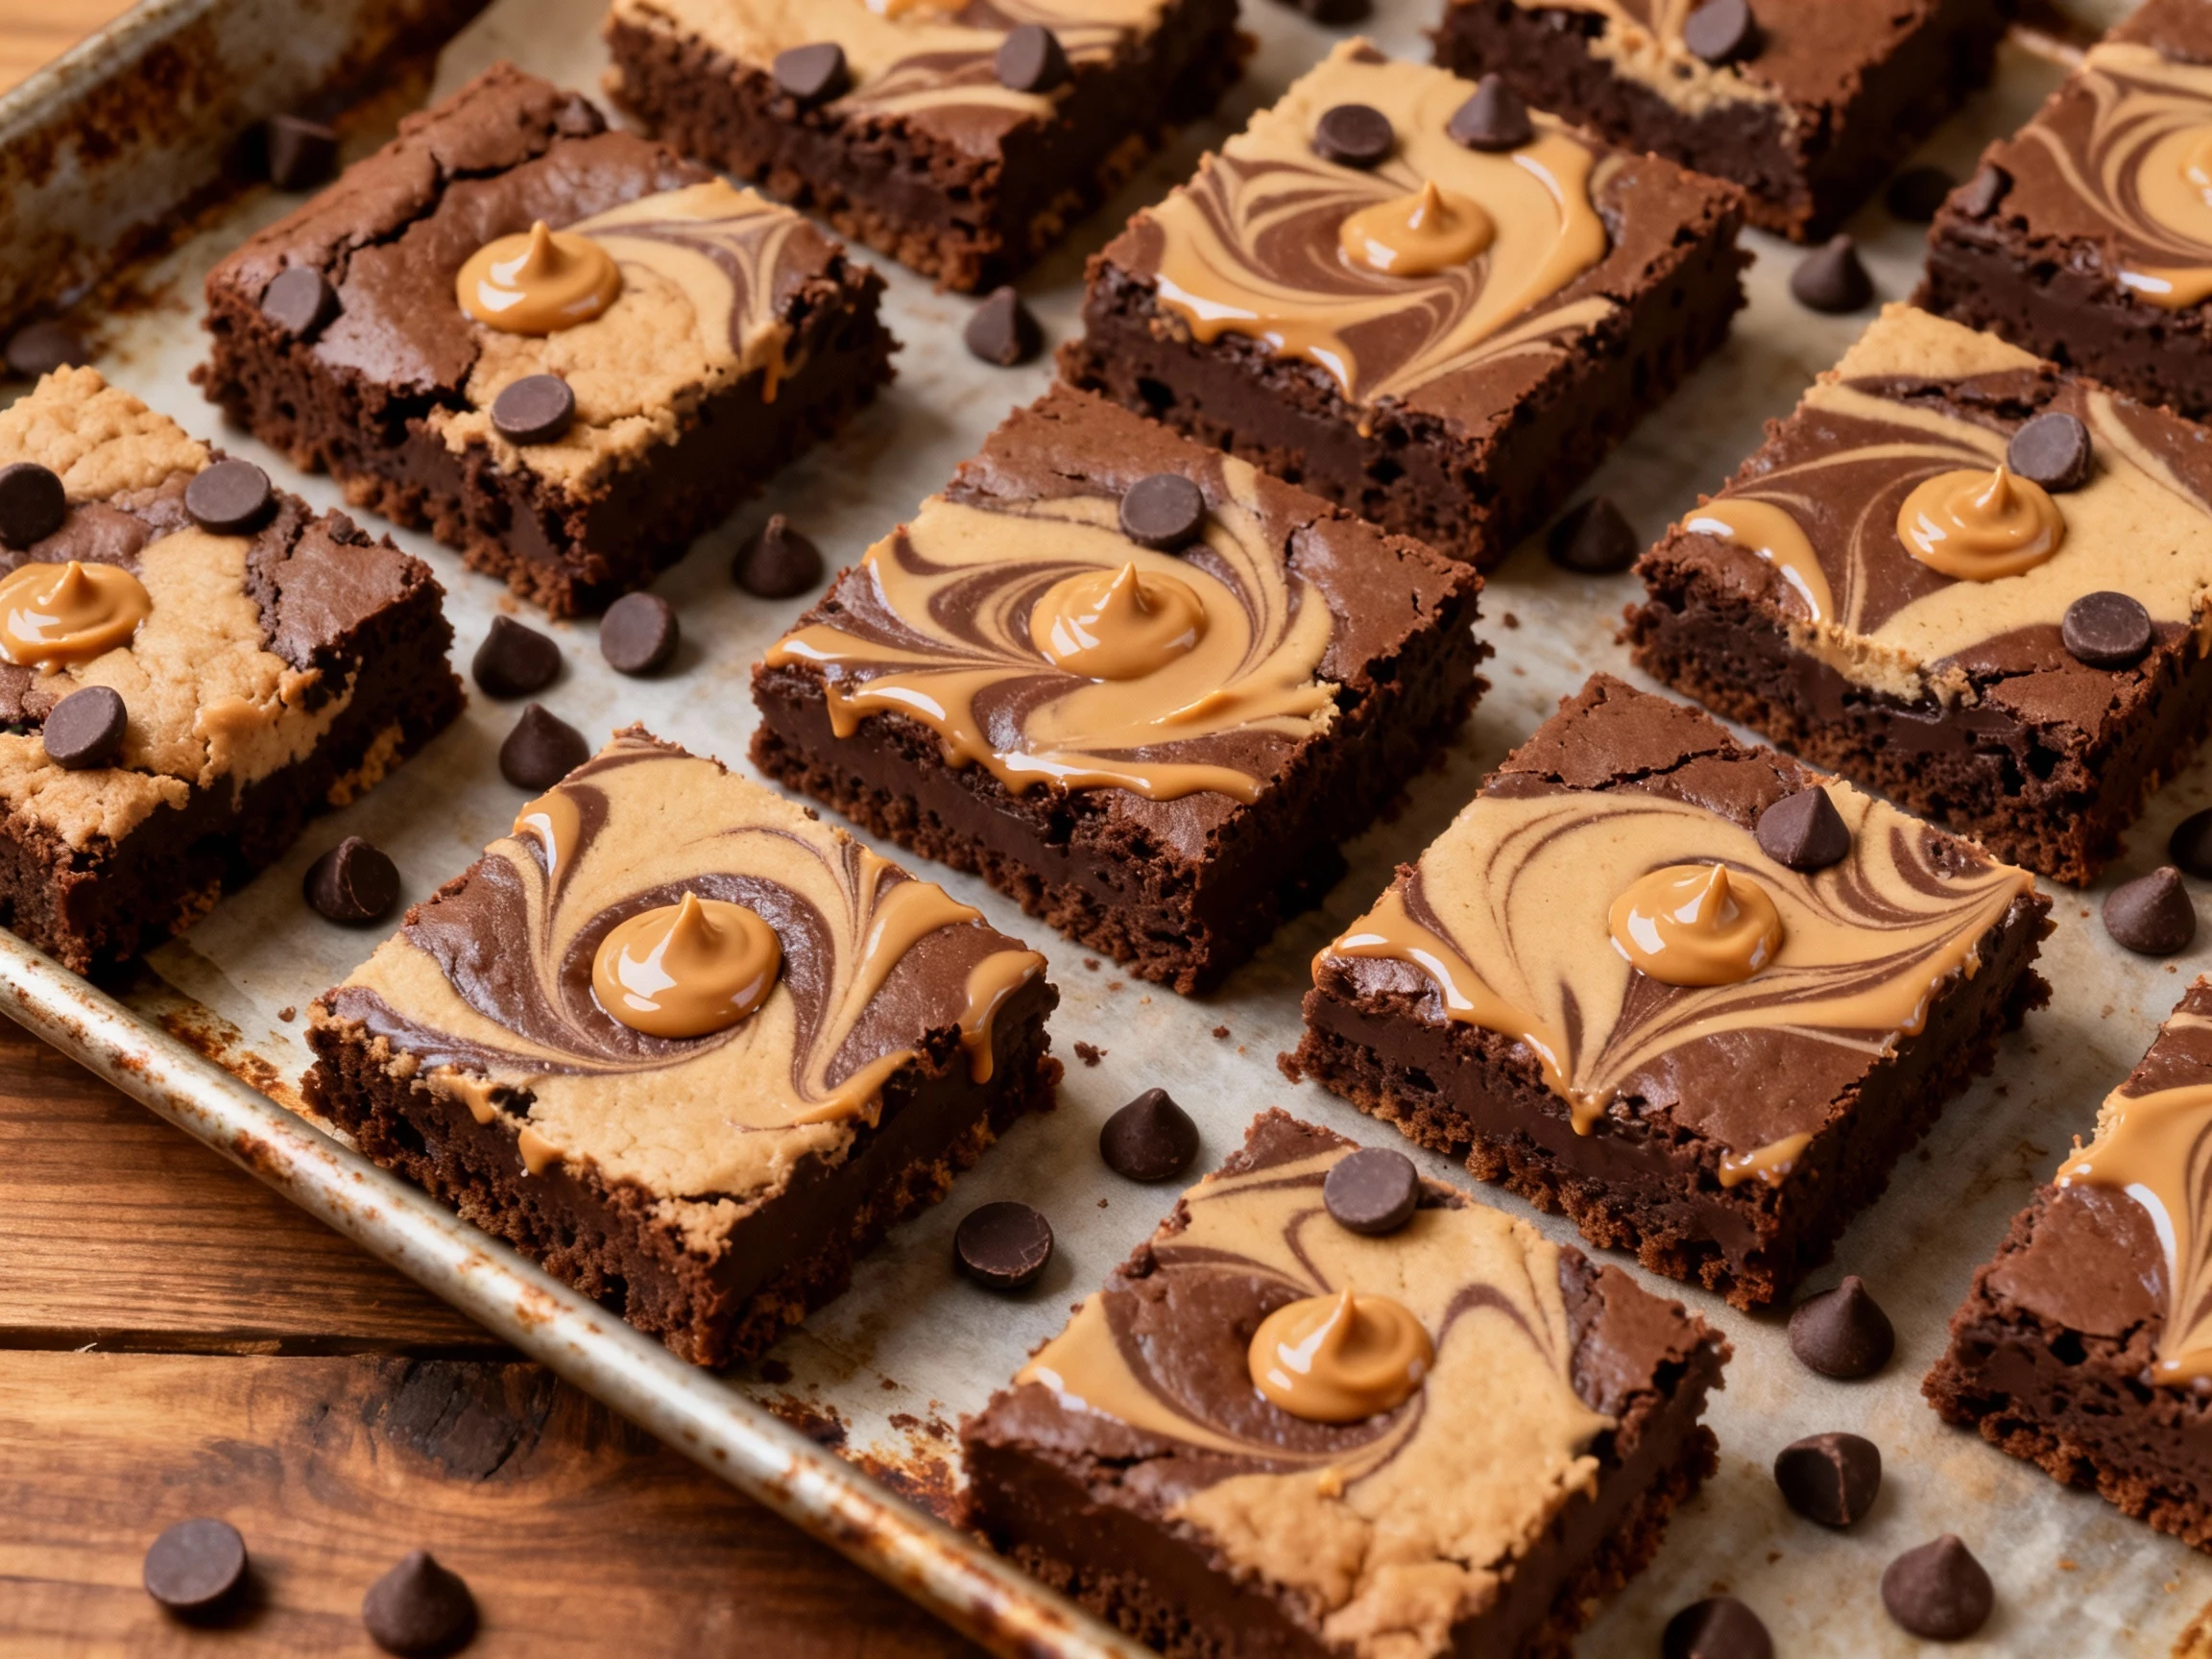
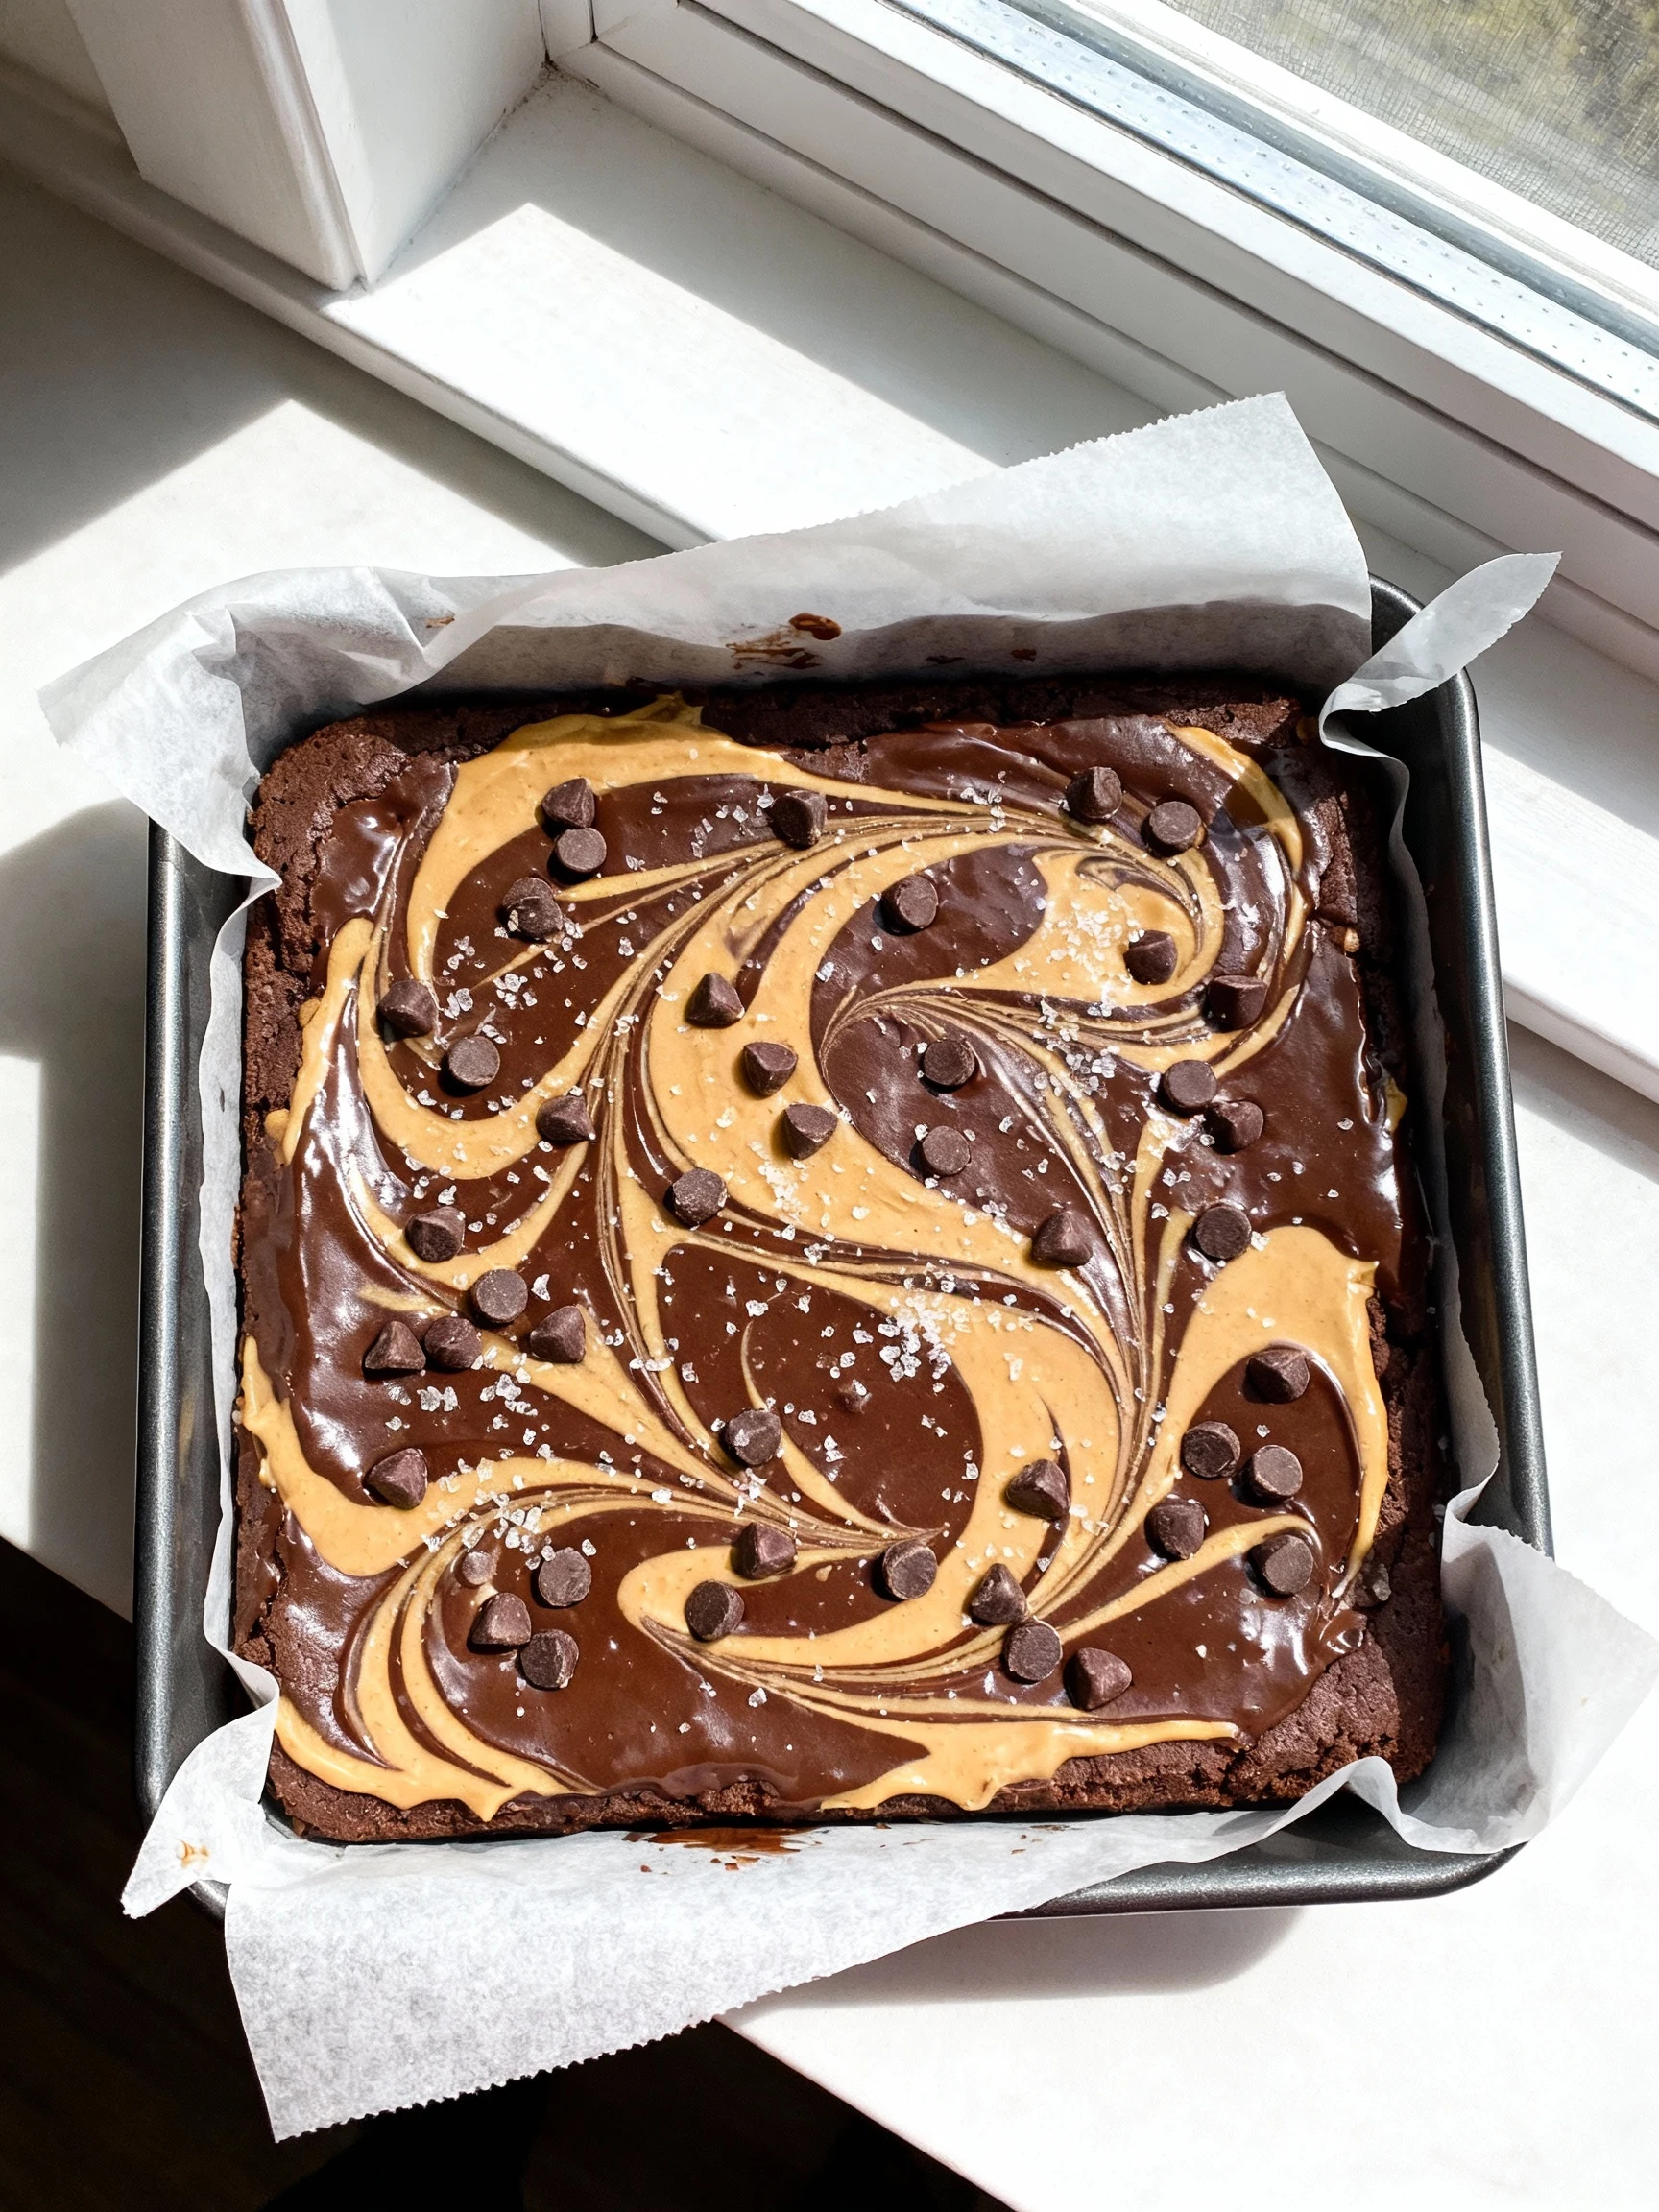
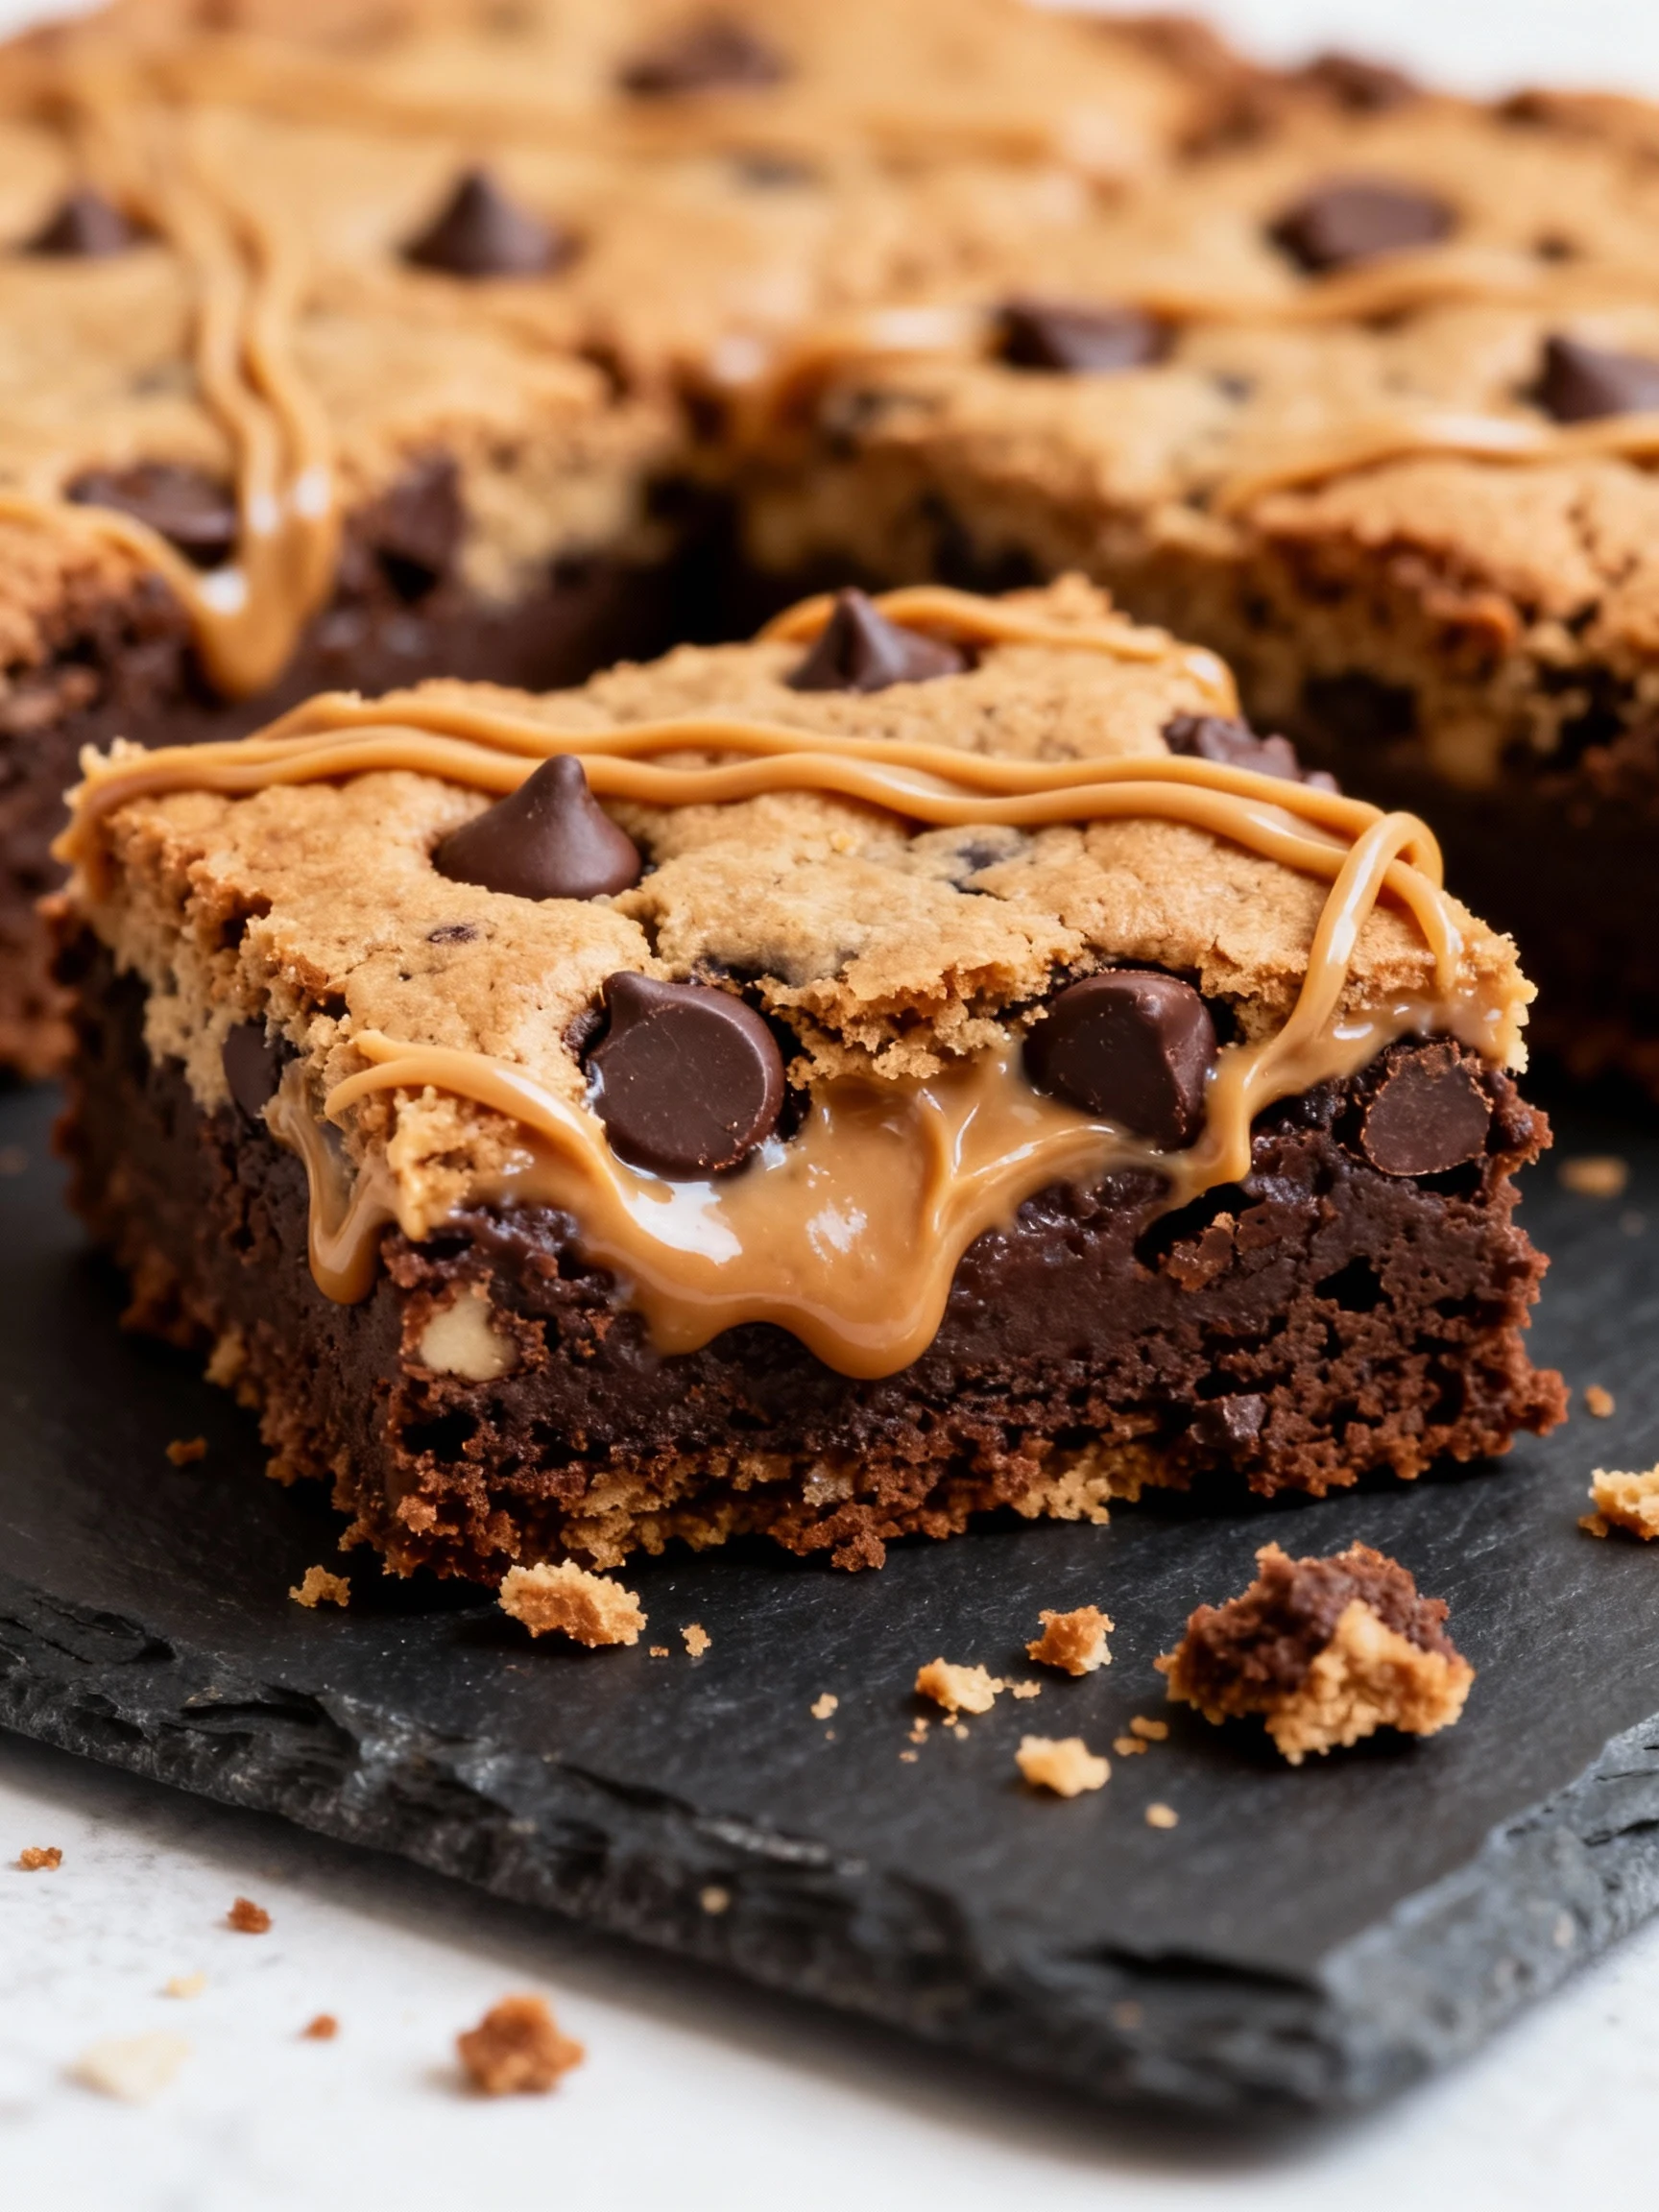
- Peanut butter (1/2 cup): for the swirl, use creamy for pretty ribbons.
- Powdered sugar free sweetener (2 to 3 tablespoons, optional): sweetens the peanut butter swirl if your peanut butter is very natural.
- Sugar free chocolate chips (1/2 cup): melty pockets of chocolate throughout.
- Optional chopped peanuts (1/4 cup): crunch factor for people who like texture.
How to Make It – Instructions
This is a “stir, swirl, bake” recipe. If you can mix a batter and drag a knife through peanut butter, you can make these bars. Your biggest job is not overbaking them.
-
Heat the oven and prep the pan. Set your oven to 350°F. Line an 8×8-inch pan with parchment, leaving a little overhang so you can lift the bars out later.
-
Mix the dry base. In a large bowl, add the sugar free chocolate cake mix and cocoa powder. Whisk them together so you don’t get random bitter cocoa pockets.
-
Add the wet ingredients. Stir in the eggs, melted butter, Greek yogurt, vanilla, and salt. The batter will look thick, like cookie dough pretending to be brownie batter.
-
Fold in the chips. Add the sugar free chocolate chips and mix until evenly distributed. If you want chopped peanuts, add them now too.
-
Press into the pan. Scrape the batter into your lined pan and press it into an even layer. A silicone spatula helps, but clean fingers work too.
-
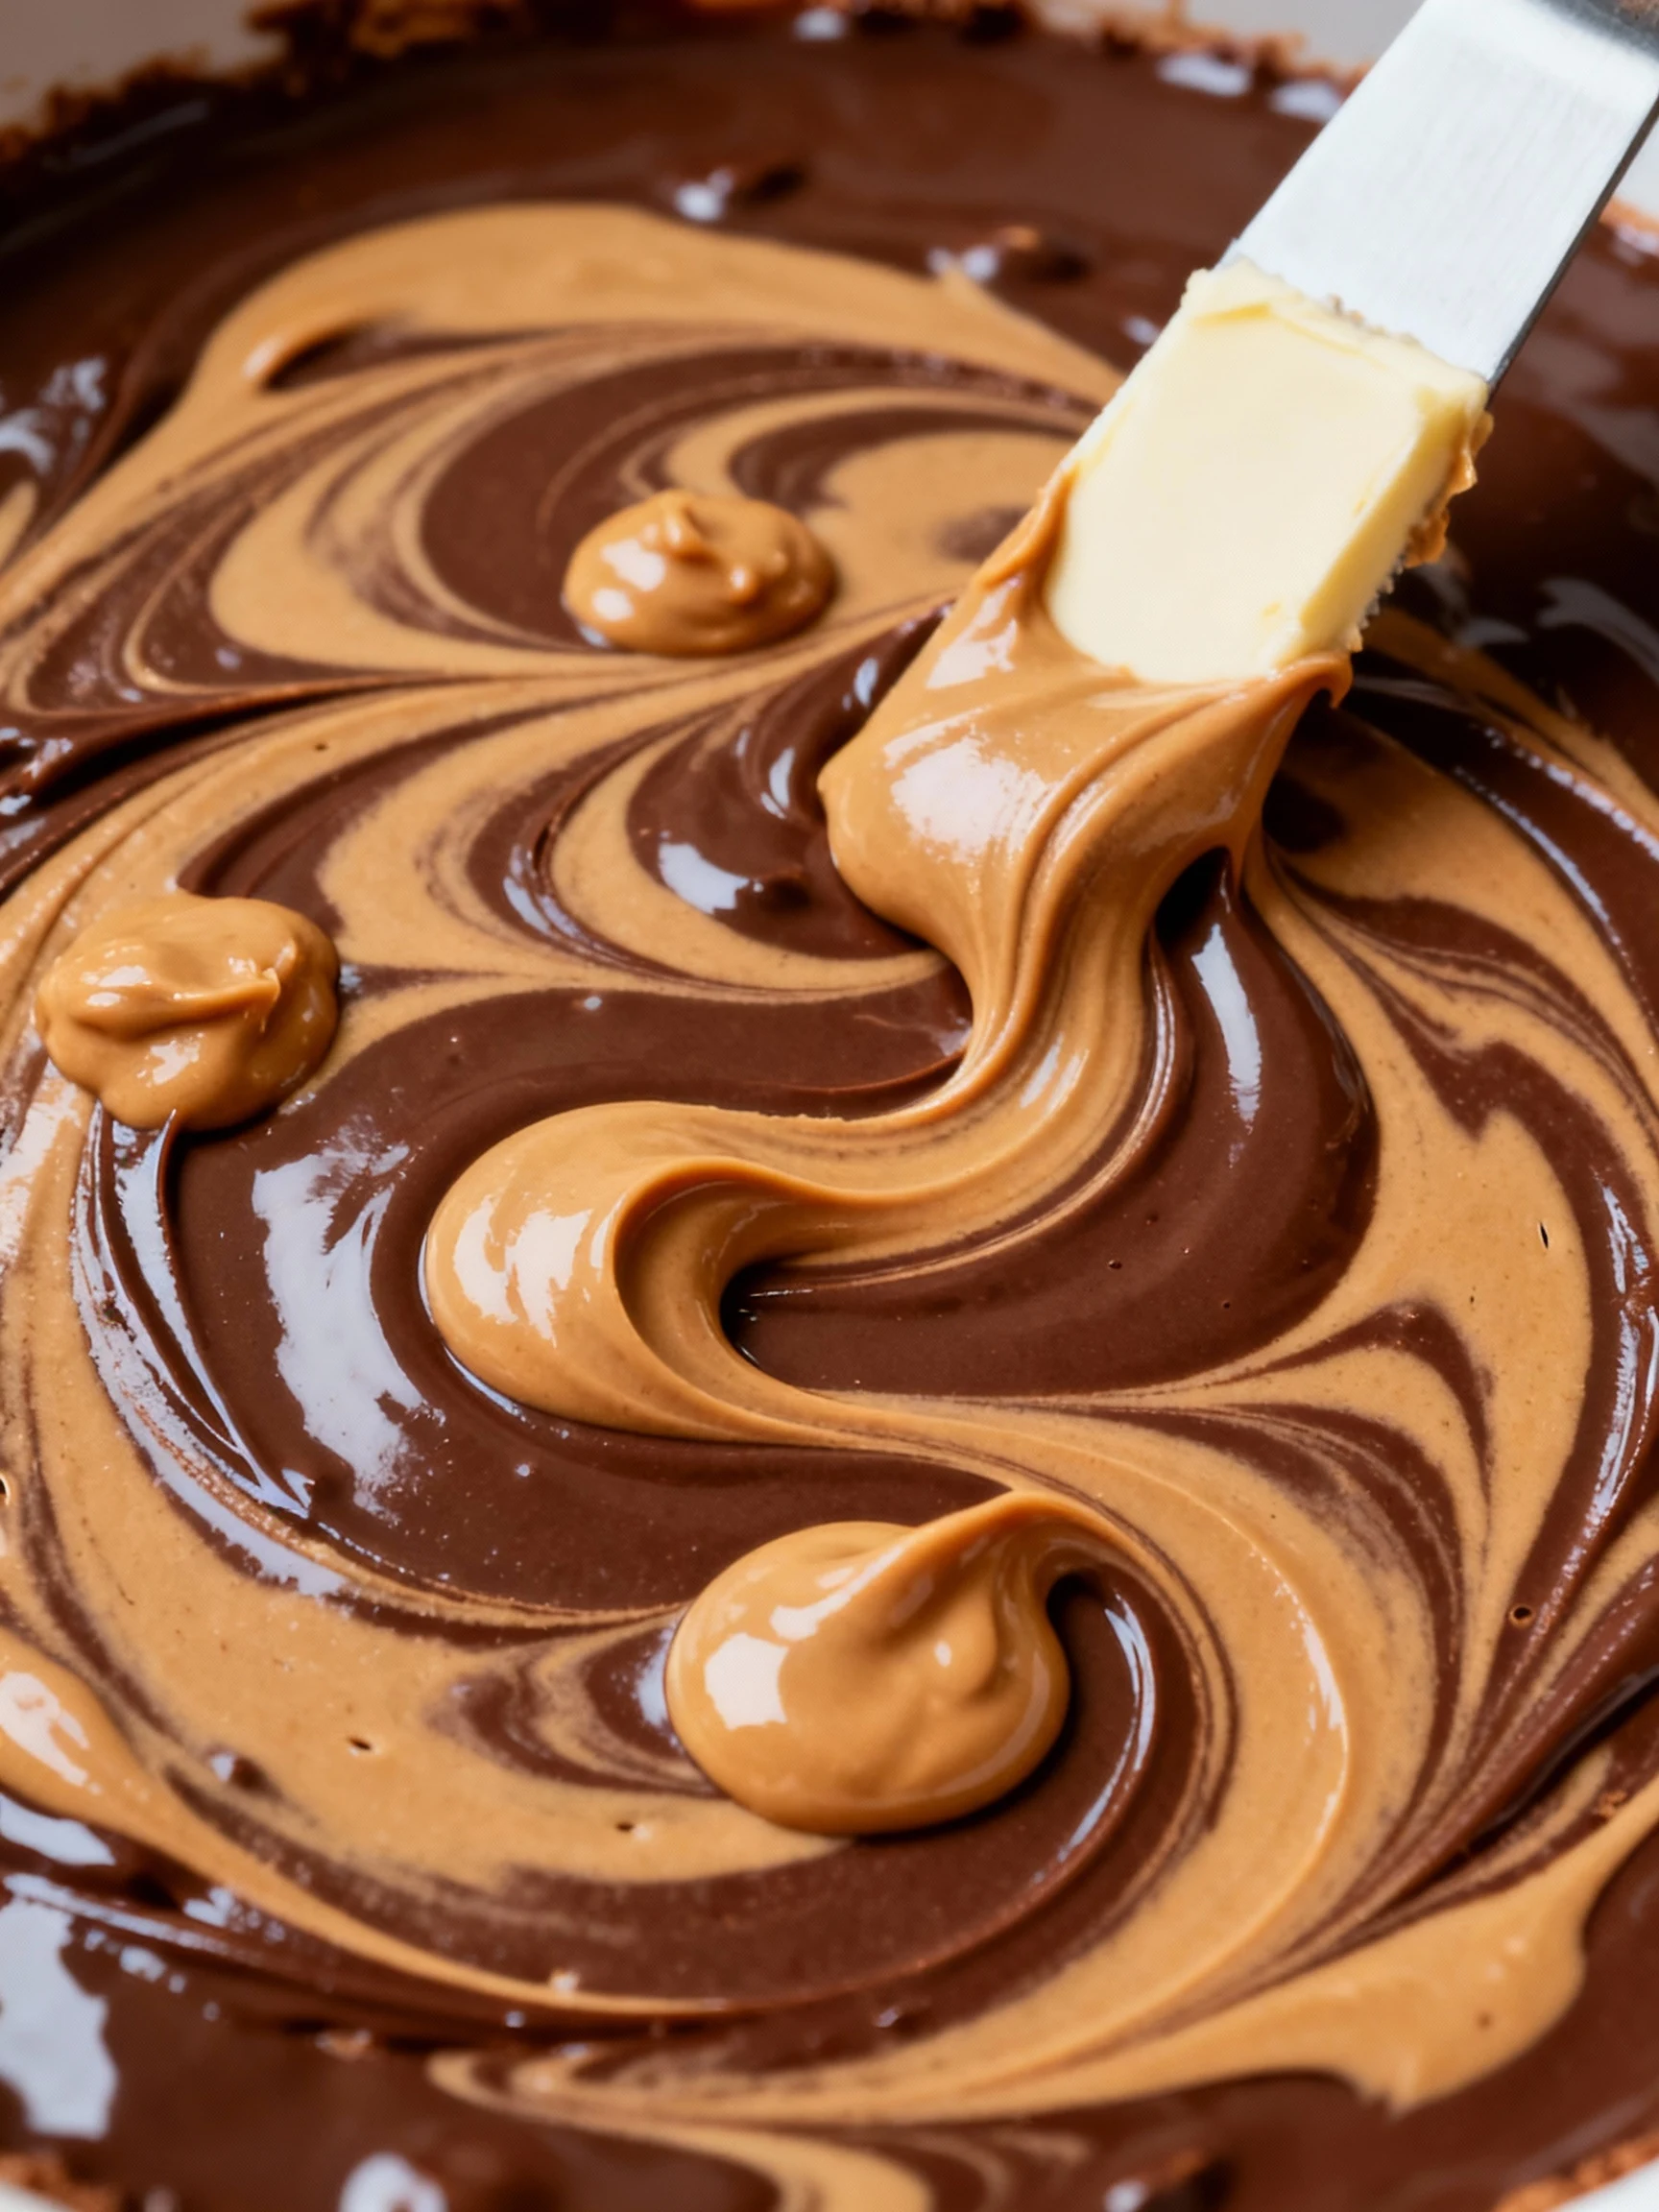
Make the peanut butter swirl. In a small bowl, stir peanut butter with powdered sugar free sweetener if you want it sweeter. Warm it for about 10 seconds in the microwave if it’s too stiff to swirl.
-
Swirl like you mean it. Dollop peanut butter over the top, then drag a butter knife through in slow S-shapes. Don’t overdo it, or you’ll mix it in and lose the cool marbled look.
-
Bake, then stop baking. Bake 18 to 24 minutes. Pull them when the edges look set but the center still looks slightly soft. A toothpick should come out with moist crumbs, not clean.
-
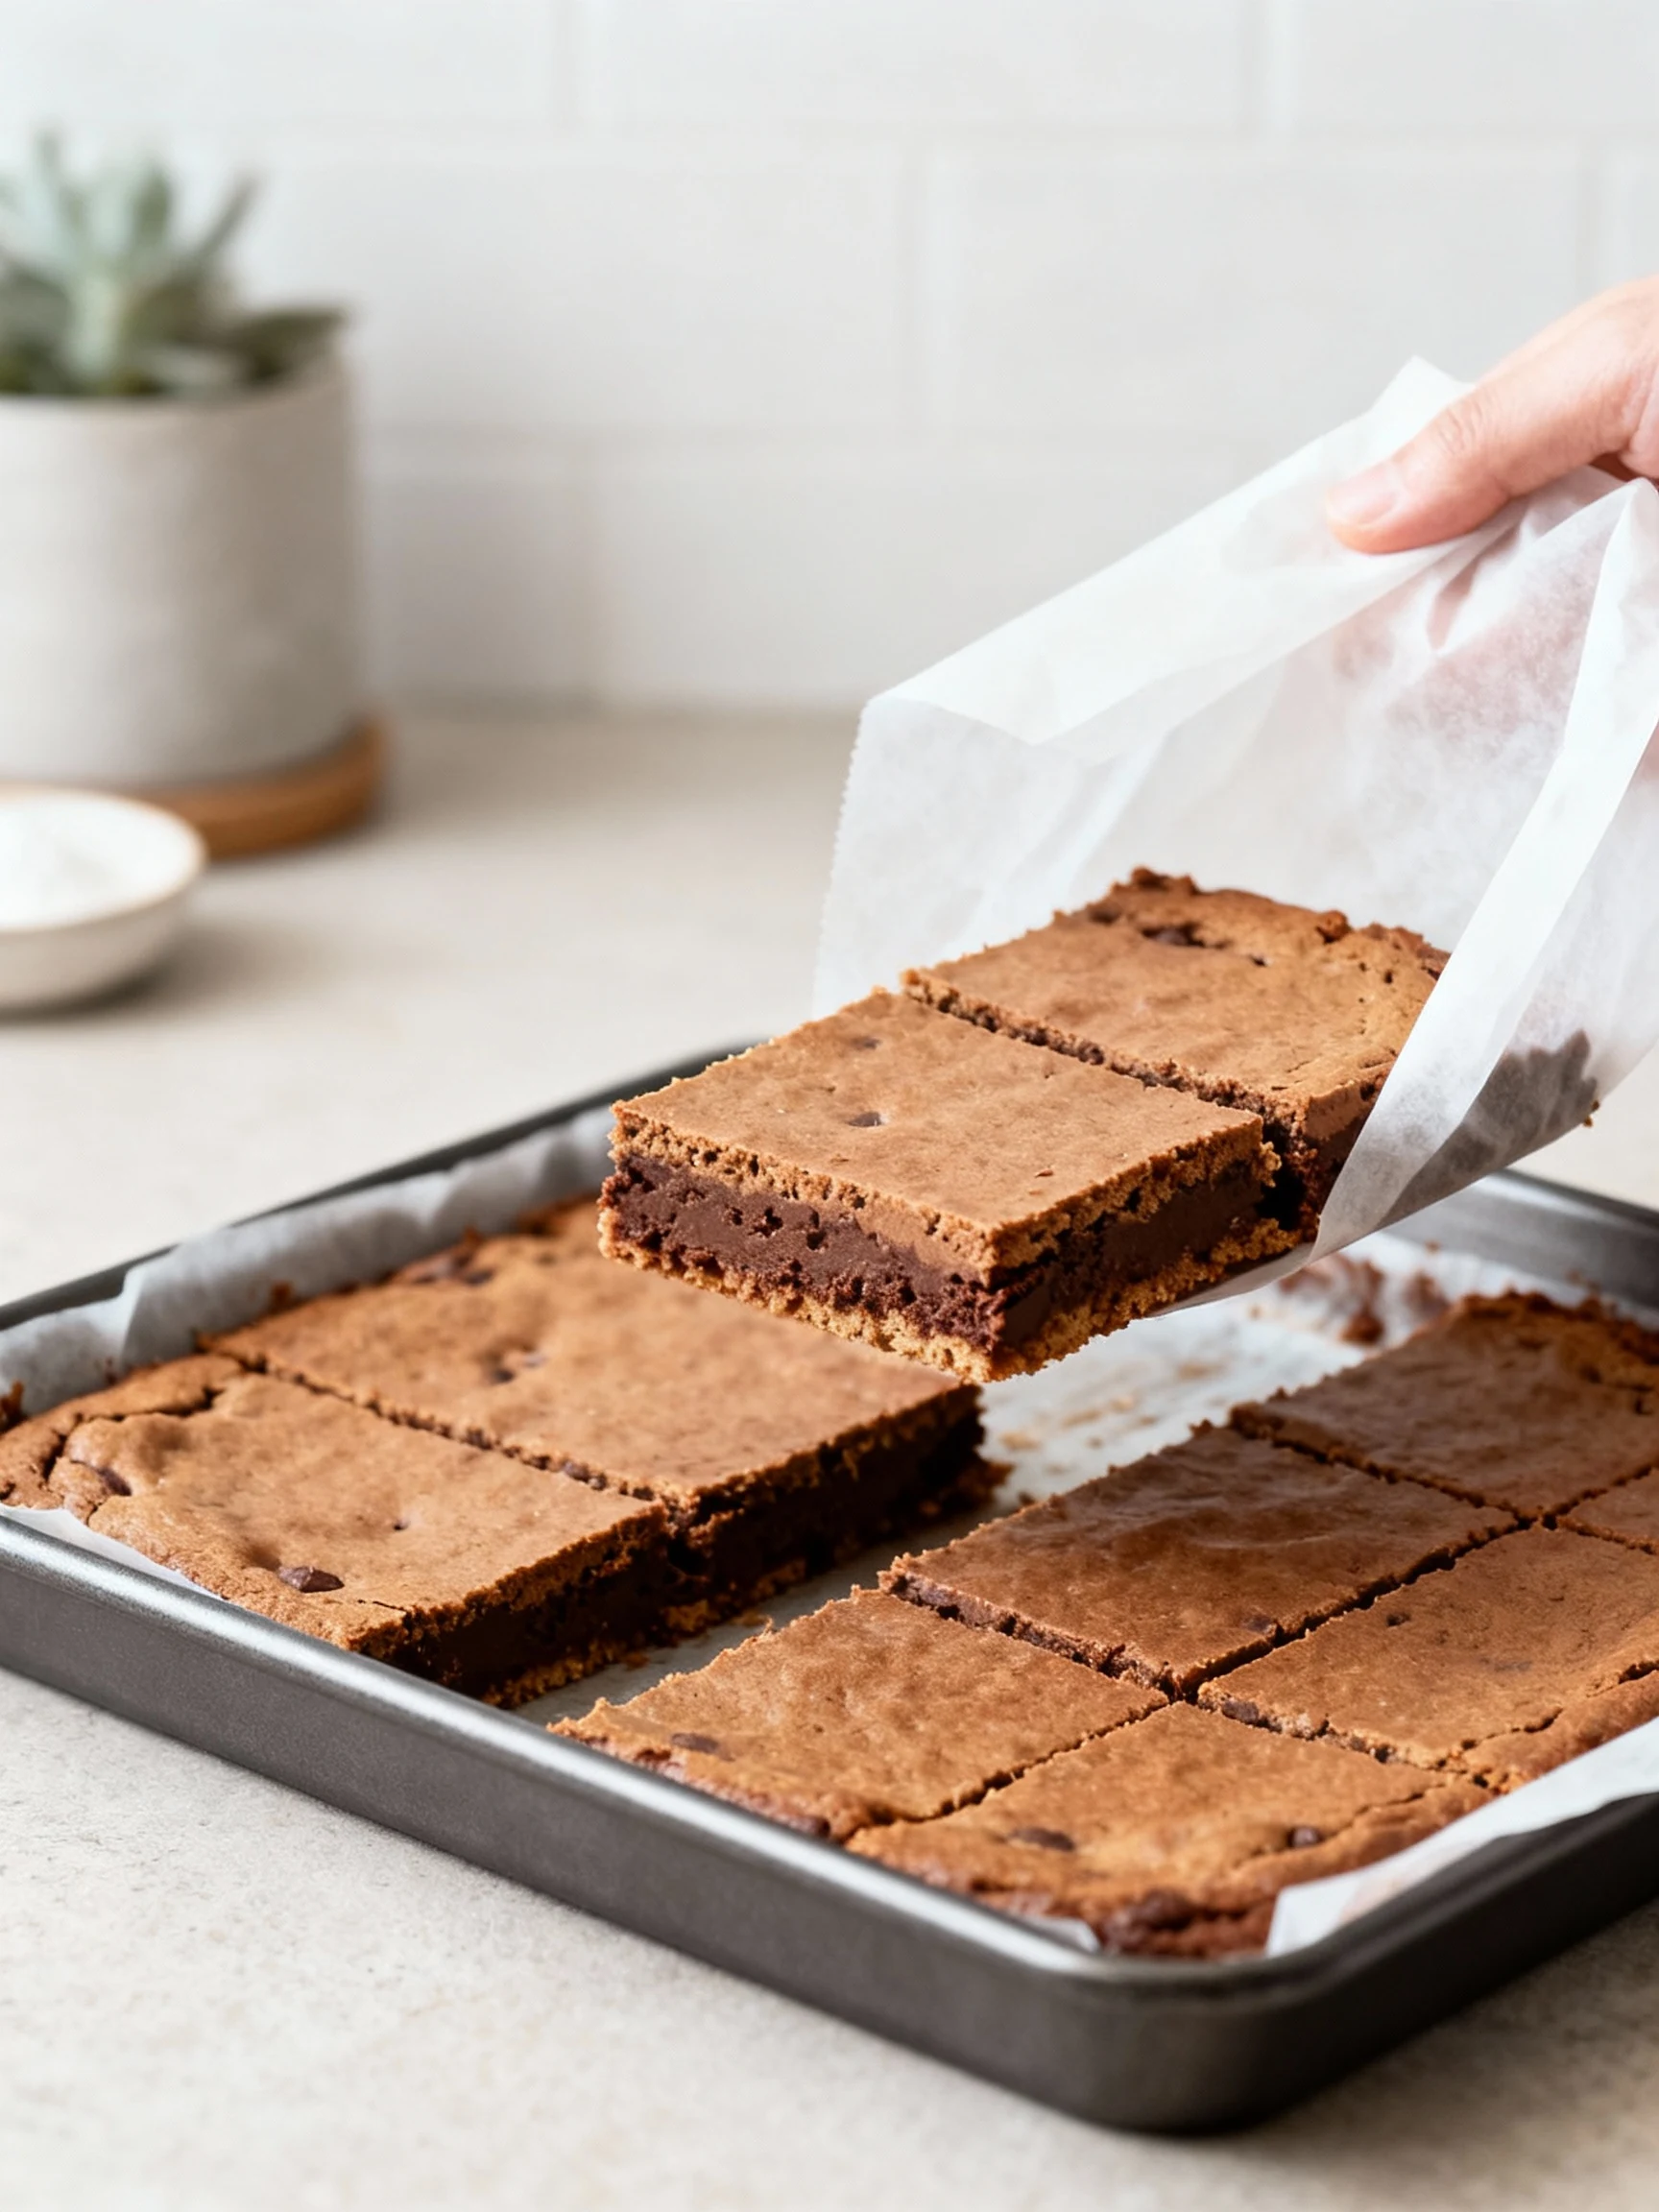
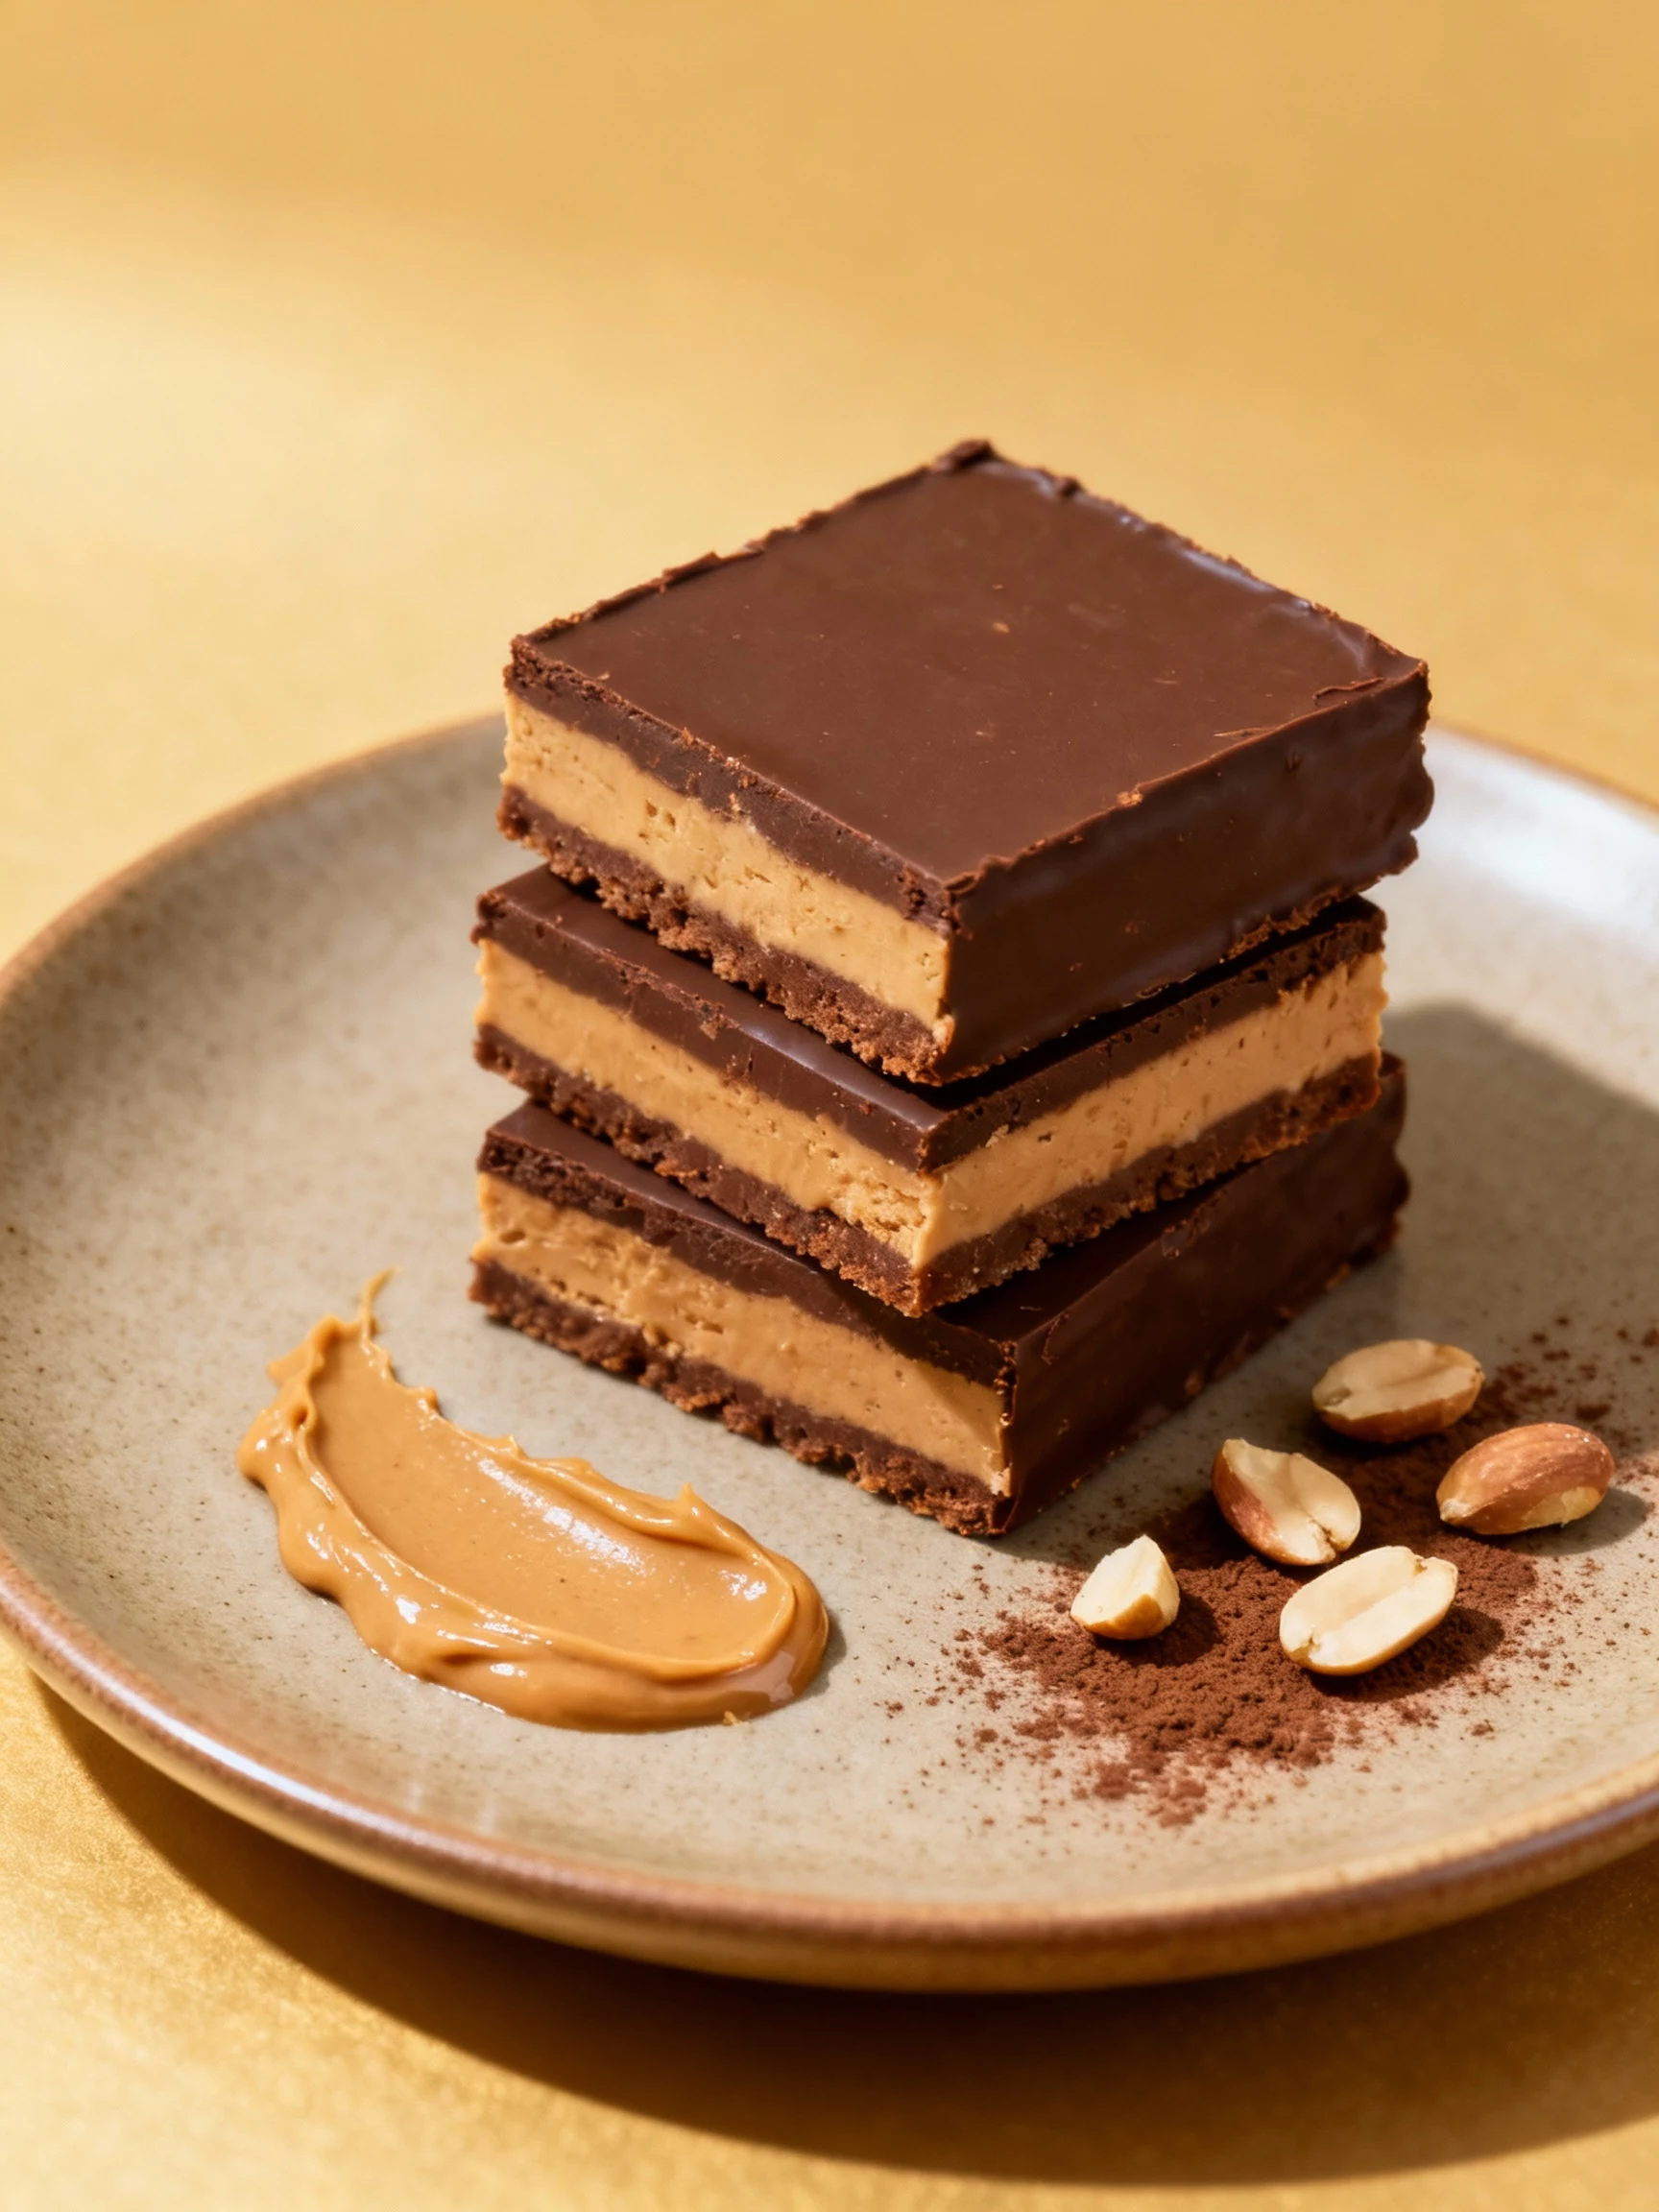
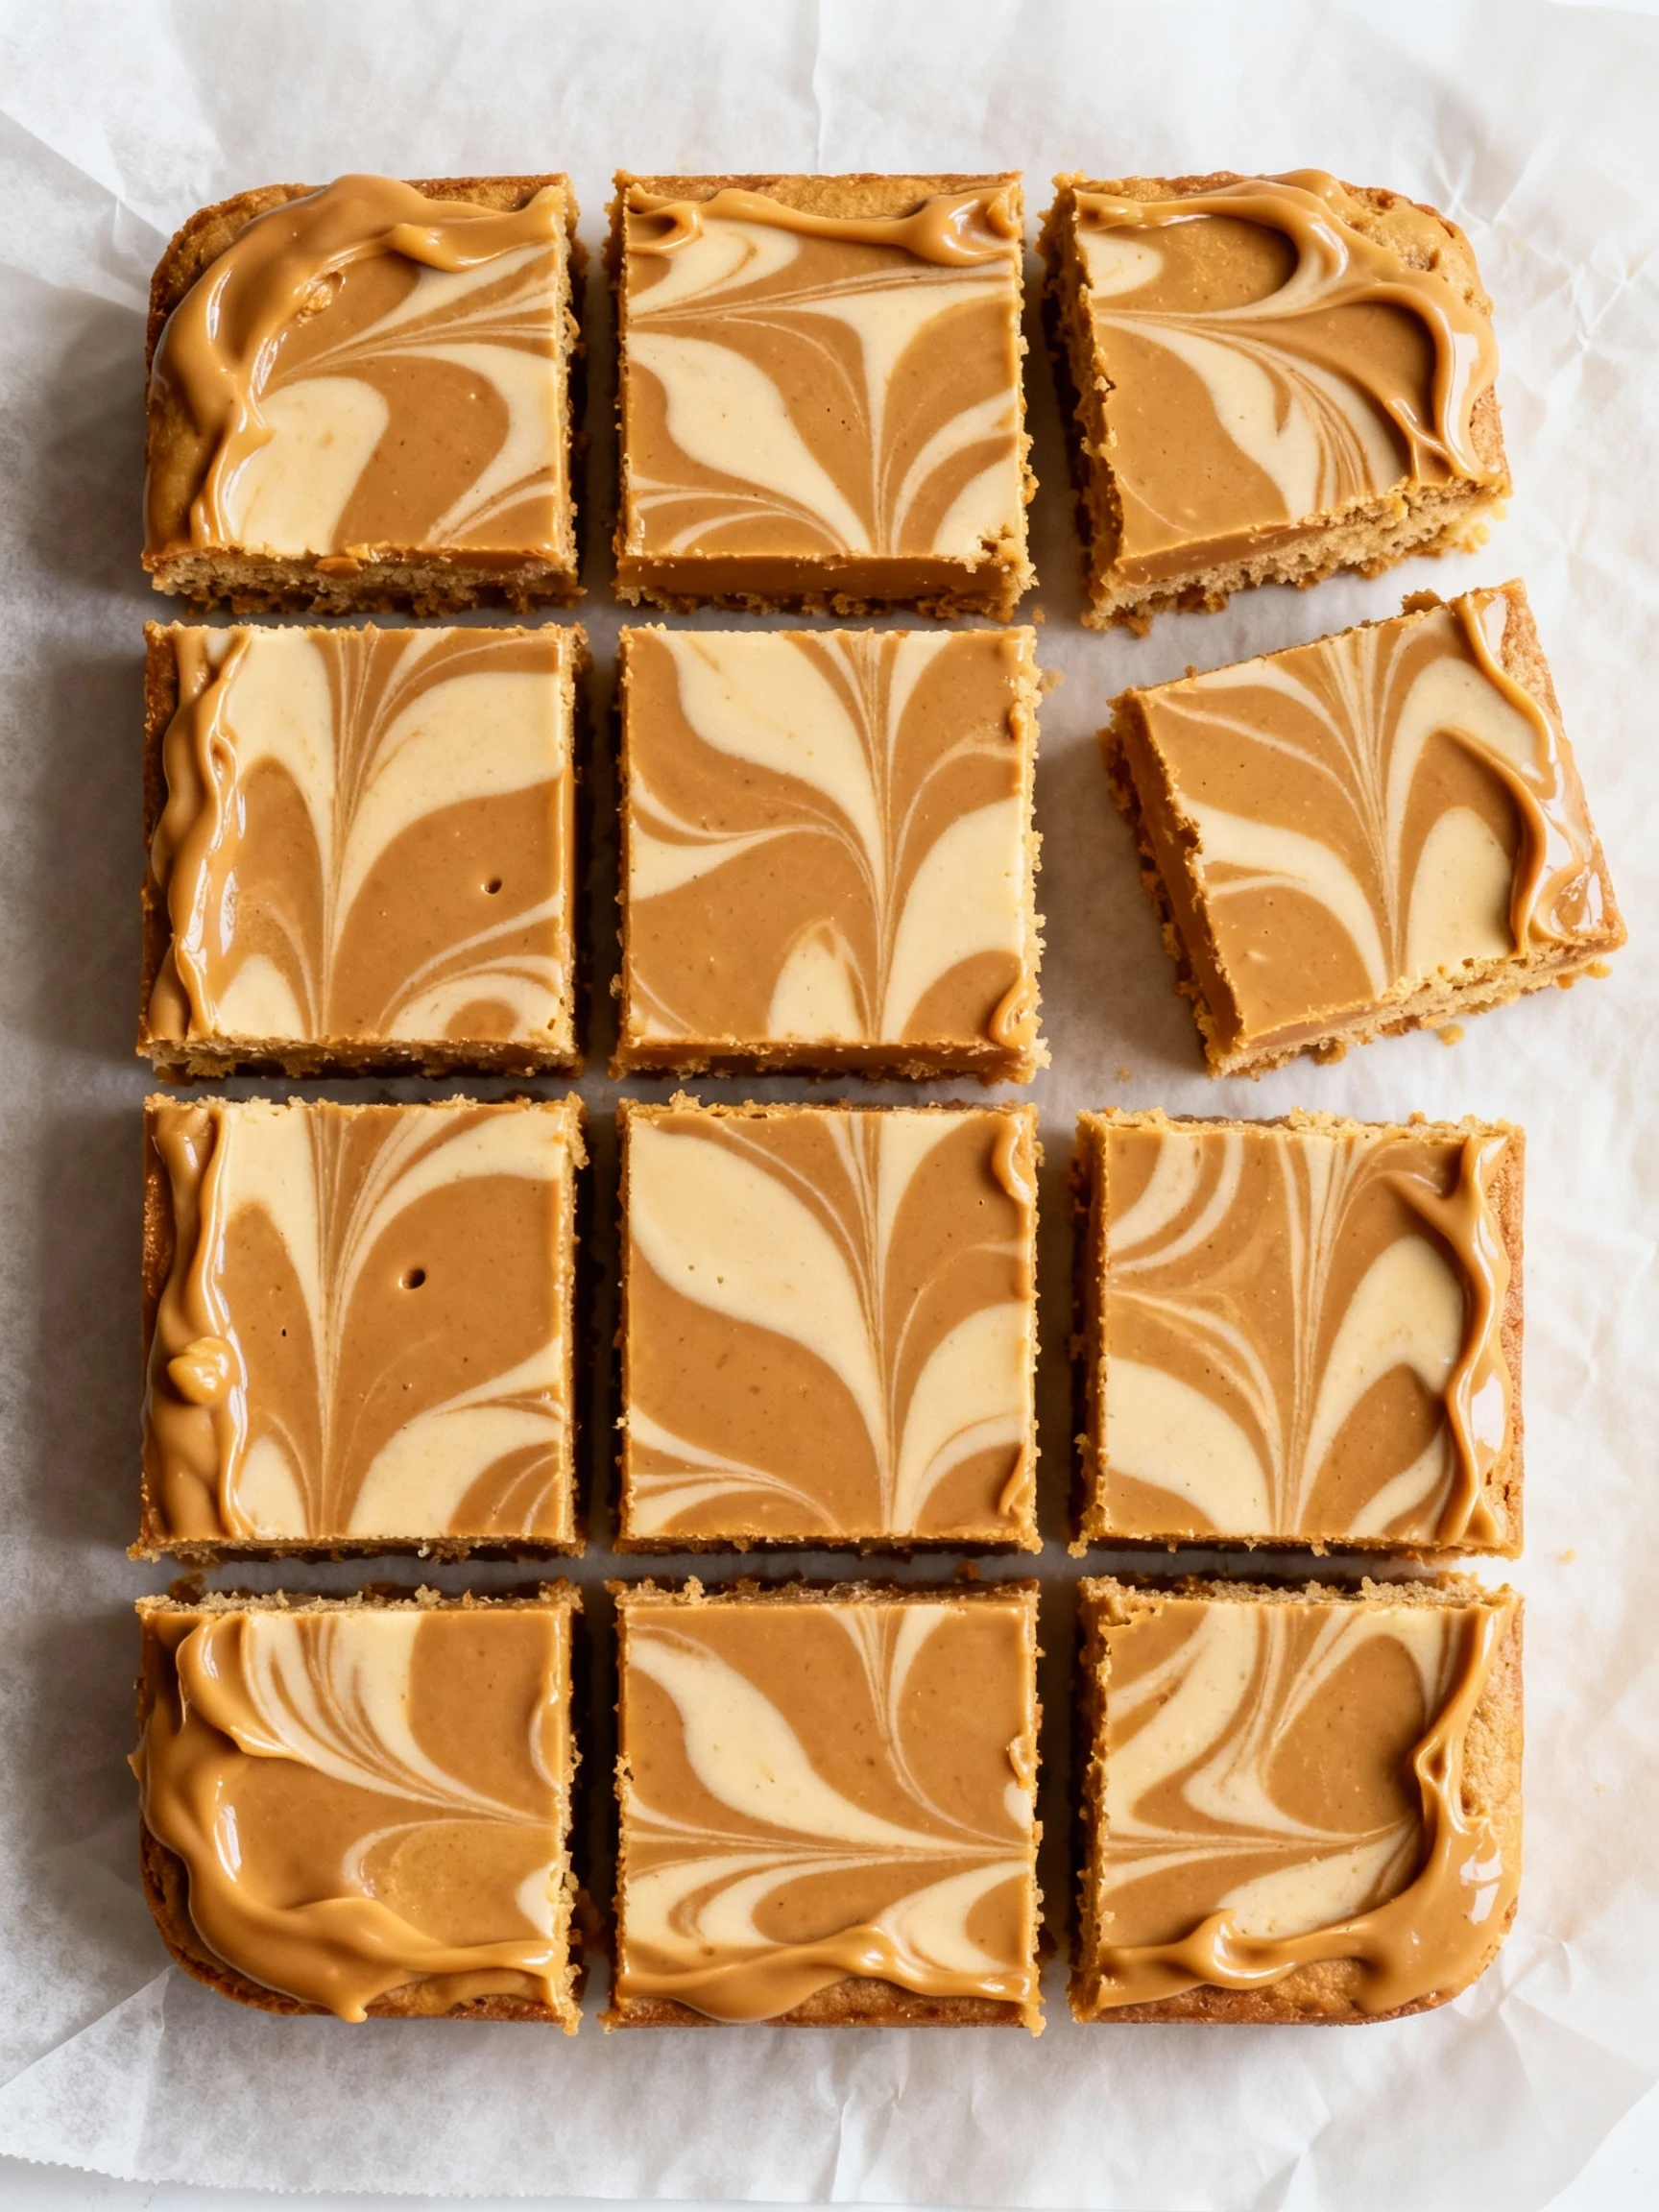
Cool for clean slices. Let the pan cool completely, then chill for 30 to 60 minutes if you want sharp edges. Lift out using the parchment and slice into squares.
Storage Tips
These bars stay chewy for days if you store them correctly. Heat and air are the enemies of that fudgy texture, so don’t leave them uncovered on the counter like you’re trying to dry them out on purpose.
- Room temperature: Store in an airtight container up to 3 days. Add parchment between layers to prevent sticking.
- Refrigerator: Keep up to 7 days for a denser, brownie-like bite. Let a square sit 10 minutes before eating for best texture.
- Freezer: Wrap individual bars and freeze up to 2 months. Thaw at room temp or microwave 10 to 15 seconds for a warm-and-gooey moment.
FYI, the peanut butter swirl firms up more in the fridge, which some people love. If you prefer softer bars, store them at room temp and just keep the lid on tight.
Health Benefits
Let’s be honest: these are still dessert. But they can be a smarter dessert, which is the whole point of using a sugar free cake mix in the first place. You keep the flavor, reduce the sugar load, and still get something that feels indulgent.
- Lower added sugar than traditional bars, depending on the mix and chips you choose.
- More protein from eggs and Greek yogurt, which helps with satiety.
- Peanut butter adds healthy fats that make the bars feel richer with less sweetener needed.
- Portion friendly because they slice clean, and one square usually feels like “enough.”
If you’re sensitive to sugar alcohols, pick a mix sweetened with what works for you and keep portions reasonable. Your stomach deserves respect.
Don’t Make These Errors
This recipe is simple, but it’s not immune to chaos. Most “failures” happen because people treat bar recipes like cake recipes, and then they act shocked when the texture goes weird. Don’t be that person.
- Overbaking: The bars keep cooking as they cool. Pull them early for that fudgy center.
- Using a giant pan: A 9×13 makes them thin and dry. Stick to 8×8 for thick, chewy bars.
- Skipping salt: Sugar free baking needs salt to taste like dessert instead of “sweet-ish.”
- Swirling too aggressively: You want ribbons, not peanut butter blended into the whole batter.
- Not lining the pan: You can grease it, sure, but parchment makes slicing cleaner and sanity intact.
Different Ways to Make This
If you make these once, you’ll start plotting variations. The base is sturdy, so you can customize without wrecking the texture. Keep the mix-to-wet ratio similar and you’ll be fine.
- Extra fudgy version: Replace the Greek yogurt with 1/3 cup sour cream and add 1 extra tablespoon butter.
- Higher protein twist: Mix 2 tablespoons unflavored or chocolate protein powder into the dry ingredients and add 1 tablespoon milk if batter feels too thick.
- Crunchy peanut butter bars: Use crunchy peanut butter and add chopped peanuts on top before baking.
- PB and jelly vibe: Swirl peanut butter plus 2 tablespoons sugar free raspberry jam, then gently marble both into the top.
- Chocolate overload: Add 1/4 cup sugar free chocolate chunks and a sprinkle of cocoa nibs for bite.
- Nut free option: Swap peanut butter for sunflower seed butter and skip the peanuts.
If your sweetener tastes “cool” or minty, balance it with a pinch more salt and a little extra vanilla. It’s not magic, it’s just flavor management.
FAQ
Can I use any sugar free chocolate cake mix?
Yes, but results vary by brand. Some mixes bake up drier, so if yours tends to run dry, add an extra tablespoon of Greek yogurt or a splash of milk to keep the bars chewy.
Do I need to add the cake mix ingredients listed on the box?
No. This recipe uses the dry mix as an ingredient, not as a boxed cake. Follow the ingredients and amounts here so the bars set correctly and stay dense.
How do I know when the bars are done?
Look for set edges and a center that still looks slightly soft. A toothpick should come out with moist crumbs. If it comes out totally clean, you likely baked a little too long.
Can I make these dairy free?
Yes. Use coconut oil instead of butter, dairy free yogurt, and dairy free sugar free chocolate chips if you can find them. The texture stays chewy, just slightly less rich.
What if my peanut butter won’t swirl?
Warm it briefly so it loosens up, then dollop and swirl. Natural peanut butter can be thicker, so a 10 to 15 second microwave hit usually fixes it.
Can I make these in a 9×9 pan?
Yes, but they’ll bake a bit faster and end up slightly thinner. Start checking around 16 to 18 minutes and pull them when the center still looks soft.
Are sugar free chocolate chips necessary?
They’re optional, but they add pockets of chocolate that make the bars taste more decadent. If you skip them, consider adding an extra tablespoon of cocoa powder or a handful of chopped nuts for texture.
Wrapping Up
These chocolate peanut butter bars prove you don’t need a mountain of sugar to make a dessert people obsess over. You get thick, chewy squares with a dramatic swirl, and they come together fast enough to feel unfair. Make a batch, slice them small, and watch how quickly “just one” turns into “who ate the last piece?” If you want, tell me what cake mix brand you’re using and whether you like them more fudgy or more cakey, and I can dial in the bake time and ratios.
Printable Recipe Card
Want just the essential recipe details without scrolling through the article? Get our printable recipe card with just the ingredients and instructions.