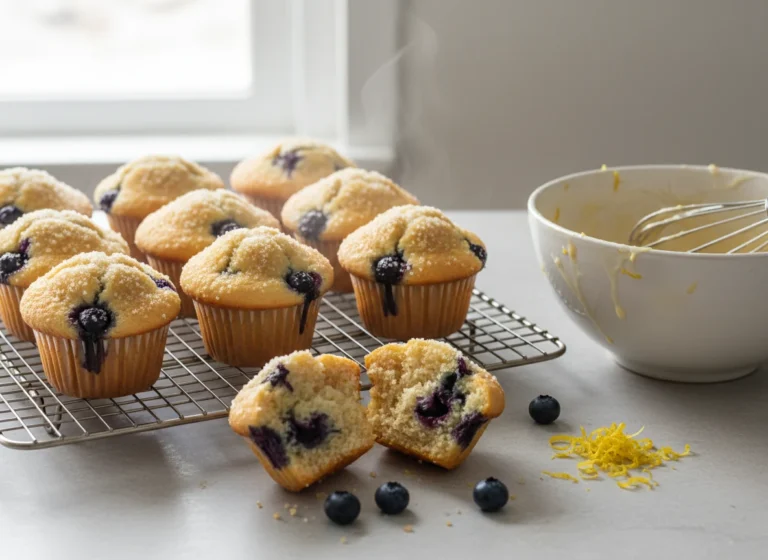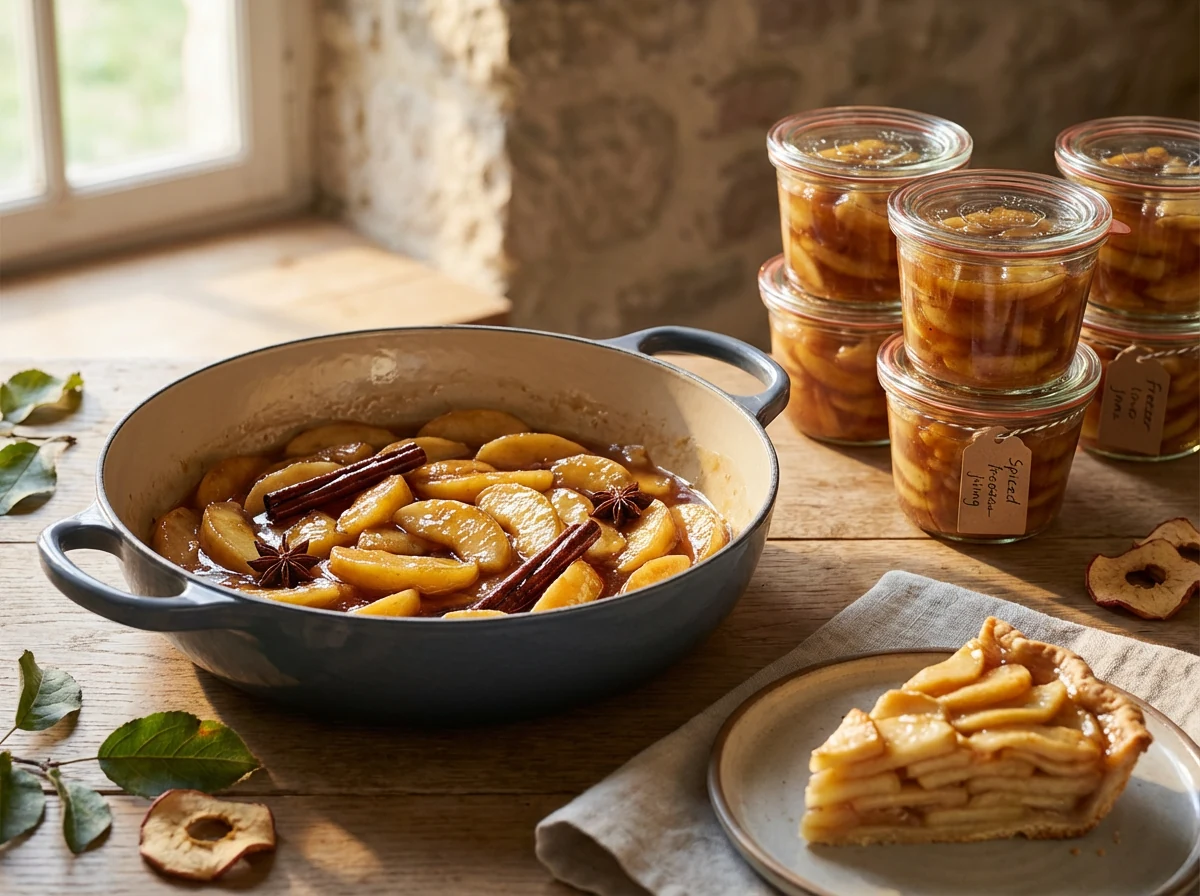
Apple Pie Filling Recipes — Fast Foolproof Freezer Ready
Make glossy, spiced apple filling in 20 minutes, freeze for months, and use it in pies, crisps, turnovers, or pancakes—no soggy bottoms.
Most people cook apples until they’re mush, then wonder why the pie leaks. You’ll do the opposite: quick-cook, lock in texture, and control the syrup like a pro. This method builds a shiny, thick glaze that hugs every slice and never waters down your crust. It scales like a dream, freezes perfectly, and works in everything from holiday pies to Tuesday-night waffles. Want bakery results without a bakery diploma? Keep reading.
What Makes This Recipe Awesome
We’re not gambling with raw fruit in the oven. We pre-cook the apples just enough to set their shape, then build a sauce that thickens reliably. That means no giant gaps in your pie as apples shrink—just neat, tender layers and a luscious, clingy glaze.
The flavor dial turns your way. Lemon brightens; warm spices deepen; vanilla and a touch of butter polish it off. You can tweak sweetness, switch thickeners, or splash in Calvados (yes, chef’s kiss). And the method is weeknight-fast yet holiday-worthy. FYI, it’s freezer-friendly, so you can stack pint jars like gold bars.
Ingredients
Yield: About 5 cups filling — enough for one deep-dish 9-inch pie or 12–14 hand pies.
- 3 lb (1.36 kg) firm apples, peeled, cored, sliced 1/4-inch thick (mix Honeycrisp, Granny Smith, Pink Lady)
- 1/2 cup (100 g) granulated sugar
- 1/3 cup (70 g) light brown sugar, packed
- 2 tbsp fresh lemon juice (plus 1 tsp zest, optional)
- 1 cup (240 ml) apple cider or apple juice (water works in a pinch)
- 3 tbsp (24 g) cornstarch (see notes for clearjel/arrowroot)
- 1 1/2 tsp ground cinnamon
- 1/4 tsp ground nutmeg (or 1/8 tsp cardamom for a twist)
- 1/2 tsp kosher salt
- 2 tbsp unsalted butter (for silkiness; use coconut oil for dairy-free)
- 1 1/2 tsp vanilla extract
- Optional: 1 tbsp Calvados or bourbon; pinch allspice or clove; 2–3 tsp grated fresh ginger
- Thickener swaps: 2 1/2 tbsp arrowroot (gluten-free) or 1/4 cup ClearJel for canning
Step-by-Step Instructions
- Prep the apples. Peel, core, and slice apples 1/4-inch thick for even cooking. Toss immediately with lemon juice to prevent browning.
- Make a cold slurry. Whisk cornstarch into the cold apple cider until smooth. Cold liquid avoids lumps—no exceptions.
- Flavor base. In a wide Dutch oven over medium heat, melt butter. Stir in both sugars, cinnamon, nutmeg, and salt until sandy and fragrant, about 1 minute.
- Coat the apples. Add apples and toss until every slice glistens. Cook 2–3 minutes to warm them through; they’ll start to release juices.
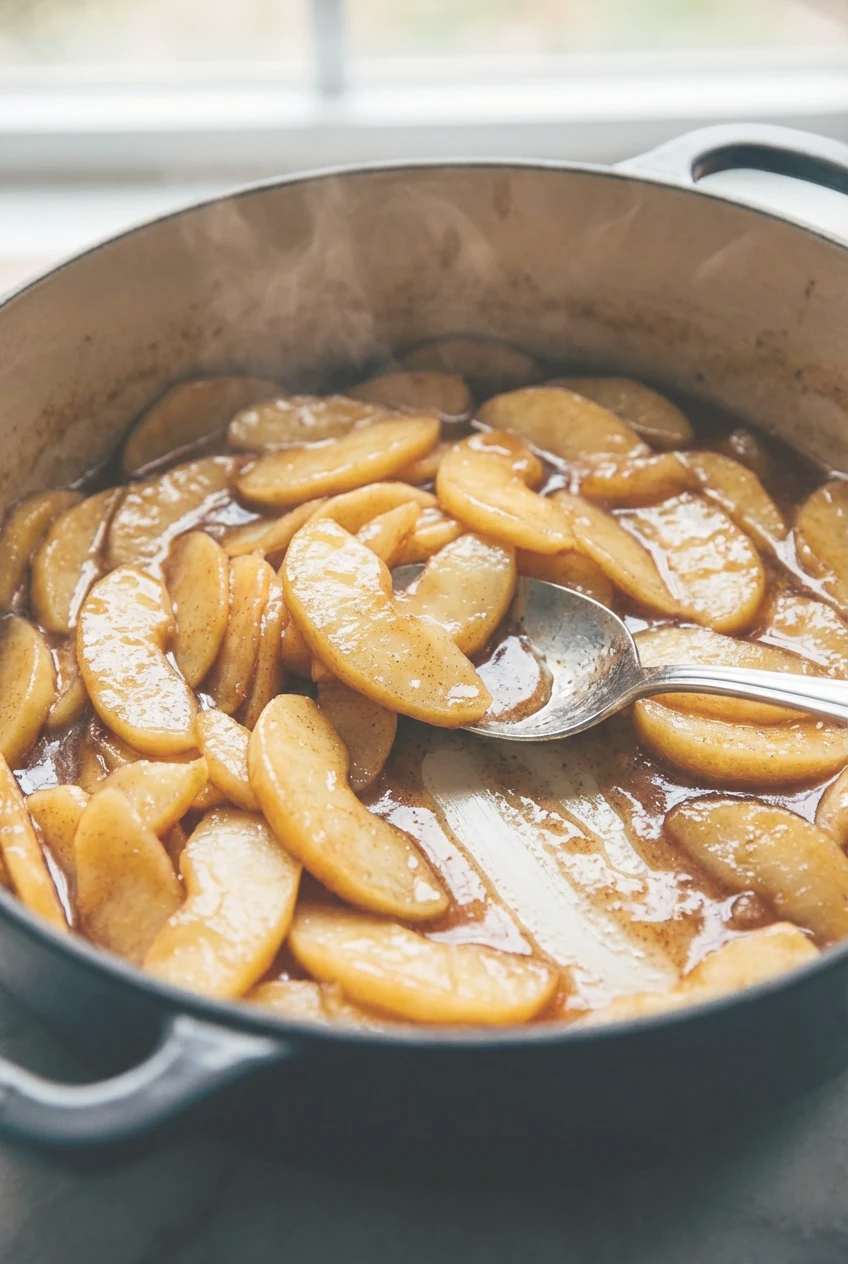
- Thicken the sauce. Pour in the cornstarch-cider slurry. Bring to a lively simmer, stirring constantly, until the syrup turns clear and glossy, about 3–5 minutes.
- Cook to tender-crisp. Keep the heat moderate and stir gently until apples bend without breaking and a spoon leaves clean trails in the glaze, another 2–4 minutes. Don’t let them go mushy.
- Finish. Remove from heat. Stir in vanilla and any optional Calvados/bourbon. Taste; add a pinch more salt or lemon if needed. Balanced is the goal, not cloying.
- Cool completely. Transfer to a shallow pan to cool faster. Cooling sets the starch so your pie won’t flood the oven. Chill at least 1 hour before using.
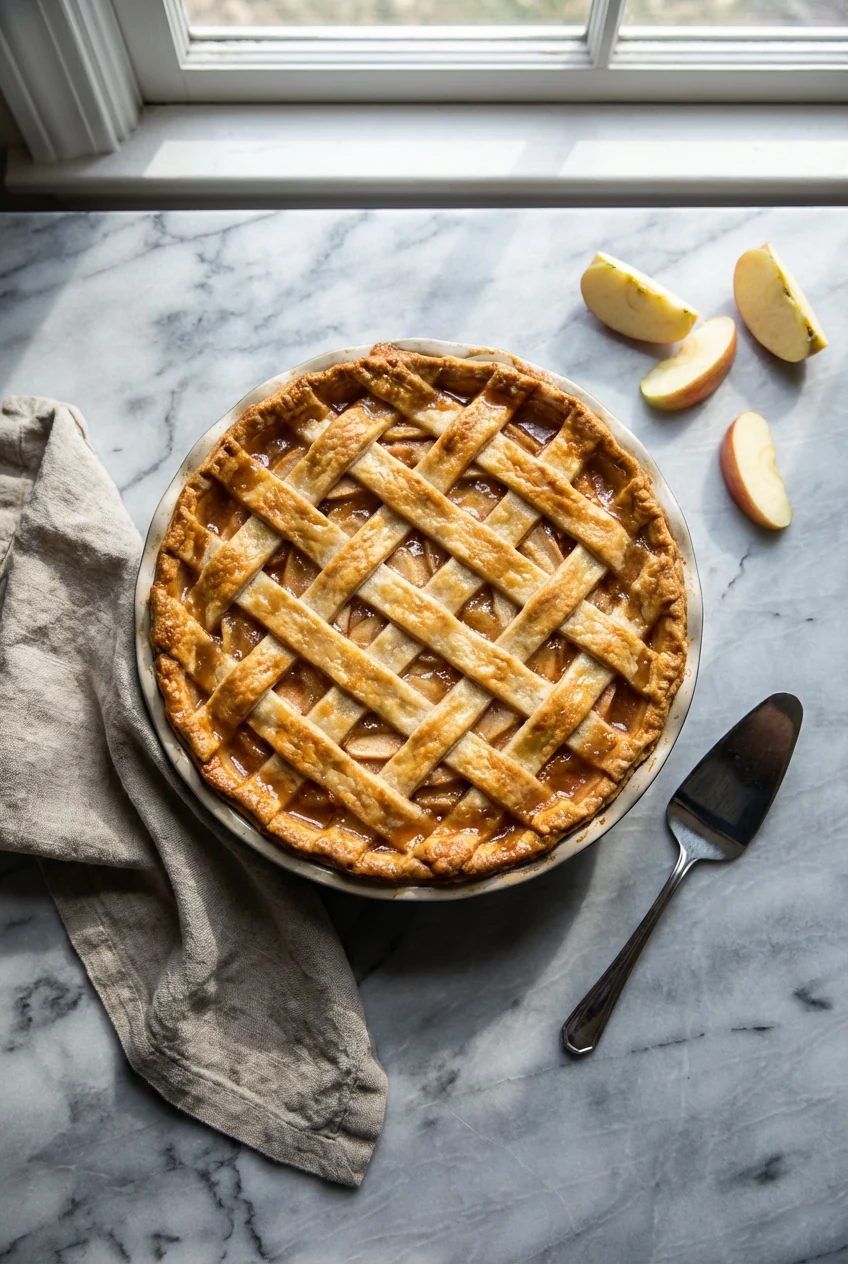
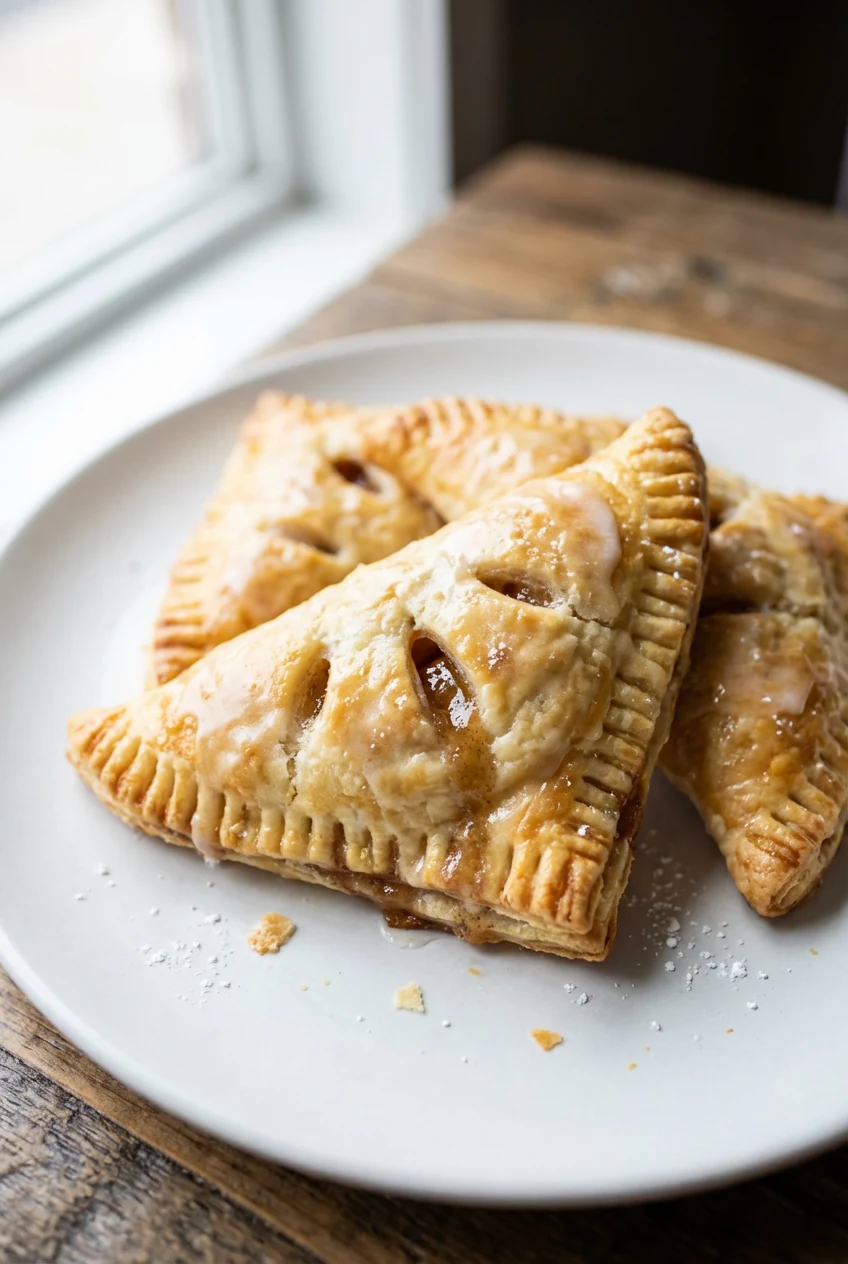
- Use it right. For a double-crust pie, pile in chilled filling, dot with 1 tbsp butter if you like, and bake until juices bubble in the center. For hand pies or turnovers, use 2–3 tbsp per pastry and crimp tightly.
- Adjust on the fly. If too thick, stir in 1–2 tbsp warm cider. If too thin, simmer 1–2 minutes more or stir in a slurry of 1 tsp cornstarch + 2 tsp cold cider, then simmer 30 seconds.
Storage Instructions
- Refrigerator: Store in an airtight container up to 7 days. The sauce will thicken slightly as it chills.
- Freezer: Portion into freezer bags or jars (leave 1/2 inch headspace). Freeze up to 6 months. Thaw overnight in the fridge, then warm gently if needed.
- Reheat: Low heat on the stove, stirring, until loosened and glossy. If it looks dull or too tight, add a splash of cider and heat 30–60 seconds.
- Canning (read first): For shelf-stable jars, use a tested ClearJel formula from a reliable source (e.g., USDA/NCHFP). Do not can cornstarch-thickened fillings. Maintain proper acid with measured lemon juice.
What’s Great About This
- Zero soggy crusts: Pre-cooking + a set glaze means clean slices and crisp bottoms.
- Restaurant-level shine: The syrup finishes clear and glossy, not cloudy or gummy.
- Flexible sweetness: Use less sugar or swap some for maple or honey without wrecking the texture.
- Freezer MVP: Stash batches and “bake from the bank” whenever the craving hits.
- Works across desserts: Pies, galettes, crisps, turnovers, crepes, yogurt bowls, you name it.
- Foolproof thickening: Clear visual cues and fixes if you overshoot or undershoot.
Don’t Make These Errors
- Cutting apples too thin. Paper-thin slices go mushy fast and weep. Stick to 1/4 inch.
- Dumping starch into hot liquid. Lumps galore. Always mix a cold slurry first.
- Skipping the chill. Warm filling will steam your crust and turn the bottom soggy.
- Overcooking the fruit. Aim for tender-crisp; the oven will finish the job later.
- Using flour for freezing. Flour can go pasty when frozen. Use cornstarch, arrowroot, or ClearJel.
- Under-seasoning. A pinch of salt and lemon is the difference between flat and “wow.”
Different Ways to Make This
Stovetop Classic (the base method)
Fast, controlled, and glossy. Ideal for immediate use, freezing, or refrigerated storage. It gives you the best texture and the cleanest spice bloom.
Slow Cooker Batch
Add all ingredients except starch and vanilla; cook on Low 3–4 hours until apples are just tender. Stir in starch slurry and cook 15–20 minutes more to thicken. Finish with vanilla. Great for set-it-and-forget-it days.
Instant Pot Shortcut
Toss apples with sugars, spices, salt, lemon, and 1/3 cup cider. Pressure cook 1 minute, quick release. Stir in a slurry of starch + remaining cider; saute on “Sauté” until glossy, then add vanilla. Watch closely; IPs reduce fast.
No-Cook Freezer Kit
Toss apples with sugars, spices, salt, lemon, and ClearJel (not cornstarch). Portion into bags and freeze flat. When baking, the heat thickens the juices in the oven—super convenient for future pies.
Maple-Bourbon Caramel Version
Replace 1/3 cup sugar with 1/4 cup maple syrup. Brown the butter until nutty, deglaze with cider, then proceed. Finish with 1 tbsp bourbon. Deep, cozy, and slightly smoky.
Chai-Spiced Upgrade
Use 1 tsp cinnamon, 1/2 tsp ground ginger, 1/4 tsp cardamom, and a pinch of clove. Finish with vanilla and a dab of honey. It tastes like sweater weather.
Gluten-Free and Vegan
Swap cornstarch with 2 1/2 tbsp arrowroot. Replace butter with coconut oil. Keep the simmer gentle; arrowroot thickens fast and can thin out with prolonged high heat.
FAQ
What are the best apples for this filling?
Use a mix for flavor and texture: Granny Smith for tart bite, Honeycrisp or Pink Lady for sweetness and structure, and maybe a Golden Delicious for silkiness. All-tart or all-sweet blends can taste flat, so balance is key.
How much filling do I need for a 9-inch pie?
Plan on about 5 cups for a deep-dish 9-inch pie, or 4 to 4 1/2 cups for a standard-depth 9-inch. For hand pies, use 2–3 tablespoons per pastry so they seal properly.
Can I reduce the sugar without ruining the texture?
Yes. You can cut total sugar by 25–30% with no issues. If you go lower, keep an eye on thickness; sugar helps the syrup body. For swaps, try 1/4 cup maple syrup in place of some granulated sugar and reduce cider by 1–2 tablespoons.
Cornstarch, arrowroot, or ClearJel—what’s the difference?
Cornstarch is reliable for fridge/freezer use and gives a clear, glossy sauce. Arrowroot is great for gluten-free and shines at lower heat but can thin if cooked too long. ClearJel stays stable during canning and freezing and is the only thickener recommended for water-bath canning.
My filling turned runny. How do I fix it?
Return it to the pot and simmer 1–2 minutes to activate the starch fully. Still thin? Stir in a quick slurry of 1 tsp cornstarch + 2 tsp cold cider, simmer 30–60 seconds, and reassess. Also make sure it’s fully cooled before using—thickening completes as it cools.
Do I need to peel the apples?
Peeling is best for a silky, cohesive filling. That said, you can leave peels on for rustic vibe and extra color—just slice thinner so the skins aren’t chewy. IMO, a mix looks great in galettes but can tug when slicing a classic pie.
Can I make this dairy-free or vegan?
Absolutely. Swap the butter for coconut oil or a neutral oil. The texture stays glossy and the flavors still pop; coconut oil adds a faint tropical note that plays nicely with cinnamon.
Is this safe for canning?
Use a tested recipe with ClearJel and measured acid from a trusted source (USDA/NCHFP). Don’t can cornstarch-thickened fillings; they’re not considered safe for heat penetration. For shelf life without canning, freeze instead—it keeps quality beautifully.
Can I use frozen apples?
Yes. Don’t thaw fully; use them semi-frozen to avoid a flood of juice. You may need a bit more starch—start with an extra 1 teaspoon cornstarch and adjust in the pot until the glaze coats the spoon.
How do I prevent gaps under the top crust?
Pre-cook to tender-crisp (so apples already shrink), chill the filling fully, and pack it tightly in the pie shell. A few vertical vents in the top crust also help steam escape so everything settles evenly.
In Conclusion
This is the smart way to make apple filling: quick pre-cook, targeted thickening, and bright, balanced flavor. You get clean slices, crisp crusts, and a shine that screams bakery-quality. Batch it, freeze it, riff on it—then claim the compliments like you woke up a pastry savant. Your future pies, turnovers, and brunch waffles just got an upgrade, no culinary school required. FYI, your friends will ask for the recipe—don’t be shy about sharing the glory.
Printable Recipe Card
Want just the essential recipe details without scrolling through the article? Get our printable recipe card with just the ingredients and instructions.